Experiencing issues with your 2003 Chevy Silverado’s OBD2 port can be frustrating, especially when you need to diagnose engine problems or pass emissions tests. A non-functional OBD2 port often leaves you in the dark, unable to retrieve crucial diagnostic trouble codes. If you’re also noticing your cigarette lighter (or accessory power port) is acting up, it might point to a common electrical issue. Let’s dive into troubleshooting this problem, focusing on the likely culprit: Fuse 13 and its related wiring, using a 2003 Silverado Obd2 Port Wire Diagram to guide us.
The first and simplest step in diagnosing a dead OBD2 port and a weak cigarette lighter is to check Fuse 13, located in your Silverado’s underhood fuse box. It’s surprising how often a seemingly good fuse can be the root of the problem. Fuses can sometimes fail internally or develop corrosion on their terminals, even without visible signs of being blown.
Therefore, before you delve deeper into wiring diagrams and multimeter tests, replace Fuse 13 with a new 20 Amp fuse. This simple action alone might restore power to both your OBD2 port and cigarette lighter.
If replacing Fuse 13 doesn’t solve the issue, it’s time to investigate further using a multimeter and a 2003 Silverado OBD2 port wire diagram. The diagram reveals a straightforward circuit: Fuse 13 in the underhood fuse box directly powers both the OBD2 port (specifically pin 16) and the center terminal (Pin A) of the cigarette lighter port.
[Hình ảnh Wiring Diagram gốc được chèn vào đây]
To confirm if Fuse 13 is indeed the problem, or if there’s a wiring issue, grab your multimeter (a digital one is ideal) and set it to measure DC Volts. With the ignition on or at least in the accessory position, ground the black lead of your multimeter to any metal part of the chassis. Then, with Fuse 13 installed, use the red probe to touch each of the exposed metal contacts on top of Fuse 13. You should read approximately 12VDC on both sides of the fuse.
If you’re not getting 12VDC on both sides of Fuse 13, or on either side, it indicates a problem upstream of the fuse, which is less likely in this scenario as other circuits powered from the battery would likely be affected too. However, if you see 12VDC on the input side of the fuse but not the output (load side), then the fuse is indeed blown or defective, even if it looks visually intact. Replace it again with a known good fuse.
If you are getting 12VDC on both sides of Fuse 13, but still no power to the OBD2 port or cigarette lighter, the issue lies in the wiring between the fuse box and these ports. This is where the “2003 silverado obd2 port wire diagram” becomes invaluable.
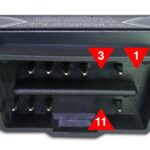
Switch your multimeter to Ohms (resistance measurement). Remove Fuse 13 to prevent short circuits. Connect one lead of your multimeter to the load side contact in the fuse box for Fuse 13 (the side that should be feeding power to the OBD2 port and cigarette lighter). Connect the other multimeter lead to pin 16 of the OBD2 port connector. Pin 16 is typically located in the top right corner of the OBD2 port.
Your multimeter should read close to zero ohms, indicating good continuity in the wire. A reading of infinite resistance (or very high resistance) signifies a break or open circuit in the wire between the fuse box and the OBD2 port. In this case, you’ll need to carefully trace the wire using the 2003 Silverado OBD2 port wire diagram to locate the break and repair it. Check for any damaged, corroded, or disconnected sections of wire.
By systematically checking Fuse 13 and using a multimeter in conjunction with the “2003 silverado obd2 port wire diagram”, you can effectively diagnose and repair a non-functional OBD2 port and cigarette lighter in your 2003 Chevy Silverado. Once you’ve restored power, you should be able to connect your OBD2 scanner and retrieve any diagnostic trouble codes, getting you one step closer to resolving any underlying issues with your vehicle. Good luck, and remember to always consult the wiring diagram for your specific vehicle year and model for accurate troubleshooting!