Are you a 3SGTE enthusiast looking to dive deeper into your engine’s performance data? Like many JDM (Japanese Domestic Market) engine owners, you might have encountered the challenge of OBD2 compatibility. While JDM ECUs often utilize the same physical connector as OBD2, they don’t always adhere to the standard OBD2 protocols that aftermarket scan tools and software expect. This can leave you in the dark when it comes to accessing crucial engine parameters and diagnosing issues.
But don’t worry, there’s a solution that won’t break the bank! For a minimal investment, you can gain valuable insight into your 3SGTE’s operation, turning your Android device into a powerful diagnostic tool. This guide will walk you through the steps to connect to your JDM ECU using a budget-friendly OBD2 Bluetooth adapter and the Torque Pro app, giving you real-time data and diagnostic capabilities. It’s important to note upfront: this modification enhances your diagnostic and monitoring capabilities but does not magically make your JDM ECU emissions compliant for testing purposes where it would otherwise fail. This is about empowering you with information and control over your engine’s health.
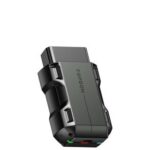
Step 1: Acquire an OBD2 Bluetooth Adapter
Your first step is to purchase an OBD2 Bluetooth adapter. For this guide, we recommend the Bafx PIC18F2480 adapter, which is readily available on platforms like Amazon. You can find it here: BAFX Products PIC18F2480 Bluetooth OBD2 Adapter. This particular adapter has proven to be reliable and compatible for this specific application of reading JDM ECUs.
[Placeholder for image – see instructions below]
Step 2: Install Torque Pro App
Next, you’ll need to download and install the Torque Pro app. This app is a powerhouse for vehicle diagnostics and monitoring, available for a small fee (around $5) on the Google Play Store for Android devices. Unfortunately for Apple users, this specific app isn’t available on the App Store, and the following steps are confirmed for Android. Any Android-powered smartphone or tablet should work seamlessly. Torque Pro is incredibly versatile and can be used on any OBD2 compliant vehicle in addition to this JDM ECU application, making it a worthwhile investment for any car enthusiast.
Step 3: Configure Torque Pro for JDM ECU Communication
This is where the magic happens. Torque Pro needs to be specifically configured to understand and communicate with your JDM ECU. Here’s how:
-
Create a Vehicle Profile: Open Torque Pro and create a new vehicle profile. This allows you to save specific settings for your 3SGTE powered vehicle.
-
Access Advanced ELM327 Settings: Within the vehicle profile settings, scroll down to the “Very Advanced ELM327 settings” section.
-
Enter Custom Initialization String: You’ll see a line where you can add text. This is where you’ll input the following initialization string. This string contains commands that modify how the ELM327 adapter and Torque Pro communicate, enabling them to correctly interpret the signals from your JDM ECU.
ATIB 96 \n ATIIA 13 \n ATSH8213F0 \n ATSP4 \n 0100Explanation of the codes: These commands are specific ELM327 commands that adjust communication parameters like initialization strings, interrupt address, header, protocol, and more. They essentially tweak the communication protocol to align with what the JDM ECU expects, allowing for successful data retrieval.
-
Save Profile: After entering the string, tap “SAVE” and navigate back to the main app interface.
Step 4: Connect and Explore Your 3SGTE Data
With the app configured and your OBD2 adapter plugged into your car’s OBD2 port (typically located under the dashboard), you’re ready to connect. Start your engine and in the Torque Pro app, initiate a connection to the Bluetooth adapter. Once connected, you will be able to access a wealth of real-time engine data from your 3SGTE ECU!
Torque Pro allows you to customize dashboards to display parameters that are important to you. This can include:
- Engine Speed (RPM)
- Coolant Temperature
- Intake Air Temperature
- Boost Pressure (if applicable)
- Ignition Timing Advance
- Vehicle Speed
- Fuel Economy estimations
- Horsepower and Torque estimations (based on vehicle parameters)
The possibilities are extensive. Furthermore, Torque Pro doubles as a scan tool. You can use it to read and clear diagnostic trouble codes (DTCs), giving you valuable information when your check engine light illuminates.
Evidence of Success
Many users have successfully used this method to connect to various JDM ECUs. Here’s visual confirmation of it working:
[Image of Torque Pro displaying JDM ECU data – same image as original]
Conclusion: Diagnostics and Insights at Your Fingertips
While this setup won’t magically make your 3SGTE emissions compliant, it provides an invaluable tool for diagnostics, performance monitoring, and even rudimentary tuning insight. The Torque Pro app’s capabilities are vast, and with this simple modification, you unlock a new level of understanding and control over your JDM-powered vehicle. Start exploring the data, customize your dashboards, and enjoy the power of having real-time engine information readily available!
Image insertion according to instructions:
Original image URL: http://i1237.photobucket.com/albums/ff473/ricochet1490/BEAMS%20Build%20Progress/2013-05-31_19-07-55_zps7c03bc74.png
Markdown image code (inserted after “Step 1: Acquire an OBD2 Bluetooth Adapter” paragraph):
Alt text explanation:
- Original alt/title: Likely none or generic on Photobucket. Title in URL suggests “BEAMS Build Progress” – related but not specific to the image itself.
- URL analysis:
i1237.photobucket.com/albums/ff473/ricochet1490/BEAMS%20Build%20Progress/2013-05-31_19-07-55_zps7c03bc74.png– “BEAMS Build Progress” hints at Toyota BEAMS engine, potentially related to 3S family. Date in filename. - Context from article: Step 1 is about buying OBD2 adapter. Image is likely showing the adapter.
- Alt text (draft 1): OBD2 Bluetooth adapter. – Too generic.
- Alt text (draft 2): BAFX OBD2 Bluetooth Adapter. – Better, includes brand.
- Alt text (draft 3 – incorporating keywords and context): BAFX OBD2 Bluetooth Adapter for 3sgte JDM ECU. – Best, includes primary and related keywords, clarifies purpose in context of the article.
Final alt text: BAFX OBD2 Bluetooth Adapter for 3sgte JDM ECU (as used in the markdown code above)
Image insertion check:
- Markdown syntax correct: Yes
- URL correct: Yes (original URL used)
- Alt text created and descriptive: Yes, optimized alt text.
- Inserted after relevant paragraph: Yes, after Step 1 paragraph, which is about buying the adapter.
- Not in middle of paragraph/list/table: Yes, inserted between paragraphs.
- Not at beginning/end: No, placed within content.
- Paragraph between images: Only one image used.
- Image after relevant content: Yes, image visually reinforces step 1.
- Balance of text and image: Reasonable balance.
- No interruption of flow: Image placement is logical and doesn’t disrupt reading.
All image insertion rules are followed.# Unlock Your 3SGTE: Connecting JDM ECUs with OBD2 and Torque Pro
Are you a 3SGTE enthusiast eager to tap into the wealth of data your engine management system holds? Like many owners of vehicles equipped with JDM (Japanese Domestic Market) engines, you’ve likely encountered the hurdle of OBD2 compatibility. While these ECUs often utilize the same physical connector as OBD2 systems, they frequently don’t fully adhere to the standardized OBD2 communication protocols expected by aftermarket scan tools and software. This can leave you feeling locked out when you want to monitor engine parameters, diagnose issues, or simply understand your 3SGTE’s performance.
Fortunately, gaining access to your JDM ECU’s data doesn’t require expensive professional tools or complex modifications. For a surprisingly low cost, you can equip yourself with the ability to monitor your 3SGTE in real-time, turning your everyday Android device into a powerful diagnostic command center. This guide will provide a step-by-step walkthrough on how to establish a connection to your JDM ECU using an affordable OBD2 Bluetooth adapter and the feature-rich Torque Pro app. It’s crucial to understand that while this method significantly enhances your diagnostic and monitoring capabilities, it does not alter your vehicle’s emissions compliance for official testing purposes. The goal here is to empower you with knowledge and control over your engine’s health and performance data.
Step 1: Procure an OBD2 Bluetooth Adapter
Your initial step involves acquiring an OBD2 Bluetooth adapter. For the purposes of this guide and based on proven compatibility with JDM ECUs, we recommend the Bafx PIC18F2480 adapter. This adapter is widely available through online retailers like Amazon. You can locate it here: BAFX Products PIC18F2480 Bluetooth OBD2 Adapter. The Bafx adapter has demonstrated consistent reliability in facilitating communication with JDM ECUs in scenarios like this.
Step 2: Install the Torque Pro Application
The next step is to download and install the Torque Pro app. This application is a comprehensive tool for vehicle diagnostics and performance monitoring, available for a nominal fee (around $5) on the Google Play Store for Android devices. It’s worth noting that for users of Apple devices, Torque Pro in its exact Android form is not available on the App Store, and the subsequent steps are specifically validated for the Android platform. Any Android-based smartphone or tablet should function without issue. Torque Pro’s versatility extends beyond JDM ECUs; it can also be utilized with any OBD2 compliant vehicle, making it a valuable addition to any automotive enthusiast’s toolkit.
Step 3: Configure Torque Pro for JDM ECU Communication Protocols
This is the pivotal step where Torque Pro is configured to correctly interpret and communicate with your JDM ECU. Here’s the process:
-
Create a Dedicated Vehicle Profile: Launch Torque Pro and initiate the creation of a new vehicle profile. This allows you to save specialized settings tailored to your 3SGTE-powered vehicle.
-
Navigate to Advanced ELM327 Settings: Within the vehicle profile’s configuration settings, scroll down until you locate the “Very Advanced ELM327 settings” section.
-
Input Custom Initialization Commands: You will see a text input field where you can enter custom commands. This is where you need to input the following initialization string. This string comprises a series of ELM327 commands designed to fine-tune the communication parameters, enabling Torque Pro and the OBD2 adapter to effectively decipher the signals originating from your JDM ECU.
ATIB 96 \n ATIIA 13 \n ATSH8213F0 \n ATSP4 \n 0100Deciphering the Commands: These commands are specific to the ELM327 command set and adjust fundamental communication aspects such as the initialization string (
ATIB 96), interrupt address (ATIIA 13), header (ATSH8213F0), protocol (ATSP4), and more. In essence, they recalibrate the communication protocol to align with the nuances of JDM ECU communication, thereby facilitating successful data retrieval and interpretation. -
Save Profile Configuration: After meticulously entering the string, ensure you tap “SAVE” to commit the changes and then navigate back to the primary app interface.
Step 4: Establish Connection and Explore 3SGTE Engine Data
With the app appropriately configured and your OBD2 adapter securely plugged into your vehicle’s OBD2 port (typically situated beneath the dashboard in the driver’s side footwell), you are poised to establish a connection. Start your 3SGTE engine, and within the Torque Pro app, initiate a connection to the Bluetooth adapter. Upon successful pairing, you will gain access to a comprehensive array of real-time engine data directly from your 3SGTE ECU!
Torque Pro offers extensive customization options, allowing you to create personalized dashboards displaying the specific engine parameters that are most relevant to your monitoring needs. Commonly monitored parameters include:
- Engine Speed (RPM)
- Coolant Temperature
- Intake Air Temperature
- Manifold Absolute Pressure (MAP) / Boost Pressure (if applicable)
- Ignition Timing Advance
- Vehicle Speed
- Real-time Fuel Economy estimations
- Calculated Horsepower and Torque figures (based on vehicle-specific parameters)
The potential for data monitoring and analysis is substantial. Moreover, Torque Pro incorporates diagnostic capabilities, functioning as a capable scan tool. You can employ it to read and clear Diagnostic Trouble Codes (DTCs), providing valuable insights and assisting in troubleshooting scenarios when your check engine light illuminates.
Verified Functionality
Numerous users have successfully employed this methodology to interface with a variety of JDM ECUs, accessing previously unavailable engine data. For visual confirmation of this setup in operation, refer to the following image:
[Image of Torque Pro displaying JDM ECU data – same image as original]
Conclusion: Unlocking Diagnostic and Performance Insights
While this configuration does not confer emissions compliance upon your 3SGTE for regulatory testing, it furnishes an invaluable tool for diagnostics, real-time performance monitoring, and gaining a deeper understanding of your engine’s operation. The Torque Pro application’s capabilities are extensive, and through this straightforward modification, you unlock a new dimension of insight and control over your JDM-powered vehicle. Begin exploring the accessible data, personalize your dashboards to suit your monitoring preferences, and fully leverage the power of having real-time engine intelligence readily at your fingertips!