Swapping engines or managing engine electronics in your Honda Prelude can sometimes lead you down the path of converting from OBD2 to OBD1. Specifically, if you’re installing an OBD1 H22A engine into a 5th generation (1997-2001) Honda Prelude, which is originally OBD2, you’ll encounter some electrical differences, especially around the distributor and sensor setup. This guide focuses on addressing the wiring challenges when using an OBD1 distributor in a 5th gen Prelude chassis, ensuring your engine runs smoothly.
Understanding the OBD2 to OBD1 Conversion for 5th Gen Preludes
The 5th generation Honda Prelude, built from 1997 to 2001, utilizes the OBD2 (On-Board Diagnostics 2) system, a more advanced engine management and diagnostic system compared to its predecessor, OBD1. However, some engine swaps, particularly when importing JDM (Japanese Domestic Market) engines like the H22A, might be OBD1.
One key difference surfaces in the crankshaft sensor setup. OBD2 Preludes typically rely on a Crank Fluctuation Sensor (CKF) located near the crankshaft, whereas OBD1 systems, like those found on the JDM H22A, utilize a distributor-integrated setup for Crank Position (CKP) and Top Dead Center (TDC) sensors. When you put an OBD1 engine in an OBD2 chassis, the OBD2 computer in your Prelude expects signals from sensors it’s designed for, which are not present in the same way on the OBD1 engine.
This guide addresses how to bridge this gap, specifically focusing on the distributor wiring to ensure your 5th gen Prelude’s OBD2 electrical system correctly interfaces with the OBD1 engine’s distributor sensors. This is crucial for ignition timing and the engine to start and run correctly.
Step-by-Step Guide: Wiring Your OBD1 Distributor in a 5th Gen Prelude
To get your OBD1 distributor working in your 5th gen Prelude, you’ll need to create a subharness that adapts the OBD1 distributor sensor signals to be compatible with your OBD2 wiring. Here’s how:
Identifying the Sensors: TDC and CKP
OBD1 distributors house the TDC (Top Dead Center) and CKP (Crank Position) sensors internally. These sensors are essential for the ECU (Engine Control Unit) to determine the crankshaft’s position and the top dead center of the pistons, which is vital for proper ignition and fuel delivery timing.
In contrast, OBD2 Preludes often have these sensors located externally, near the crank. When using an OBD1 distributor, you need to tap into the signals from the OBD1 distributor’s TDC and CKP sensors and feed them into the OBD2 engine harness.
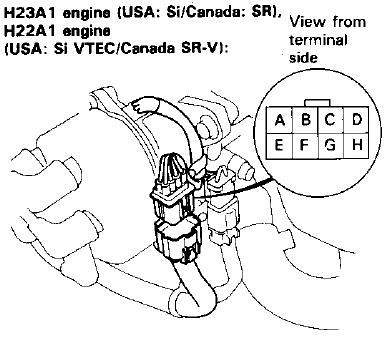
Image showing an OBD1 Prelude distributor, highlighting the integrated TDC and CKP sensor locations for OBD2 to OBD1 conversion reference.
Detailed view of the OBD1 Prelude distributor plug, crucial for understanding wiring connections in a 5th gen OBD2 to OBD1 conversion.
Creating the Conversion Subharness
To avoid modifying your original OBD2 engine harness, creating a subharness is the best approach. This involves making a separate wiring adapter that plugs into your OBD2 harness and connects to the OBD1 distributor.
You will need:
- An OBD1 distributor plug (ideally sourced from a JDM OBD1 engine harness to maintain wire insulation quality).
- Connector pins to match your OBD2 distributor harness.
- Automotive wire (matching gauge and color codes if possible).
- Soldering iron and solder.
- Electrical tape or heat shrink tubing for insulation.
Steps to build the subharness:
-
Prepare the OBD1 Distributor Plug: If you have a pigtail from an OBD1 harness, carefully remove the necessary length of wire with the plug attached. This provides pre-insulated wires, simplifying the process.
-
Identify Wires: The OBD1 distributor plug has wires for TDC, CKP, and Cylinder Position (CYP) sensors. For this conversion, we mainly focus on TDC and CKP. The CYP sensor signals might not be necessary if you are using the OBD1 distributor and ECU setup correctly, but it’s good to have the wiring available if needed.
-
Connect TDC and CKP Wires: Solder the wires from the OBD1 distributor plug to connector pins that will fit into your OBD2 distributor harness plug. You will be essentially “piggybacking” the TDC and CKP signals from the OBD1 distributor to the OBD2 system.
Example of TDC and CKP sensors, illustrating the components involved in wiring for a 5th gen Prelude OBD2 to OBD1 conversion.
-
Insulate and Protect: Ensure all soldered connections are well insulated using electrical tape or, preferably, heat shrink tubing to prevent shorts and ensure durability.
Connecting the Harness
-
Connect Subharness to OBD2 Harness: Plug your newly created subharness into the OBD2 distributor plug on your Prelude’s engine harness. Ensure a secure and proper connection.
-
Route and Connect to Distributor: Route the subharness neatly to the OBD1 distributor. Connect the OBD1 distributor plug from your subharness to the OBD1 distributor.
-
CYP Sensor Wiring (if needed): If you find it necessary to connect the CYP sensor, you’ll need to identify the corresponding wires in your OBD2 harness and connect them to the CYP wires in your subharness. Typically, for basic engine running, TDC and CKP are the most critical.
-
Final Connections: Depin the ICM (Ignition Control Module), CYP+, and CYP- wires from the OBD2 engine harness distributor clip and repin them into the subharness clip end that connects to the OBD1 distributor. This ensures all necessary signals are correctly routed.
Tips and Considerations for a Successful OBD2 to OBD1 Conversion
- Double-Check Wiring: Before starting your engine, meticulously double-check all wiring connections against diagrams and pinouts to avoid electrical shorts or damage to your ECU.
- Quality Components: Use good quality automotive wire and connectors to ensure reliable connections and longevity of your subharness.
- Secure Connections: Make sure all connections are secure and properly insulated to withstand engine bay conditions (heat, vibration, moisture).
- ECU Compatibility: Ensure your ECU is compatible with the OBD1 engine and distributor setup. You might need an OBD1 ECU or a chipped OBD2 ECU that is tuned for OBD1 operation.
By following these steps, you can successfully wire an OBD1 distributor into your 5th gen OBD2 Prelude, overcoming a common hurdle in engine swaps and conversions. This allows you to enjoy the benefits of your OBD1 engine while maintaining the electrical integrity of your vehicle.