It appears you’re facing some frustrating challenges in getting your Seeed CAN shield V2.0 to communicate with your car’s OBDII port via a DB9 connector. Many enthusiasts and professionals alike rely on OBD2 connections for retrieving crucial vehicle data like engine RPM and speed. It’s understandable to feel stuck when even basic test sketches fail to yield results. Let’s dive into some potential causes and troubleshooting steps to get you on the right track.
It’s common to see others seemingly effortlessly access engine data, which can be disheartening when you’re facing roadblocks. For projects like custom instrument clusters, reliable OBD2 data is essential. The fact that you only have one shield makes diagnosis slightly trickier, but your oscilloscope testing is a good starting point. The continuous “spamming” behavior you observed might be indicative of a few things, and we’ll explore those.
The consistent signal output even after sending a single message, as shown in your oscilloscope capture, could be due to the CAN shield repeatedly transmitting the request message. This might be normal behavior if it’s expecting an acknowledgment or response that it’s not receiving. It’s less likely that the shield has its own processor autonomously spamming unrelated data; rather, it’s probably stuck in a loop trying to establish communication. The persistence even after uploading a new sketch suggests the shield might retain its last instructions until power is cycled, which is not unusual for some hardware.
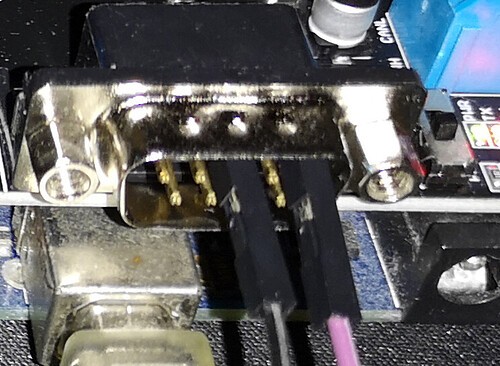
Before we delve deeper, let’s address your OBD2 to DB9 cable. Creating your own cable is a common practice, but it’s crucial to verify the wiring meticulously. Incorrect wiring is a frequent culprit in OBD2 communication problems. You mentioned using multiple sources for wiring diagrams and testing with a multimeter, which is excellent practice. However, let’s re-examine the standard OBD2 pinout and how it typically maps to a DB9 connector in automotive CAN bus applications.
The OBD2 connector in your car is standardized, but the DB9 connector is more general-purpose. In automotive contexts, especially for CAN bus interfaces via DB9, specific pins are designated for CAN High, CAN Low, and ground. It’s vital to ensure your custom cable correctly bridges the OBD2 CAN pins to the appropriate DB9 pins for your Seeed CAN shield. Double-check your wiring against reliable OBD2 to DB9 pinout diagrams commonly available online.
Moving on to your code, let’s analyze the examples you’ve tried. The Seeed Studio example for OBDII PIDs is a good starting point. Your modified code, designed for continuous data retrieval without manual input, looks structurally sound. You’re correctly sending PID requests (like 0x0C for RPM and 0x0D for speed) and setting up filters to receive responses from the expected OBD2 response ID (0x7E8).
Here are a few key areas to investigate further:
1. CAN Bus Speed and Protocol:
- Baud Rate: Ensure your CAN bus baud rate in the code (CAN_500KBPS) matches your vehicle’s OBD2 CAN bus speed. 500kbps is common for OBD2, but some vehicles might use different speeds. Consult your vehicle’s documentation if unsure.
- Protocol Compatibility: While OBD2 is a standard, variations exist (like ISO 15765-4 CAN). Your CAN shield and code need to be compatible with the specific CAN protocol your car uses on its OBD2 port. Most standard OBD2 implementations are compatible with common CAN shields, but it’s worth verifying if you’re working with a less common vehicle or protocol.
2. CAN Shield Initialization and Filtering:
- Shield Initialization: Your code includes standard CAN shield initialization. Double-check the SPI CS pin (D9 in your code) is correctly wired to your Seeed CAN shield. The “CAN BUS Shield init fail” message suggests potential issues here. Ensure the shield is properly powered and connected to your microcontroller.
- CAN Filters and Masks: You’ve set up masks and filters, which is good practice to reduce CAN bus load. However, ensure your filters (0x7FC mask and 0x7E8 filter) are correctly configured to receive responses from your car’s ECU. Incorrect filter settings can block the responses you’re expecting.
3. OBD2 PID Requests and Responses:
- PID Format: You’re sending Mode 01 PIDs, which is standard for retrieving current data. The format (data length, mode, PID) in your
sendPidfunction looks correct. - Response Handling: The
taskCanRecvfunction checks for incoming CAN messages. Ensure the response ID (0x7E8) is indeed the correct response ID for your vehicle. Some vehicles, or specific ECUs within a vehicle, might use slightly different response IDs. - Error Handling: Implement more robust error handling in your code. Check the return status of
CAN.sendMsgBufandCAN.checkReceiveto detect potential CAN bus errors or communication failures.
4. Hardware Issues:
- CAN Shield Functionality: Since you only have one shield, directly testing its functionality is harder. If possible, try borrowing or acquiring another CAN device (even a different CAN shield or USB CAN adapter) to rule out a faulty shield.
- OBD2 Port Power and Ground: Although you tested with an OBD2 scanner, re-verify that your OBD2 port is providing power and ground to your CAN shield through your DB9 cable. Some OBD2 ports might have issues or blown fuses.
5. Code Examples and Community Resources:
- Seeed Studio Examples: Revisit the Seeed Studio CAN shield examples and try running the most basic examples first to confirm basic CAN communication is working.
- Online Forums and Communities: Automotive and Arduino communities are excellent resources. Share your code, wiring diagrams, and oscilloscope captures on forums dedicated to car hacking, OBD2, and Arduino. Experienced users might spot subtle errors or offer specific advice for your car model.
Connecting to a car’s OBD2 port via DB9 and CAN bus opens up a world of possibilities for vehicle data access and customization. Troubleshooting communication issues can be complex, but by systematically checking each potential point of failure – from wiring and hardware to code and protocol – you can pinpoint the problem and achieve a reliable Obd2 Db9 connection for your project. Remember to double-check every step, utilize online resources, and don’t hesitate to seek help from the community.