For Tesla Model 3 and Model Y owners looking to expand their vehicle’s functionality, the OBD2 adapter is an essential tool. These innovative electric vehicles, while technologically advanced, do not come equipped with a standard OBD2 port readily accessible in traditional gasoline cars. This is where the Model 3 Obd2 Adapter steps in, providing a gateway to your Tesla’s data and enabling the connection of various aftermarket accessories.
This adapter is ingeniously designed to integrate seamlessly into your Tesla’s existing system. It’s installed within the car’s center console, specifically in the rear footwell area, tucked neatly under a small cover. For newer 2024 models onwards, the installation location shifts to the driver’s footwell, behind a panel on the right side. Crucially, the model 3 obd2 adapter is non-invasive; it simply bridges the existing connectors without altering your car’s original wiring. This allows you to safely tap into the data flow within your Tesla.
The primary function of the model 3 obd2 adapter is to create an OBD2 port where none existed before. This newly created port opens up a world of possibilities. One popular application is connecting OBD2 Bluetooth dongles or devices like the XBB Dongle, particularly useful for triggering auxiliary lights. By accessing the car’s CAN bus data through the adapter, you can intelligently control aftermarket lighting based on vehicle signals.
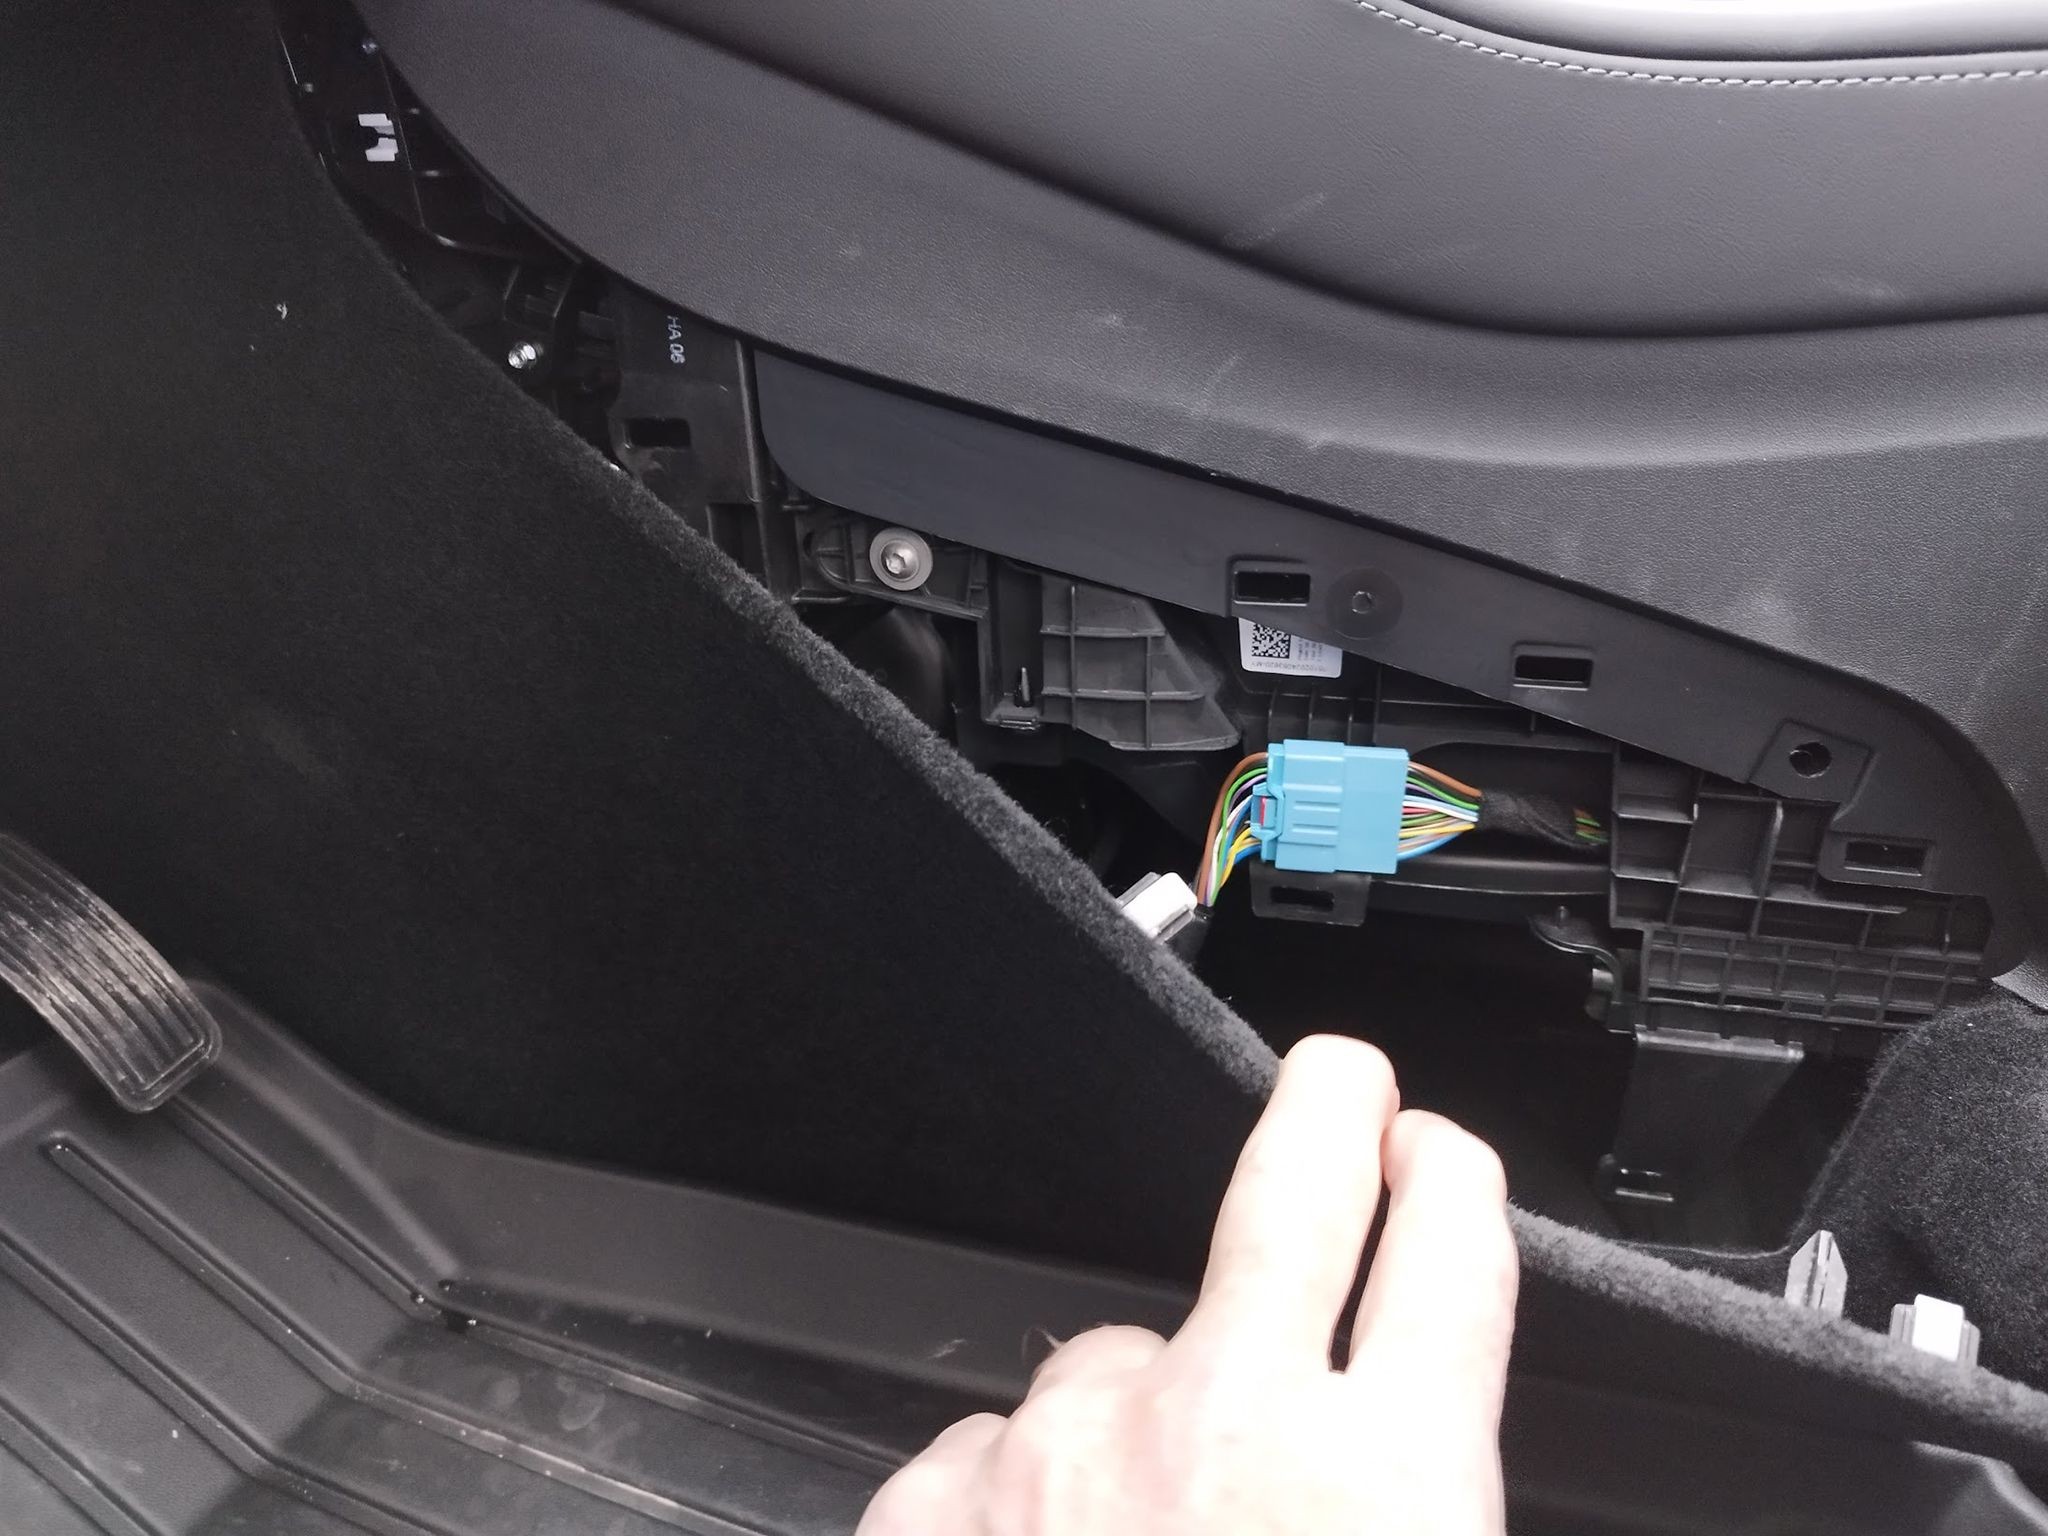 OBD2 port location in a 2024 Tesla Model 3 driver's footwell. The adapter is installed in the connector behind the panel on the right side of the driver's footwell.
Why Use a Model 3 OBD2 Adapter?
The benefits of installing a model 3 obd2 adapter are numerous:
- Access Vehicle Data: Gain access to your Tesla’s diagnostic data, CAN bus information, and performance metrics.
- Connect OBD2 Accessories: Enable the use of a wide range of OBD2 compatible devices, such as Bluetooth dongles, diagnostic scanners, and performance monitors.
- Auxiliary Lighting Solutions: Integrate and control aftermarket lights, like auxiliary driving lights, for enhanced visibility and safety, especially with devices like the XBB Dongle.
- DIY Customization: Empower yourself to customize and enhance your Tesla’s functionality without complex wiring modifications.
Installation Guide for Your OBD2 Adapter
Installing the model 3 obd2 adapter is a straightforward process, but requires careful attention to safety, especially concerning your Tesla’s electrical system. Always ensure the vehicle is completely powered down before proceeding.
Pre-Installation Power Down Procedure (Crucial for Safety):
- Disable Sentry Mode: Turn off Sentry Mode via the Tesla mobile app or the car’s touchscreen (Controls -> Security -> Sentry Mode = Off).
- Prepare for Power Off: Fully open the driver’s side window and close the driver’s door. Open a rear door for easy access to the OBD2 adapter location after power down.
- Initiate Power Off: Through the open driver’s window, use the touchscreen to power off the car: Controls -> Safety -> Power Off.
- Wait for Complete Shutdown: Exit the vehicle and wait outside for a minimum of 8-10 minutes. Listen for a relay “click” and ensure all humming noises from the car cease. This ensures complete shutdown of all CAN buses and relays.
Installation Steps (Standard Location – Center Console Footwell):
- Access the Connector: Locate the protective cover in the rear footwell of the center console.
- Remove the Cover: Carefully remove the cover. It’s secured by approximately 5 clips, which can be released by gentle pulling or prying. This will expose the wiring harness and connectors.
- Disconnect the Connector: Disconnect the existing connector.
- Install the OBD2 Adapter: Place the model 3 obd2 adapter between the disconnected connectors, ensuring all connections are firmly and properly seated.
- Close the Cover: Reinstall the protective cover.
Installation Note for 2024+ Model 3:
- For 2024 and newer Model 3 vehicles, the OBD adapter is installed in the driver’s footwell. Look for the connector behind the panel on the right side of the footwell (refer to the image above for visual guidance). The power down procedure remains the same, but the physical location of the installation differs.
Pro Tip: To avoid repeatedly accessing the installation location, consider routing the OBD2 port cable to a more accessible area, such as under the rear footwell carpet or beneath the front seats. This allows for easy connection of OBD2 devices without removing the cover each time.
Important Safety Notes:
- Vehicle Power Down: Absolutely ensure the car is completely powered off and has been shut down for the recommended time before disconnecting any connectors. Failure to do so can cause electrical damage.
- Professional Installation (Optional): If you are uncomfortable with any part of this installation process, seek professional assistance from a qualified car electrician.
- Disclaimer: The installer assumes all responsibility for proper installation. Valostore or carparteu.com are not liable for any issues arising from improper installation.
By following these guidelines, you can safely and effectively install a model 3 obd2 adapter and unlock a new level of functionality and customization for your Tesla Model 3 or Model Y.