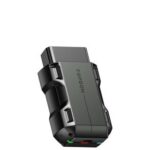
For Aristo owners looking to tap into their vehicle’s diagnostics and customization capabilities, Toyota Techstream software is an indispensable tool. Unlike generic OBD2 scanners, Techstream provides in-depth access to your Toyota Aristo’s systems, allowing you to read error codes, adjust settings, and much more. Many Aristo owners have found that standard OBDII readers fall short when it comes to accessing the full potential of their JDM vehicles. This guide walks you through the essential steps to get Toyota Techstream set up for your Aristo OBD2 system.
What You Need for Aristo OBD2 Setup
To begin, you’ll need two key components to establish a connection between your computer and your Aristo’s OBD2 port:
MVCI Cable
A Vehicle Communication Interface (MVCI) cable is crucial for bridging the gap between your Aristo and the Techstream software. Not all cables are created equal, and compatibility can be an issue. For reliable performance with your Aristo, it’s recommended to use a verified working MVCI unit. You can often find these cables from online retailers.
Toyota Techstream Software
The heart of the operation is the Toyota Techstream software itself. This is the same software used by Toyota dealerships and offers comprehensive diagnostic and customization options. Finding a reliable version of Techstream can be tricky, as some versions may require online activation or have region-specific limitations. It’s advisable to seek out a version that is known to work offline and supports various regions, including JDM (Japanese Domestic Market) vehicles like the Aristo. Version 12 is often cited as a stable and functional option.
Step-by-Step Aristo OBD2 Setup Guide
Follow these steps to install and configure Toyota Techstream for your Aristo OBD2 diagnostics:
Step 1: Obtain the MVCI Cable
Acquire a compatible MVCI cable. Ensure it is the correct type and model that is known to function with Toyota Techstream and JDM vehicles.
Step 2: Download and Install Techstream Software
Download a verified version of Toyota Techstream software. Version 12 has proven to be a reliable choice for many users. It’s generally recommended to avoid using the software versions that sometimes come bundled with the cables, as these can be less reliable or outdated.
Toyota Techstream 12 Download Link
It’s important to note that Techstream software is often optimized for older Windows operating systems like Windows XP or Windows 7. You may need to use a spare laptop running one of these older systems or utilize a virtual machine environment on a modern laptop to run Windows XP or 7.
Once downloaded, unzip the software package and proceed with the installation. Typically, this involves:
- Plugging in your MVCI cable to your laptop.
- Installing the necessary MVCI driver software.
- Installing the Techstream software itself, following the instructions provided in any accompanying text files (like ‘instructions.txt’).
Step 3: Connect to Your Aristo
With the software installed, you’re ready to connect to your Aristo:
-
Launch the Techstream software on your laptop.
-
Connect the MVCI cable to the OBD2 port in your Toyota Aristo. The OBD2 port is usually located underneath the steering column in the driver’s side footwell. You may need to locate a small cover to access the port.
-
Start your Toyota Aristo’s engine.
-
In the Techstream software interface, click on the “Connect” button to establish communication with your vehicle’s ECU (Engine Control Unit).
Once connected, you will have access to a wide range of diagnostic and customization options for your Aristo, including reading and clearing diagnostic trouble codes (DTCs), viewing live data, performing system tests, and adjusting customizable vehicle parameters.
Troubleshooting and Tips
- Connection Issues: If Techstream fails to connect, ensure the MVCI cable is properly connected to both your laptop and the Aristo’s OBD2 port. Verify that the vehicle ignition is switched on (engine running is generally recommended for full diagnostics). Double-check that the MVCI drivers are correctly installed.
- Software Compatibility: If you encounter software errors or instability, try running Techstream in compatibility mode for Windows XP or Windows 7. Using a dedicated older laptop or a virtual machine often resolves these issues.
- Clearing Error Codes: After addressing the underlying issue that triggered a check engine light (CEL) or error code, you can use Techstream to clear the codes. In the software interface, locate the button typically represented by an engine icon with an eraser. Clearing codes will turn off the CEL, but if the problem persists, the light will eventually return.
Conclusion
Setting up Toyota Techstream for your Aristo OBD2 system empowers you with dealership-level diagnostic and customization capabilities. By following these steps, you can gain deeper insights into your vehicle’s health, troubleshoot issues effectively, and even personalize certain vehicle settings. This enhanced control is invaluable for any Aristo owner who wants to maintain and optimize their vehicle’s performance.
