For car enthusiasts and those who like to monitor their vehicle’s performance, the OBD2 port is a crucial interface. It’s the gateway to a wealth of data about your car’s engine, sensors, and overall health. But what if you want to use multiple OBD2 devices simultaneously? This is where the question arises: Can You Get An Obd2 Splitter? The answer is a definitive yes, and this guide will show you not only if you can get one, but also how to install an OBD2 splitter to expand your diagnostic capabilities.
Expanding your OBD2 port access is simpler than you might think. With readily available tools and parts, you can easily install an OBD2 splitter and utilize multiple devices at once. This article provides a step-by-step guide to installing an OBD2 splitter, allowing you to connect devices like diagnostic scanners, performance monitors, or GPS trackers without constantly swapping cables.
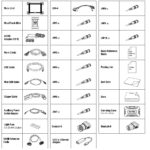
Tools and Parts You’ll Need
Before you begin, gather these essential tools and parts to ensure a smooth installation process:
- OBD2 Splitter: This is the core component that creates multiple OBD2 ports from a single one. You can find these online from automotive parts retailers.
- Mounting Bracket (Optional but Recommended): A bracket helps securely mount the new OBD2 splitter and keeps it neatly in place behind your dashboard.
- Phillips Head Screwdriver: For removing various screws during the process.
- Torx Screwdriver Set: Many car manufacturers use Torx screws, so a set is necessary.
- Trim Removal Tool: Plastic trim tools help prevent damage to your car’s interior panels.
- Mini Flat Head Screwdriver: Useful for disconnecting small electrical connectors.
Step-by-Step OBD2 Splitter Installation Guide
Now, let’s get into the installation process. Follow these steps carefully to expand your OBD2 port effectively:
-
Access the OBD2 Port Area: Begin by using the Phillips screwdriver to remove the hood release handle located beneath the dashboard on the driver’s side. Once removed, you’ll see another screw, typically a Torx screw, which you should also remove.
-
Remove Interior Trim Panels: Gently pull back the door weather stripping near the dashboard. Next, remove the black plastic door trim panel. To access the OBD2 port, you need to remove the kick panel, which is the plastic panel surrounding the OBD2 port. Carefully pull it towards the center of the car (transmission tunnel). This panel is held by two snap clips. One clip is located in the lower middle of the panel, and the other becomes visible after removing the weather stripping. Use the trim removal tool to detach the snap connector closest to the trunk release button. It’s often easier to remove the snap connector from the car body and re-insert it into the kick panel for easier reassembly later.
-
Disconnect the Trunk Release Button: Push the trunk release button from behind the kick panel to detach it. Rotate the button to see how the wire harness is connected. Use the miniature flat head screwdriver to gently release the wire harness clip. Set the trunk release button and the kick panel aside.
-
Loosen the Lower Dash Panel: Use the Torx screwdriver to unscrew the lower dash panel screws. You only need to remove the screw closest to the door and the screw immediately to its right. Removing these two screws should provide enough flexibility to access the OBD2 port.
-
Unscrew the OEM OBD2 Port: Locate the OEM OBD2 port, which is typically secured by two Phillips screws. Remove both of these screws to detach the factory OBD2 port from its mounting location.
-
Connect the OBD2 Splitter: Take the OEM harness (the connector you just detached from the factory OBD2 port) and plug it into the male connector of the OBD2 splitter.
-
Mount the First Splitter Connector: Take the first female connector in the OBD2 splitter series and plug it into the aftermarket mounting bracket you purchased (if using one). This will become your new, relocated OBD2 port.
-
Connect Auxiliary Devices and Secure Wiring: Plug any auxiliary OBD2 devices you plan to use (like scanners or monitors) into the remaining female connectors of the splitter. Carefully tuck these extra connectors and wiring up behind the lower dash panel. Pull down slightly on the lower dash panel to create some space and then push the connectors up and out of the way. Once the wiring is positioned, screw the lower dash panel back into place.
-
Install the Mounting Bracket (If Used): If you are using a mounting bracket, screw it into the original OBD2 port location. This securely mounts the new primary OBD2 port from the splitter.
-
Position the Splitter for Kick Panel Clearance: The positioning of the OEM harness and the OBD2 splitter connection is critical to ensure the kick panel fits back correctly. Make sure the trunk release harness is positioned as shown in the image below to facilitate reconnection and kick panel fitment.
-
Reinstall the Kick Panel and Trunk Release: Put the kick panel back into place. Remember the snap connector you removed in step 2? Re-inserting the kick panel is often easier if this snap connector is already in place on the kick panel. Ensure the trunk release wiring is accessible, and then plug the trunk release button back into its connector.
-
Reinstall Remaining Trim: Put the door trim panel back into place, followed by the door weather stripping. Finally, reinstall the OBD2 access cover.
Conclusion
Successfully installing an OBD2 splitter allows you to overcome the limitation of a single diagnostic port. Now you can simultaneously use various OBD2 devices, gaining real-time insights into your vehicle’s performance and health. This simple modification enhances your ability to monitor and maintain your car, providing valuable data at your fingertips. With the answer to “can you get an OBD2 splitter?” being a resounding yes, you can now take advantage of this convenient upgrade for your vehicle.