For any automotive enthusiast diving into a custom car project, especially one geared towards experimentation and track use, a well-organized dashboard and switch panel are essential. While the roll cage for this project is complete, the next crucial step involves creating functional and accessible mounting solutions for gauges and switches. This guide details the fabrication of a custom Car Dash Part and switch panel using readily available materials, perfect for a DIY build.
Constructing the Car Dash Part
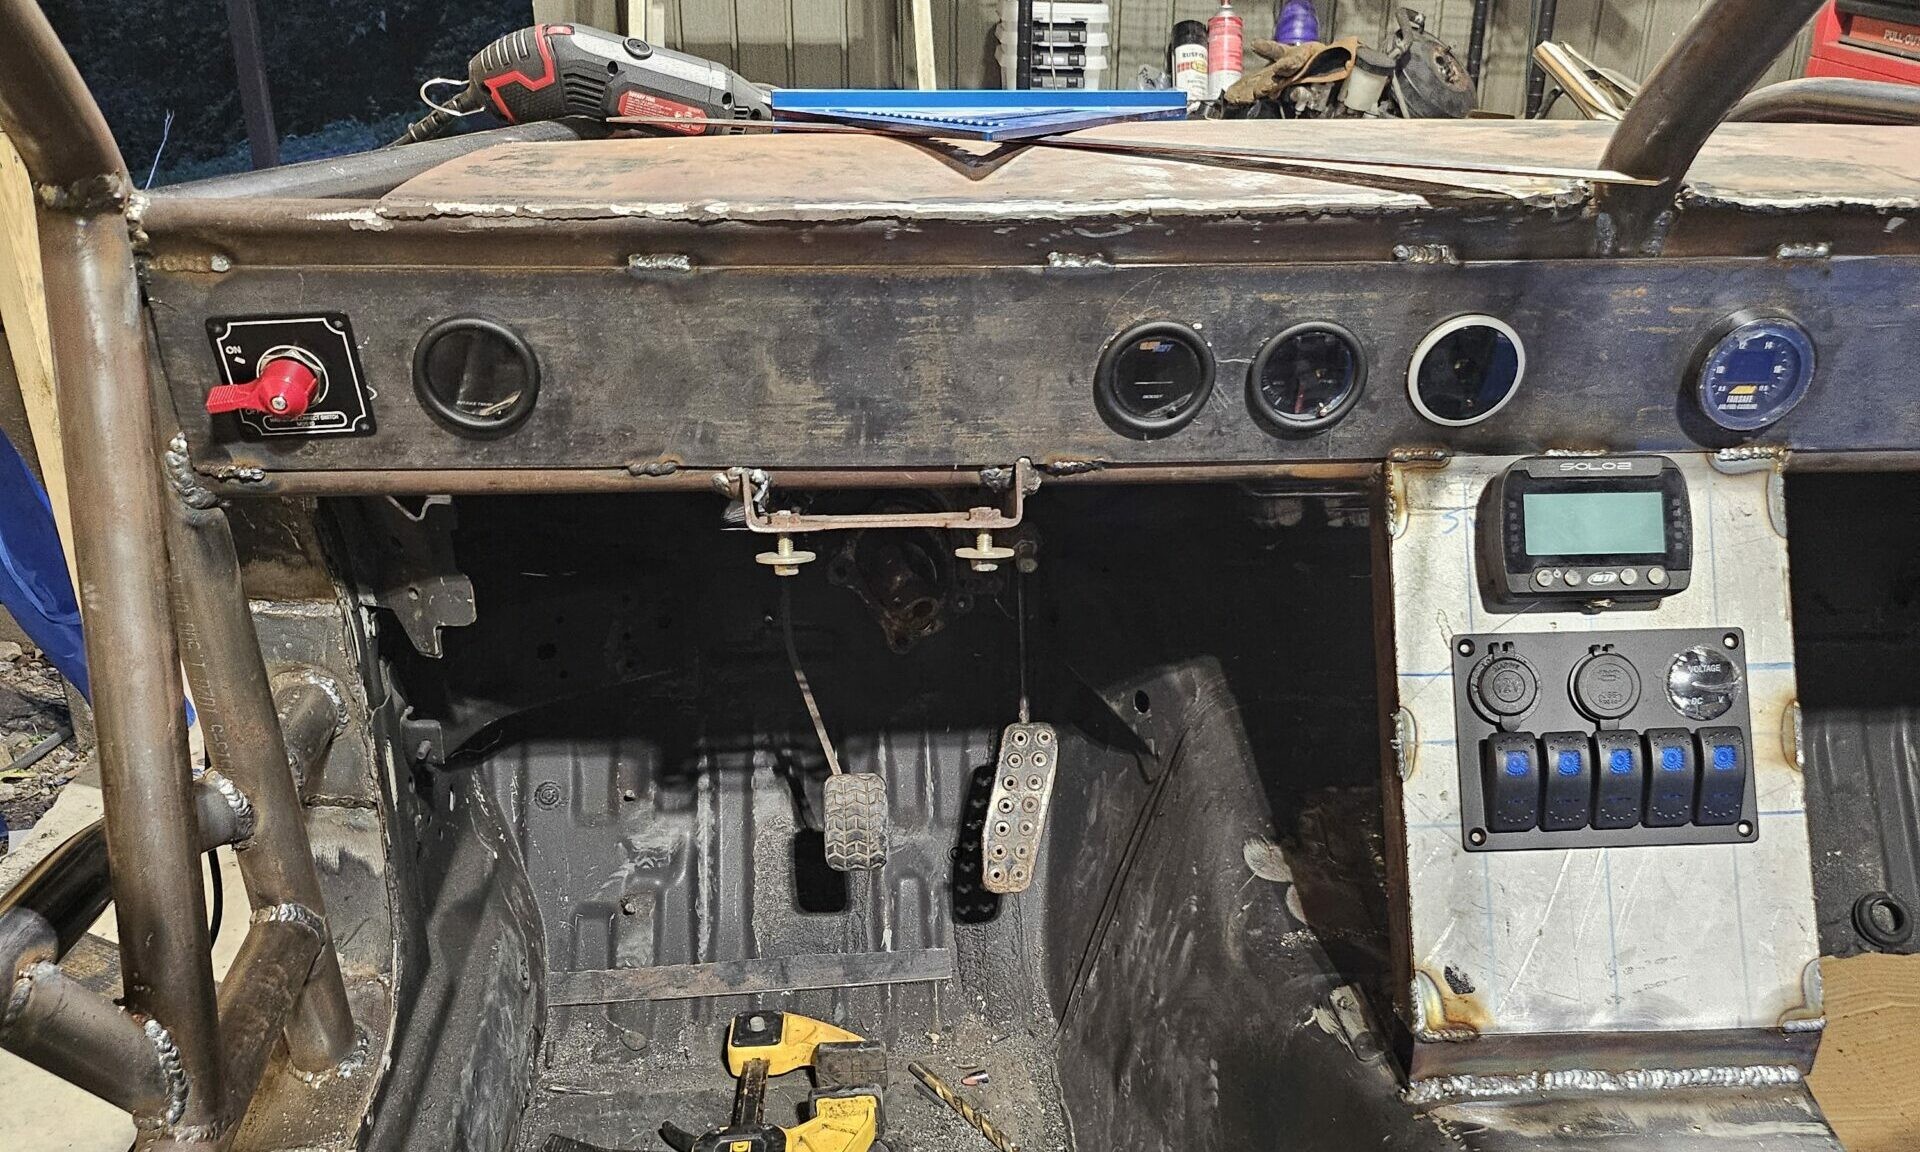
The foundation of this car dash part starts with the roll cage itself. A secondary dash bar was strategically installed above the existing steering column support. Positioned approximately 6 inches above the lower bar, this upper bar creates a rectangular opening that spans the width of the cage. This design serves a dual purpose: framing the dashboard area and providing a straight, robust edge for mounting a future Lexan windscreen. This added bar is critical in creating a dedicated space for the car dash part.
With the frame established, the next step involved creating the actual dash panel. A piece of 1/8″ thick x 6″ wide flat steel was cut to length, ensuring it spanned the dash opening across both the driver and passenger sides. After welding this steel piece into place, attention turned to layout and precision. Holes for the gauges and a cut-off switch were carefully marked and cut. To ensure a professional and uniform appearance, a laser level and ruler were employed to maintain alignment and level spacing throughout the gauge layout process for this car dash part.
Fabricating the Switch Panel
For the switch panel component of this car dash part setup, a cost-effective approach was prioritized without sacrificing functionality. A 22-gauge sheet metal piece was selected as the base, paired with a marine-grade five-switch panel sourced from Amazon. Opting for a marine-grade panel offers durability and weather resistance, crucial for exposed applications. This budget-conscious choice, costing significantly less than specialized racing switch panels, proves that effective solutions don’t always require premium price tags.
Installation of the switch panel involved shaping the 22-gauge sheet metal to fit within pre-attached switch mount supports on the roll cage. Precise measurements were taken from the back of the switch panel and transferred to the sheet metal for accurate cutting. Fine-tuning with a Dremel ensured a snug fit for the switch panel within the sheet metal surround. Finally, the prepared sheet metal was welded to the previously mounted supports, creating a secure and integrated switch panel as part of the complete car dash part assembly.
The result is a functional and custom-built car dash part and switch panel, ready to house essential gauges and controls. This DIY approach showcases how to create a professional-looking and practical setup using basic fabrication skills and smart material choices.
Up Next
With the car dash part and switch panel complete, the project moves to the front end fabrication. This next phase will focus on constructing a front structure to accommodate the radiator, a tubular bumper, and the front sway bar. Reinstalling the drivetrain is necessary to ensure accurate measurements and fitment for these components. Following the front end work, the final steps will involve addressing any remaining details, such as window net and windscreen attachments, bringing the project closer to completion.