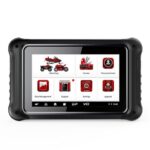
Keeping your Cen-Tech OBD2/EOBD scanner updated is crucial for optimal performance, ensuring it accurately diagnoses vehicle issues and supports the latest car models. Software updates enhance functionality, add new features, and fix potential bugs, making your scanner an even more valuable tool in your automotive toolkit. This guide provides a clear, step-by-step process to update your Cen-Tech scanner, ensuring you have the latest software version and can diagnose your vehicle effectively.
Updating Your Cen-Tech Scanner: A Detailed Walkthrough
Before you begin, ensure you have a stable internet connection and access to a computer running Windows. The update process involves downloading software from the Harbor Freight website and using the Maxilink II tool to transfer it to your scanner.
Step 1: Download the Software Update Package
The first step is to download the latest software update package for your Cen-Tech scanner.
- Visit the Harbor Freight Website: Navigate to www.harborfreight.com in your web browser.
- Search for Your Scanner: Use the search bar to find your specific Cen-Tech scanner model. You can typically find the SKU number (like 60794) on the scanner itself or its packaging.
- Locate the Software Update: On the product page for your scanner, look for a “Software Updates” or “Downloads” section.
- Download the ZIP File: Download the software update package, which is usually provided as a ZIP file. Take note of where you save this file on your computer – your downloads folder or desktop are common locations.
Step 2: Unzip the Downloaded File
The downloaded file is compressed in ZIP format and needs to be extracted before you can use it.
- Locate the ZIP File: Find the ZIP file you downloaded in the previous step.
- Extract the Contents: Right-click on the ZIP file and select “Extract All…” (or a similar option depending on your operating system). Choose a destination folder to extract the files to and remember this location. Tools like WinRAR or 7-Zip can also be used if you prefer.
Step 3: Install Maxilink II Software
Maxilink II is the software tool required to update your Cen-Tech scanner.
- Install from CD (if available): If your scanner came with a CD, insert it into your computer and run the Maxilink II setup software.
- Download from Harbor Freight (if needed): If you don’t have the CD or cannot find the software, it might be available on the Harbor Freight website, potentially within the same “Software Updates” section where you found the scanner update.
- Run Maxilink II: Once installed, run the Maxilink Tool Kit. The Maxilink II window should open, ready for the scanner connection.
Step 4: Connect Your Cen-Tech Scanner to Your Computer
Now, you need to establish a connection between your scanner and your computer.
- Use the USB Cable: Connect your Cen-Tech scanner to your computer using the provided USB cable.
- Enter Update Mode on the Scanner:
- Power on your Cen-Tech scanner.
- Navigate to the “Setup” menu using the scanner’s buttons.
- Select “Update Mode” and press “OK”. The scanner screen should indicate it’s in update mode.
Step 5: Select Your Scanner Model in Maxilink II
With the scanner connected and in update mode, Maxilink II should recognize it.
- Check Connection Status: Look at the status bar in the upper right corner of the Maxilink II window. It should turn green, indicating a successful connection.
- Select Your Model (SKU Number): On the left side of the Maxilink II window, locate and select the model number (SKU) that matches your Cen-Tech scanner. This is crucial for applying the correct update.
Step 6: Select the Update File and Start the Update
The final steps involve pointing Maxilink II to the downloaded update file and initiating the update process.
- Click “Select File”: In the “Update Program” pane of the Maxilink II window, click the “Select File” button.
- Locate the .bin File: Browse to the folder where you extracted the software update files (from Step 2). Select the file with the “.bin” extension. This is the actual software update file.
- Click “Update”: In the Maxilink II window, click the “Update” button to begin the software update process.
- Wait for Completion: A progress bar will appear in Maxilink II and on your scanner’s screen. Important: Do not disconnect the scanner, turn off either the scanner or your computer, or interrupt the update process in any way. This could cause damage to your scanner.
- Confirmation Message: Once the update is complete, a confirmation message will appear on the scanner’s screen.
Step 7: Restart Your Scanner
After a successful update, restarting the scanner is necessary to finalize the process.
- Power Off the Scanner: Turn off your Cen-Tech scanner.
- Power On the Scanner: Turn the scanner back on. It should now be running with the updated software.
Troubleshooting and Support
If you encounter any issues during the update process, double-check all connections, ensure you have selected the correct scanner model and update file, and that your internet connection is stable. For further technical assistance, contact Harbor Freight customer support at 1-800-444-3353.
By following these steps, you can easily update your Cen-Tech OBD2/EOBD scanner and ensure it’s running at its best, providing you with accurate and reliable diagnostic information for your vehicle. Keeping your scanner updated is a simple yet essential part of car maintenance for any DIY enthusiast or professional mechanic.