Encountering the “Maintenance Required” light in your Honda Civic can be unsettling. It’s your car’s way of communicating that something needs attention. While it might trigger a visit to the mechanic, often, understanding the issue is the first step towards a potentially simple fix. This guide will walk you through how to diagnose and potentially clear the maintenance required light in your Honda Civic using an OBD2 scanner, focusing on common error codes and DIY solutions.
Understanding the Maintenance Required Light in Your Honda Civic
The “Maintenance Required” light isn’t always indicative of a major breakdown. It’s a general warning that prompts you to check your vehicle. In many cases, it’s triggered by routine maintenance reminders like oil changes. However, it can also illuminate due to detected issues within your car’s systems, which are often stored as error codes. These error codes can range from minor sensor glitches to more significant problems affecting your engine or emissions system.
Diagnosing the Issue with an OBD2 Scanner
The most effective way to understand why your maintenance light is on is by using an OBD2 (On-Board Diagnostics II) scanner. This tool allows you to communicate with your car’s computer and read the stored Diagnostic Trouble Codes (DTCs). Here’s how to use it:
- Locate the OBD2 Port: This port is usually located under the dashboard on the driver’s side of your Honda Civic. Refer to your owner’s manual if you’re unsure of the exact location.
- Plug in the OBD2 Scanner: With your car turned off, plug the OBD2 scanner into the port.
- Turn the Ignition to “ON” (Engine Off): Turn your key to the “ON” position, which powers up the car’s electronics without starting the engine.
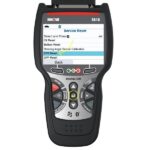
- Power on the Scanner and Read Codes: Follow your scanner’s instructions to power it on and initiate a code scan. The scanner will display any stored DTCs.
- Record the Codes: Note down any error codes that appear. These codes are crucial for diagnosing the problem.
Alt text: OBD2 scanner displaying error codes P1298 and P0420, indicating potential car issues.
Common Honda Civic Error Codes and DIY Solutions
Let’s delve into two common error codes that might trigger the maintenance required light in your Honda Civic and explore potential DIY fixes:
Error Code P1298: High Voltage ELD Circuit
The error code P1298 in Hondas and Acuras specifically points to “High voltage ELD Circuit”. ELD stands for Electronic Load Detector. This component monitors the electrical load on your charging system, informing the system how much charge the battery needs. A P1298 code indicates the ELD is detecting a higher voltage than expected.
Potential Causes and Troubleshooting:
- Blown Fuse: A common and often simple cause is a blown fuse in the ELD circuit. Check your fuse box diagram (usually found in your owner’s manual or on the fuse box cover itself) to locate the ELD fuse and inspect it for damage.
- Wiring Issue: A short circuit in the wiring harness related to the ELD can also cause this code. Inspect the wiring harness near the intake manifold for any signs of damage, fraying, or shorts.
- Faulty ELD: If fuses and wiring are intact, the ELD sensor itself might be faulty and require replacement.
DIY Solution (ELD Replacement):
If you suspect a faulty ELD, replacement is often a straightforward DIY task. The ELD unit is typically located within the fuse box.
- Locate the ELD: Identify the ELD in your fuse box. Consult your repair manual or online resources specific to your Honda Civic model for the exact location.
- Purchase a Replacement ELD: You can purchase a new ELD unit from a Honda/Acura dealership or reputable auto parts supplier.
- Disconnect the Negative Battery Terminal: Always disconnect the negative battery terminal before working on electrical components to prevent shorts.
- Remove the Old ELD: Carefully remove the old ELD unit. It might be clipped in or require a small screwdriver to release.
- Install the New ELD: Install the new ELD unit in the reverse order of removal.
- Reconnect the Negative Battery Terminal: Reconnect the negative battery terminal.
Alt text: A new Electronic Load Detector (ELD) component, used for resolving P1298 error codes in Honda vehicles.
Error Code P0420: Catalytic Converter System Efficiency Below Threshold (Bank 1)
The P0420 code signals that your catalytic converter’s efficiency is below the acceptable threshold. The catalytic converter is a crucial part of your car’s emissions system, responsible for reducing harmful pollutants. This code arises when the readings from the oxygen sensors placed before and after the catalytic converter are too similar, indicating the converter isn’t functioning optimally.
Potential Causes and Troubleshooting:
- Faulty Catalytic Converter: The most common culprit is a failing or aged catalytic converter. Converters have a lifespan and can become less efficient over time, especially with high mileage.
- Oxygen Sensor Issues: Malfunctioning oxygen sensors (upstream or downstream) can provide inaccurate readings, leading to a false P0420 code.
- Exhaust Leaks: Leaks in the exhaust system, particularly before the catalytic converter, can affect sensor readings and trigger this code.
- Engine Problems: Engine issues like misfires or rich/lean fuel conditions can overload the catalytic converter and reduce its efficiency.
DIY Solution (Fuel System Cleaner – Proceed with Caution):
In some milder cases, particularly if the P0420 code appears intermittently, a fuel system cleaner formulated to clean catalytic converters might offer a temporary solution. However, this is not a guaranteed fix and should be considered a diagnostic step, not a permanent repair.
- Use a Reputable Catalytic Converter Cleaner: Purchase a fuel system cleaner specifically designed for catalytic converters from a reputable brand.
- Follow Instructions Carefully: Add the cleaner to your fuel tank as per the product instructions, usually when your tank is near empty, and then fill up with premium gasoline.
- Monitor and Re-scan: Drive your car as usual and monitor if the maintenance light turns off. After a couple of fuel tank refills, use your OBD2 scanner to check if the P0420 code is still present or if it can be cleared.
Important Note: If the P0420 code persists after trying a fuel cleaner, or if it returns quickly, it’s crucial to have your catalytic converter and oxygen sensors professionally inspected. A failing catalytic converter can lead to more serious emissions issues and potentially damage other components.
Clearing the Maintenance Required Light
Once you’ve addressed the underlying issue and potentially resolved the error codes (or at least diagnosed them), you can attempt to clear the maintenance required light using your OBD2 scanner.
- Connect the OBD2 Scanner: Plug the scanner into the OBD2 port and turn the ignition to “ON.”
- Navigate to the “Clear Codes” or “Erase Codes” Function: Follow your scanner’s menu to find the option for clearing codes.
- Clear the Codes: Select the “Clear Codes” option and confirm your choice.
- Verify the Light is Off: After clearing the codes, the maintenance required light should turn off, provided the underlying issue has been resolved.
If the maintenance light comes back on shortly after clearing the codes, it indicates that the problem is still present. You’ll need to further investigate the error codes and potentially seek professional diagnosis and repair.
Conclusion
Using an OBD2 scanner is an invaluable tool for Honda Civic owners to understand and address the “Maintenance Required” light. By identifying error codes like P1298 and P0420, you can take informed steps towards DIY repairs or seek targeted professional help. Remember, while some issues can be resolved with simple fixes, others might require expert attention. Prioritizing proper diagnosis and addressing the root cause will ensure your Honda Civic remains reliable and on the road.