In the world of automotive diagnostics, deciphering the data from your vehicle’s On-Board Diagnostics II (OBD2) system can feel like learning a new language. Among the many parameters and codes you might encounter, “Clr Dist” stands out as a particularly useful piece of information for both car owners and mechanics. But what exactly is “Clr Dist Obd2 Meaning”? This comprehensive guide will break down this parameter, explaining its significance and how it can aid in diagnosing and maintaining your vehicle.
Understanding Clr Dist: Distance Since Diagnostic Trouble Codes Cleared
“Clr Dist” is an abbreviation for Distance Since Cleared Diagnostic Trouble Codes. In simpler terms, it’s a parameter displayed by OBD2 scanners that tells you the total distance your vehicle has traveled since the last time the diagnostic trouble codes (DTCs) were cleared from its computer system, often referred to as the Powertrain Control Module (PCM) or Engine Control Module (ECM). This distance is typically measured in miles or kilometers, depending on your vehicle’s settings and the units used by your scan tool.
Why is “Clr Dist” an Important OBD2 Parameter?
While it might seem like a simple odometer reading, “Clr Dist” plays a crucial role in several diagnostic scenarios:
Verifying Repairs and Monitoring Intermittent Issues
After performing repairs to address a check engine light or other vehicle issue, mechanics often clear the stored DTCs. “Clr Dist” then becomes invaluable for:
- Confirming the repair effectiveness: By monitoring “Clr Dist,” you can drive the vehicle and observe if the check engine light reappears or if new DTCs are logged after a certain distance. If the issue was genuinely resolved, the vehicle should accumulate mileage without triggering new codes.
- Tracking intermittent problems: Some vehicle issues are intermittent, meaning they don’t occur constantly. “Clr Dist” helps track if a problem recurs after a specific driving distance, providing clues about the conditions under which the fault might reappear.
Emissions Readiness and System Monitoring
OBD2 systems include monitors that continuously check various vehicle systems to ensure they are functioning correctly and meeting emissions standards. These monitors often require specific driving conditions and warm-up cycles to complete their tests. “Clr Dist” helps in this process:
- Ensuring monitor readiness: After clearing codes, emissions monitors reset to an “incomplete” state. Driving the vehicle for a certain distance, tracked by “Clr Dist,” is necessary for these monitors to run and achieve a “ready” status, which is required for passing emissions tests.
- Understanding warm-up cycles: “Clr Dist” is often related to another parameter, “Warm-up DTC Clr,” which counts the number of warm-up cycles since the codes were cleared. A warm-up cycle is defined as the engine coolant temperature rising by at least 40°F from the starting temperature and reaching a minimum of 160°F. Both “Clr Dist” and “Warm-up DTC Clr” are crucial for understanding if monitors have had sufficient time to run their diagnostics.
Diagnostic Strategy and Freeze Frame Data
When a DTC is triggered, the OBD2 system often stores “freeze frame” data, which is a snapshot of various parameters at the moment the fault occurred. This data can include “Clr Dist,” providing context:
- Understanding the conditions at fault: Knowing the “Clr Dist” when a DTC was set can help correlate the fault with driving patterns or conditions experienced over that distance.
- Analyzing freeze frame in relation to recent clears: If a DTC reappears shortly after clearing (low “Clr Dist”), it suggests the underlying issue persists or was not effectively addressed.
How to Access and Use “Clr Dist” on Your OBD2 Scanner
Accessing “Clr Dist” is straightforward with most OBD2 scan tools:
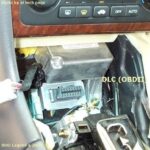
- Connect your OBD2 scanner: Plug your scanner into the OBD2 port, typically located under the dashboard on the driver’s side.
- Turn on the ignition: Turn the ignition key to the “ON” position, but do not start the engine.
- Navigate to live data or parameters: Use your scanner’s menu to access live data, real-time parameters, or a similar option.
- Locate “Clr Dist” in the parameter list: Scroll through the list of available parameters until you find “Clr Dist” or “Distance Since Codes Cleared.”
- Observe the value: The scanner will display the distance traveled since the last code clearing.
By monitoring “Clr Dist” alongside other OBD2 parameters, you gain a more complete picture of your vehicle’s health and diagnostic history.
Conclusion: “Clr Dist” as a Key Diagnostic Indicator
“Clr Dist OBD2 meaning” is more than just a technical term; it’s a valuable diagnostic indicator that helps track vehicle behavior after code clearing. Whether you are a car owner monitoring your vehicle’s condition or a professional mechanic verifying repairs, understanding and utilizing “Clr Dist” can significantly enhance your diagnostic process and contribute to effective vehicle maintenance. By paying attention to this parameter, you can better understand your vehicle’s diagnostic journey and ensure it’s running smoothly and efficiently.