Connecting an OBD2 scanner to your car should be a straightforward process, unlocking a wealth of diagnostic data and real-time vehicle information. However, enthusiasts and DIY mechanics sometimes encounter challenges when trying to establish a reliable connection, especially when using CAN bus shields for custom projects. This guide addresses common issues and provides expert insights to help you successfully connect your OBD2 scanner to your car, drawing from real-world experiences.
Many hobbyists and professionals alike aim to tap into their vehicle’s data for various projects, from custom instrument clusters to performance monitoring systems. The OBD2 port is the gateway to this data, and devices like the Seeed CAN Shield V2.0 are designed to bridge the gap between your car’s CAN bus network and microcontrollers like Arduino. But what happens when the connection isn’t as plug-and-play as expected?
One common frustration is the inability to retrieve data like engine RPM or vehicle speed, even when using seemingly correct code and hardware. Users might observe unusual behavior, such as the CAN shield continuously transmitting data without receiving proper responses from the car’s ECU (Engine Control Unit). This can lead to confusion and uncertainty about whether the hardware, software, or the connection itself is the root cause.
Diagnosing OBD2 Connection Problems
If you’re struggling to connect your OBD2 scanner or CAN shield to your car, consider these troubleshooting steps:
1. Verify CAN Shield Functionality:
- Oscilloscope Testing: As demonstrated in the original scenario, using an oscilloscope to check for signal transmission from the CAN shield is a crucial first step. The presence of a signal indicates the shield is at least attempting to communicate. However, continuous “spamming” without pauses, as observed, might suggest an issue with data interpretation or the lack of proper acknowledgement from the vehicle’s CAN bus.
- Shield Isolation Test: If possible, test the CAN shield in a controlled environment, perhaps with another CAN device, to confirm it can send and receive messages correctly in isolation. This helps rule out a fundamental hardware problem with the shield itself.
2. Inspect OBD2 Port and Wiring:
- OBD2 Port Integrity: Ensure the OBD2 port in your car is functioning correctly. Test it with a standard OBD2 scanner to confirm it can communicate and retrieve basic diagnostic information. This eliminates the car’s OBD2 port as the source of the problem.
- Custom Cable Check: If you’ve created a custom OBD2 to DB9 cable, meticulously double-check the wiring against reliable sources. Incorrect wiring is a common pitfall. Use a multimeter to test continuity and ensure each pin is correctly connected according to OBD2 and CAN bus standards.
- Grounding and Power: Verify proper grounding for your CAN shield and ensure it’s receiving adequate power. Power supply issues can lead to erratic behavior and communication failures.
An example of a DIY OBD2 to DB9 cable for connecting a CAN shield, emphasizing the importance of correct wiring for successful OBD2 connection.
3. Code Review and Configuration:
- Baud Rate Mismatch: CAN bus communication relies on a consistent baud rate. Ensure your code and CAN shield are configured to the correct baud rate for your vehicle’s CAN network (often 500kbps, but check your vehicle’s specifications).
- CAN Initialization: Carefully review the CAN bus initialization code in your Arduino sketch. Incorrect initialization parameters, such as incorrect mask or filter settings, can prevent proper communication. The provided code examples show attempts to initialize masks and filters, which are essential for receiving the correct responses.
- PID Request Format: OBD2 communication uses PIDs (Parameter IDs) to request specific data. Verify that your code is sending the correct PID request format (e.g., Mode 01 Service 01 for current data). The example codes demonstrate sending PIDs like
0x0Cfor RPM and0x0Dfor vehicle speed, which are standard Mode 01 PIDs. - Response Handling: Ensure your code is correctly handling and interpreting the responses from the ECU. Check for error codes or unexpected data formats in the received messages.
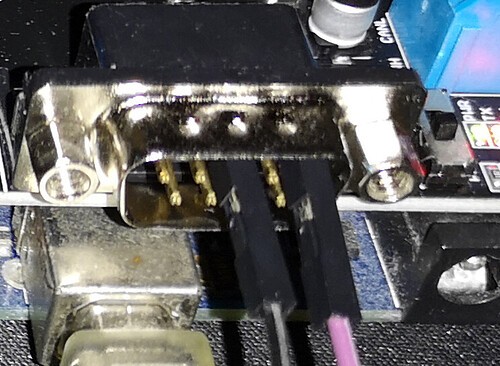
Testing a DIY OBD2 cable with a multimeter to ensure correct pinout and continuity, a crucial step in troubleshooting OBD2 connection issues.
Code Examples and Common Mistakes
The provided code snippets highlight common approaches to requesting OBD2 data using a CAN shield. Key elements include:
- CAN Library Inclusion: Using libraries like
mcp_can.hfor interacting with the MCP2515 CAN controller on the shield. - Initialization: Setting up the CAN bus with the correct baud rate and initializing masks and filters.
- PID Request Function (
sendPid): Creating functions to send CAN messages with specific OBD2 PID requests. - Data Reception (
taskCanRecv): Implementing a function to check for and process incoming CAN messages.
Common mistakes to watch out for in your code:
- Incorrect PID values: Double-check the PID codes you’re using against OBD2 documentation.
- Missing delays: While not always necessary, appropriate delays between sending requests and checking for responses can sometimes improve communication reliability.
- Filtering too narrowly: Ensure your CAN filters are not too restrictive, potentially blocking the expected response messages from the ECU. In the example code, filters are set to
0x7FCand filters are set toRESP_MSG(0x7E8), which are common for OBD2 responses, but verifying these against your specific vehicle is advisable.
Conclusion: Persistence and Precision are Key
Connecting an OBD2 scanner to your car for custom projects can be rewarding, but it often requires careful troubleshooting. By systematically checking your hardware, wiring, and code, and by understanding the fundamentals of OBD2 and CAN bus communication, you can overcome connection challenges and successfully access your vehicle’s valuable data. Remember to double-check every connection, review your code meticulously, and test incrementally to pinpoint the source of any issues. With persistence and attention to detail, you can achieve a reliable OBD2 connection and bring your automotive projects to life.