Swapping a JDM H22A engine (OBD1) into a 1996-2001 Honda Prelude (OBD2) can present some challenges, particularly when it comes to sensor compatibility. Many enthusiasts encounter the issue of integrating an OBD1 engine, often referred to as having an “OBD2 head with OBD1 block” in this context, into an OBD2 chassis. This guide provides a practical solution focusing on wiring, specifically addressing the crank and cylinder position sensors to ensure your swap starts and runs smoothly.
The primary hurdle arises from the different sensor setups between OBD1 and OBD2 systems. OBD2 Preludes typically rely on a crank fluctuation sensor, while OBD1 H22A engines utilize a top dead center (TDC) sensor and a crank position sensor (CKP). Directly connecting the OBD1 engine’s sensors to the OBD2 wiring harness won’t work without modification.
A clever workaround, initially explored by FFsquad, involves adapting the signals from the OBD1 sensors to be compatible with the OBD2 system. However, upon closer inspection of the OBD1 H22A, you’ll find it’s equipped with a TDC sensor and a CKP sensor near the crank, not the crank fluctuation sensor expected in an OBD2 setup. To resolve this, we’ll leverage the OBD1 distributor, which conveniently houses all three necessary signals: TDC, CKP, and cylinder position (CYP).
This guide details how to create a subharness that bridges the gap between your OBD2 Prelude chassis and the OBD1 H22A engine, specifically focusing on utilizing an OBD1 distributor to manage sensor signals. By creating this conversion harness, you can effectively bypass the sensor incompatibility and get your OBD1 H22A running in your OBD2 Prelude.
To begin, you’ll need an OBD1 distributor from a Prelude. This distributor contains the necessary sensors to provide the TDC, CKP, and CYP signals required for the engine to operate correctly with your OBD2 car’s electronics.
The next step is preparing the wiring. Locate and remove the distributor plug from a JDM OBD1 engine harness. Keeping the original wiring is beneficial as it retains factory insulation, simplifying the process and ensuring durability.
Identify the wires on the OBD1 plug. You’ll notice wires for cylinder position (CYP), top dead center (TDC), and crank position (CKP). For this conversion, the cylinder position sensor wires from the OBD1 subharness will not be needed as the OBD2 harness already provides these signals to the distributor.
The goal is to simulate the function of the OBD2 crank fluctuation sensor using the OBD1 TDC and CKP sensors integrated within the distributor.
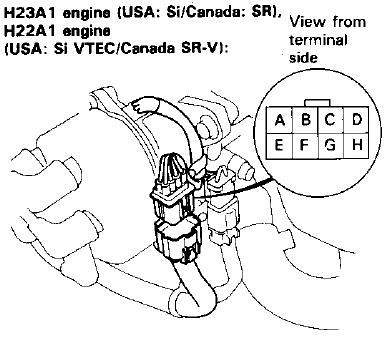
Illustration of a typical TDC and CKP sensor setup.
For the subharness connection at the engine harness side, you’ll need a compatible clip. If you don’t have a spare, you might need to carefully cut the TDC/CKP sensor clip from a donor harness. Identify the TDC and CKP wires on this clip.
Now, connect the wires. Solder the TDC and CKP wires from the OBD1 distributor plug to the corresponding wires on the TDC/CKP sensor clip you prepared. Ensure proper insulation of the soldered connections. The cylinder position sensor wires from the OBD1 plug are not used in this subharness.
Connect the subharness to the engine harness near the oil pump area. Note that OBD1 engines typically lack the TDC/CKP sensor connection on the lower timing cover, which is standard on OBD2 engines.
Route the conversion harness neatly behind the intake manifold towards the distributor. At the distributor, depin the ICM (Ignition Control Module), CYP+ and CYP- wires from the OBD2 engine harness distributor clip. Repin these wires into the OBD1 distributor plug on your newly created subharness.
Wiring diagram or pinout for CYP connections.
Finally, pin in the CYP + and – wires into the subharness connector that plugs into the OBD1 distributor.
With all connections made, your OBD1 H22A engine, often described as an “OBD2 head with OBD1 block” in swaps, should now be properly wired to your OBD2 Prelude chassis. Start your engine and enjoy the success of your swap!
Success starts up like a charm 🙂