The check engine light (CEL) in your Honda Civic MK8 can be a source of anxiety for any car owner. Understanding why it’s illuminated is the first step to addressing potential issues and maintaining your vehicle’s health. While modern mechanics rely heavily on OBD2 scanners for diagnosing these problems, there’s a method to retrieve diagnostic trouble codes (DTCs) on your Honda Civic MK8 without needing a dedicated scanner. This guide will walk you through how to manually read these codes, helping you understand what your Civic is trying to tell you.
Step-by-Step Guide to Reading OBD2 Codes Manually on Your Honda Civic MK8
This method utilizes the Civic’s built-in diagnostic system to flash the check engine light in a pattern that represents the stored DTCs. Here’s how to do it:
Step 1: Prepare Your Civic for Diagnosis
First, ensure your Honda Civic MK8’s engine is turned OFF. Locate the 16-pin OBDII Data Link Connector (DLC). In the Honda Civic MK8, you’ll typically find this port under the driver’s side dashboard, often in the vicinity of where your right knee would be while driving.
Alt text: Location of OBD2 Data Link Connector (DLC) under the dashboard of a Honda Civic MK8.
Step 2: Bridge the Service Connector
You’ll need a jumper wire to connect specific terminals within the DLC. Carefully use the jumper wire to connect terminal 4 and terminal 9 of the DLC. Important: Double-check the terminal numbers to ensure you are connecting the correct ones, as incorrect connections can cause electrical damage to your car’s Engine Control Unit (ECU).
Step 3: Observe the Check Engine Light Flashes
Turn your ignition key to the ON position (Position II) – this is the position right before you start the engine. Do not start the engine. Now, carefully watch the check engine light (CEL) on your dashboard. It will begin to flash in a specific sequence if there are any DTCs stored in the ECU. If no codes are stored, the CEL will remain constantly lit without flashing.
The flashing pattern is crucial for deciphering the codes. Long flashes represent the first digit of the code, and short flashes represent the second digit. A brief pause indicates a zero.
- Example: Four long flashes followed by five short flashes indicates code 45.
- Example: One long flash followed by a pause indicates code 10.
If multiple DTCs are stored, the CEL will display each code in sequence and then repeat the entire sequence. Carefully record each code as it is displayed and double-check your recordings to avoid errors.
Step 4: Decode the OBD2 Codes
Once you have recorded the flashed codes, you’ll need to interpret them. The one or two-digit CEL codes you observed are simplified representations of the more detailed four or five-digit OBDII codes. You will need to consult a Honda Civic MK8 specific DTC index or a comprehensive OBD2 code list to find the meaning of these codes. Online resources and repair manuals can provide these code indexes. Search for “Honda Civic MK8 OBD2 code list” to find relevant resources.
Step 5: Clearing the Codes (Optional and with Caution)
If you wish to clear the stored DTCs and reset your car’s ECU after addressing the issue (or for diagnostic purposes), you can do so by removing the #6 fuse (15A) located in the under-hood fuse box for at least 10 seconds. However, proceed with caution when clearing codes.
Important Note: If you plan to take your Honda Civic MK8 to a professional mechanic for diagnosis and repair, it is generally advisable not to clear the DTCs. Leaving the codes stored allows the mechanic to use professional OBD2 scan tools and diagnostic equipment to accurately assess the problem history and troubleshoot more effectively. This manual method is helpful for initial understanding, but professional tools provide deeper diagnostics.
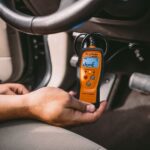
While this manual method provides a basic understanding of OBD2 codes on your Honda Civic MK8, a dedicated OBD2 scanner offers a more user-friendly and comprehensive diagnostic experience. For in-depth analysis and advanced troubleshooting, consider using an OBD2 scanner specifically designed for Honda vehicles. They offer real-time data, more detailed code descriptions, and often include features to help you further diagnose and resolve car problems.