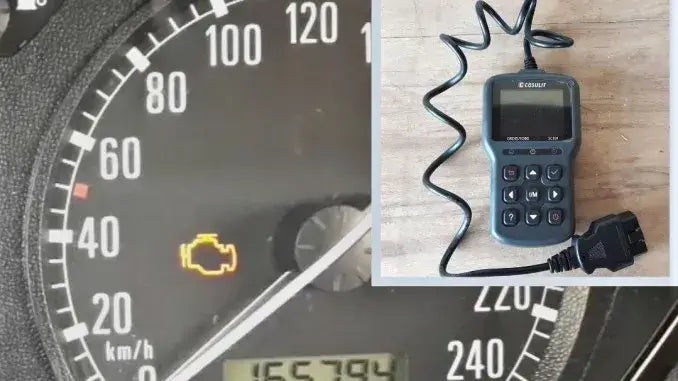
That persistent check engine light can be a source of stress for any car owner. It’s crucial to understand that driving with an active check engine light isn’t advisable. But what if you could take control of the situation yourself? This is where an OBD2 scanner comes into play. CGSULIT, your trusted auto repair resource, is here to guide you through the process of using an OBD2 scanner to clear those engine codes and potentially resolve the issue from the comfort of your garage. This guide will demonstrate just how straightforward it is to use this tool, saving you time and potential mechanic fees.
To clear a check engine light, you’ll need an OBD2 scanner, often referred to as an OBDII reader or diagnostic scanner. It’s important to choose a scanner that not only reads diagnostic trouble codes (DTCs) but also has the capability to clear them. Some basic readers are limited to just reading codes. A reliable option, such as the CGSULIT SC301 OBD2 scanner, provides both reading and code clearing functionalities.
Understanding How an OBD2 Scanner Erases Trouble Codes
Before diving into the steps, let’s briefly understand how these scanners work to clear codes. When your car’s computer, the Engine Control Unit (ECU), detects a problem, it illuminates the check engine light and stores a corresponding Diagnostic Trouble Code (DTC). An OBD2 scanner connects to your car’s diagnostic port and communicates with the ECU. The “clear codes” function essentially instructs the ECU to remove these stored DTCs and turn off the check engine light.
It’s worth noting that clearing a code doesn’t magically fix the underlying problem. If the issue that triggered the code persists, the check engine light will likely reappear soon after being cleared. Therefore, understanding the code and addressing the root cause is crucial.
Step-by-Step Guide: Clearing Codes with Your OBD2 Scanner
While some familiarity with OBD2 scanners can be helpful, these steps are designed to be easy to follow even for first-time users.
1. Locate the OBD2 Port in Your Vehicle
The OBD2 port is a standardized diagnostic port typically located within the passenger compartment of your vehicle. Common locations include under the dashboard on the driver’s side, near the steering column, or sometimes concealed by a small cover. Consult your vehicle’s owner’s manual if you are unsure of its exact location.
2. Connect the OBD2 Scanner to the Port
With the ignition off, firmly plug the OBD2 scanner connector into the OBD2 port. Ensure it clicks or is securely seated in the port to establish a good connection.
3. Turn the Ignition to the “Key On, Engine Off” Position
Turn your car key to the “ON” position. This is the position right before you start the engine. This provides power to the car’s electronics and the OBD2 port, allowing the scanner to communicate with the ECU. Do not start the engine at this stage.
4. Allow the OBD2 Scanner to Scan for Codes
Once powered on, the OBD2 scanner will typically initiate a scan automatically or require you to select a “scan” or “read codes” option from its menu. Follow the scanner’s on-screen prompts. The scanner will communicate with your car’s computer to retrieve any stored DTCs.
5. Read and Understand the Error Codes Displayed
After the scan, the OBD2 scanner will display a list of error codes. There might be one or multiple codes. It is crucial to note these codes down. Your scanner may offer a brief description of each code, or you may need to consult your vehicle’s repair manual or online resources to understand their meaning.
Understanding the error code is a critical step. It helps you determine the nature and severity of the problem. Ignoring the underlying issue and simply clearing the code is not a long-term solution. If the problem is significant, the check engine light will likely return shortly after clearing.
6. Navigate to the “Clear Codes” or “Erase Codes” Function
Using your OBD2 scanner’s menu, navigate to the “Tools,” “Clear Codes,” “Erase Codes,” or a similarly named option. The exact menu layout will vary depending on your scanner model, but these terms are generally standard.
Select the “Clear Codes” function and confirm your selection if prompted. The scanner will send a command to your car’s ECU to clear the stored diagnostic trouble codes.
7. Return to the Main Menu of the Scanner
Once the codes are cleared, return to the main menu or starting screen of your OBD2 scanner. This ensures that the code clearing process is fully completed within the scanner’s software.
8. Disconnect the OBD2 Scanner from the Port
Carefully disconnect the OBD2 scanner from your vehicle’s OBD2 port. If your scanner has a power button, turn it off before disconnecting. Handle the connector and port with care to avoid damage.
9. Turn Off the Ignition
Turn the ignition key back to the “OFF” position, removing power from the car’s systems.
10. Start the Engine and Check if the Check Engine Light is Off
Start your vehicle’s engine as you normally would. Check the instrument panel to see if the check engine light has turned off. In most cases, if the code clearing was successful, the light should be off immediately.
To further verify, let the engine run and reach its normal operating temperature. You can also start and stop the engine a few more times to ensure the check engine light does not reappear immediately.
Important Considerations After Clearing Codes
Clearing the check engine light with an OBD2 scanner is a valuable tool, but it’s essential to use it responsibly. Remember that clearing codes without addressing the underlying problem is only a temporary fix. If the issue persists, the light will return, and you could potentially be driving with an undiagnosed problem that could worsen or cause further damage.
Always prioritize diagnosing and repairing the root cause of the problem indicated by the error code. Use the OBD2 scanner to understand what’s wrong, and then take appropriate steps to fix it. Clearing codes is most beneficial after you have performed a repair, allowing you to confirm that the issue is resolved and the check engine light stays off.
Conclusion
As you’ve seen, understanding how an OBD2 scanner clears codes and performing the process is quite simple and can be accomplished in just minutes. This capability empowers you to take a proactive approach to vehicle maintenance. Investing in an OBD2 scanner can save you time and money by allowing you to diagnose and clear minor issues yourself. However, always remember that a check engine light is a signal indicating a problem, and proper diagnosis and repair are crucial for maintaining your vehicle’s health and safety.

