Whether you are a seasoned mechanic or a car owner keen on understanding your vehicle’s inner workings, knowing about the OBD2 system and how to reset it is crucial. A key part of this process is the drive cycle. You might be wondering, How Long To Reset Obd2? Understanding the drive cycle is essential for confirming repairs, preparing for emissions tests, and effectively using your OBD2 scanner for car diagnostic tests. Let’s delve into what a drive cycle is, how to perform one, and how long it actually takes to reset your OBD2 system.
Understanding OBD2 Reset and the Drive Cycle
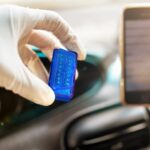
Before we discuss how long to reset OBD2, it’s important to understand what an OBD2 reset entails and why it’s necessary. OBD2 (On-Board Diagnostics II) is a standardized system in modern vehicles that monitors various components and systems related to emissions and engine performance. When your car detects an issue, it often triggers the check engine light and stores Diagnostic Trouble Codes (DTCs).
Resetting the OBD2 system essentially means clearing these stored DTCs and resetting the emission monitors to a “ready” or “complete” status. This is often necessary after you’ve performed repairs on your vehicle. However, simply clearing codes with an OBD2 scanner isn’t enough to confirm the repair and ensure your car is ready for an emissions test. This is where the drive cycle comes in.
The drive cycle is a specific set of driving conditions designed to allow your vehicle’s computer, also known as the Powertrain Control Module (PCM), to run a series of self-tests. These tests verify that the emission control systems are functioning correctly. Completing a drive cycle is crucial for:
- Confirming Repairs: After fixing an issue that triggered the check engine light, a drive cycle helps ensure the problem is truly resolved and the light doesn’t reappear.
- Emissions Testing: Many states require your vehicle to have all emission monitors in a “ready” status to pass an emissions test. A drive cycle helps set these monitors.
- Accurate Diagnostics: Performing a drive cycle after clearing codes allows you to see if the same or new codes reappear, providing a clearer picture of your vehicle’s health.
Performing an OBD2 Drive Cycle: A Step-by-Step Guide
While the exact procedure for a drive cycle can vary slightly depending on your vehicle’s make, model, and year, the general principles remain the same. Always consult your owner’s manual for the most accurate drive cycle procedure specific to your car. However, here are 10 general steps to guide you through a basic OBD2 drive cycle:
-
Clear Existing OBD II Error Codes: Using your OBD2 scanner, clear all existing diagnostic trouble codes. This step is essential as the drive cycle cannot effectively begin until the system is clear of old codes.
-
Fuel Level Check: Ensure your fuel tank is between 30% and 70% full. This fuel range is generally recommended for the drive cycle to run effectively.
-
Battery and Alternator Health: Verify that your battery and alternator are in good condition. A healthy electrical system is crucial for the drive cycle, as jump-starting your vehicle during the process is not recommended.
-
Cold Soak Period: Allow your vehicle to sit undisturbed for at least eight hours. During this “cold soak” period, ensure the key is not in the ignition and the car doors remain locked. This allows the engine to cool down completely, which is necessary for some monitors to run correctly during the drive cycle.
-
Initial Idle: Start your car and let it idle in park (P) or neutral (N) for two to three minutes. Do not engage any accessories during this initial idle period.
-
Accessory Engagement Idle: Turn on your headlights, heater, and defrosters for at least two minutes while the vehicle continues to idle. This step helps test the electrical system under a moderate load.
-
Low Speed Acceleration and Deceleration: Drive to an area where you can safely accelerate to 25 mph. Make slow, complete stops at any stop signs or traffic lights you encounter. Gradually increase your speed to 35 mph, and then to 45 mph, maintaining smooth acceleration and deceleration.
-
Highway Cruising: Find a freeway on-ramp and merge with traffic, accelerating normally. Once on the freeway, stay in the slow lane and steadily increase your speed to 55 mph or 60 mph. Engage cruise control to maintain a constant speed for at least five miles. This steady speed and distance allow various monitors to complete their tests.
-
Highway Deceleration: Locate a reasonably long exit ramp and allow your vehicle to coast down the ramp, naturally decreasing speed without braking initially. You can use the brake pedal at the very end of the ramp if needed to come to a complete stop.
-
Repeat Low Speed Driving and Final Idle: Return home or to your mechanic by repeating step number seven, including slow accelerations, decelerations, and stops. Upon arrival, put your vehicle in park and let it idle for one to two minutes to complete the cycle.
How Long Does it Take to Reset OBD2 with a Drive Cycle?
Now, to directly answer the question: how long to reset OBD2 using a drive cycle? The entire process, including preparation and driving, takes approximately 8.5 to 9 hours. Here’s a breakdown:
- Preparation (Cold Soak): 8 hours of vehicle rest.
- Drive Cycle Driving Time: Approximately 20 to 30 minutes of actual driving, depending on traffic and your ability to follow the steps smoothly.
- Initial and Final Idle: 3-5 minutes of idling in total.
Therefore, while the active driving portion is relatively short, the necessary preparation time, particularly the cold soak, makes the entire OBD2 reset process using a drive cycle take a significant portion of a day.
It’s important to note that you might need to perform the drive cycle more than once. Some monitors might not complete on the first attempt, especially if there are underlying issues. Using an OBD2 scanner to check monitor readiness after a drive cycle will tell you if you need to repeat the process.
Post-Drive Cycle OBD II Scan and Troubleshooting
After completing the drive cycle, you or your mechanic should perform another OBD II scan. This scan will help you determine if the vehicle is repaired and if the emission monitors have reset to a “ready” status.
- Monitors Ready: If all or most relevant monitors are “ready,” and no new DTCs have appeared, your OBD2 system is likely reset, and your vehicle should be ready for an emissions test.
- Monitors Not Ready: If some monitors are still “not ready,” you may need to repeat the drive cycle. Consult your vehicle’s service manual for specific monitor completion tips.
- New OBD2 Codes: If new DTCs appear after the drive cycle, it indicates that there may still be underlying issues that need to be addressed.
Dealing with New OBD2 Codes After a Drive Cycle
If a new OBD2 code arises after your drive cycle, it’s crucial to diagnose and address the underlying problem. Tools like nonda’s Smart Vehicle Health Monitor paired with the ZUS app can be invaluable. These tools allow you to:
- Read and Understand DTCs: Get detailed descriptions of the new codes.
- Access DIY Fix Guides: The ZUS app often provides short videos and guides to help you understand and potentially fix common issues at home.
- Monitor Vehicle Health: Continuously monitor your vehicle’s health and catch potential problems early.
By understanding how long to reset OBD2 with a drive cycle and utilizing diagnostic tools, you can effectively manage your vehicle’s health, ensure it’s ready for emissions tests, and potentially save money on unnecessary mechanic visits. Consider starting your DIY diagnostics with a FREE OBD2 scanner and app to take control of your car’s maintenance today!