Modern vehicles are complex machines, and when something goes wrong, the onboard diagnostic (OBD2) system is your first line of defense. An OBD2 meter, or scanner, is an invaluable tool for reading and interpreting the diagnostic trouble codes (DTCs) generated by your car’s computer. Sometimes, after performing maintenance or repairs, or even when troubleshooting persistent issues, you might need to reset your OBD2 meter. This guide will walk you through the process of how to factory reset your OBD2 meter, ensuring accurate readings and optimal performance.
Understanding Your OBD2 Meter and Why Resetting Might Be Necessary
Before diving into the “how-to,” it’s crucial to understand what an OBD2 meter does and why resetting it can be beneficial. An OBD2 meter plugs into your vehicle’s OBD2 port, typically located under the dashboard. It communicates with your car’s computer system, retrieving diagnostic information and displaying it to you. This information often comes in the form of error codes that pinpoint potential problems within your vehicle.
Resetting your OBD2 meter isn’t about fixing the underlying issue causing the error codes. Instead, it’s about clearing stored codes from the meter itself. This can be useful in several scenarios:
- After Repairs: Once you’ve fixed a problem, such as replacing a faulty sensor or a car battery, you’ll want to clear the corresponding error codes. Resetting the OBD2 meter ensures that only new, relevant codes will appear if further issues arise.
- Troubleshooting Intermittent Issues: Sometimes, error codes can be triggered by temporary glitches. Resetting the meter can help you determine if a code reappears, indicating a persistent problem, or if it was a one-time occurrence.
- Starting Fresh: If you’re lending your OBD2 meter to someone else or want to start a new diagnostic session with a clean slate, a factory reset can restore the meter to its default settings.
It’s important to note that simply resetting your OBD2 meter will not fix any mechanical or electrical problems with your car. It merely clears the stored diagnostic information within the meter.
Step-by-Step Guide to Factory Resetting Your OBD2 Meter
While the exact steps for factory resetting an OBD2 meter can vary slightly depending on the brand and model, the general process is usually straightforward. Here’s a step-by-step guide that applies to most common OBD2 meters:
-
Locate the Reset Function: Most OBD2 meters have a menu system accessible through buttons on the device. Navigate through the menu options to find settings related to “Reset,” “Setup,” or “Configuration.” Look for terms like “Factory Reset,” “Default Settings,” or “Erase All Data.” Consult your OBD2 meter’s user manual if you’re unsure where to find this function.
-
Select “Factory Reset”: Once you’ve located the reset option, select it. The meter will likely display a confirmation prompt asking if you’re sure you want to proceed with a factory reset.
-
Confirm the Reset: Carefully read the confirmation message. A factory reset will typically erase all saved data, custom settings, and potentially even language preferences on your OBD2 meter, reverting it to its original out-of-the-box state. If you’re certain you want to proceed, confirm the reset by pressing “Yes,” “OK,” or the designated confirmation button.
-
Wait for the Reset Process: The OBD2 meter will now initiate the factory reset process. This usually takes only a few seconds. Do not turn off or disconnect the meter during this time.
-
Meter Restart (If Applicable): Some OBD2 meters may automatically restart after a factory reset. If yours doesn’t, you might need to manually power it off and then turn it back on.
-
Verify the Reset: After the reset, check the meter’s settings to ensure it has reverted to default values. You might need to re-enter language preferences or other basic setup options if prompted.
Important Considerations:
- Consult Your User Manual: The most reliable source for specific reset instructions is your OBD2 meter’s user manual. Always refer to it for precise steps and any model-specific nuances.
- Data Loss: Be aware that a factory reset will erase any saved data on your OBD2 meter, such as previously scanned vehicle information or custom profiles.
- Alternative: Clearing Codes (Not a Full Reset): Sometimes, users confuse “resetting the OBD2 meter” with “clearing codes from the vehicle’s computer.” While an OBD2 meter can clear codes from your car (a separate function), a factory reset pertains to the meter itself. If you intend to clear codes from your vehicle, ensure you are using the correct function on your OBD2 meter, usually labeled “Clear Codes” or “Erase DTCs.”
When to Reset Your OBD2 Meter vs. Clearing Car Codes
It’s essential to distinguish between resetting your OBD2 meter and clearing OBD2 codes from your vehicle. These are two different actions with distinct purposes.
- Resetting the OBD2 Meter: This action restores the OBD2 meter itself to its factory default settings. It’s typically done for device maintenance or to start fresh with the scanner.
- Clearing OBD2 Codes (from the vehicle): This function, performed using the OBD2 meter, instructs your car’s computer to erase stored diagnostic trouble codes and turn off the check engine light (if it was illuminated due to those codes). This should only be done after you have addressed the underlying issue causing the codes.
Scenario Example: Imagine you replaced the battery in your Jeep Compass, as described in the original article. After replacement, you might want to:
- Use your OBD2 meter to scan for any new codes that might have arisen during the battery change.
- If you find codes related to the battery or system voltage that you believe are no longer relevant after the new battery install, you can use your OBD2 meter’s “Clear Codes” function to erase them from your Jeep’s computer.
- You would only need to “factory reset” your OBD2 meter itself if you were experiencing issues with the meter’s operation, lending it to someone else, or simply wanted to start with a clean device configuration.
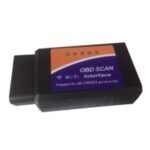
The image above shows a typical OBD2 scanner setup.
Post-Reset Checks and Next Steps
After factory resetting your OBD2 meter, it’s good practice to perform a few checks:
- Functionality Test: Connect the reset OBD2 meter to your vehicle and ensure it powers on and can connect to your car’s computer system.
- Settings Verification: Review the meter’s settings to confirm they have been reset to default. Reconfigure any personalized settings you need, such as language or units of measurement.
- Scan for Codes (Optional): Perform a quick scan of your vehicle to ensure the OBD2 meter is reading and displaying information correctly after the reset.
If you reset your OBD2 meter in an attempt to resolve a problem with the device itself, and the issue persists after the reset, consult the manufacturer’s troubleshooting resources or consider contacting their customer support.
Conclusion
Knowing how to factory reset your OBD2 meter is a valuable skill for any car owner or DIY mechanic. While it’s not a function you’ll use every day, understanding the process ensures you can maintain your diagnostic tool, start troubleshooting sessions with a clean slate, and confidently navigate your vehicle’s OBD2 system. Always remember to consult your OBD2 meter’s user manual for the most accurate and device-specific instructions. By properly using and maintaining your OBD2 meter, you’ll be better equipped to understand your vehicle’s health and address any issues that may arise.
An OBD2 meter helps diagnose issues represented by codes, and sometimes resetting the meter can be a part of the diagnostic process.