That dreaded check engine light illuminating on your dashboard can be a moment of panic for any car owner. It signals that something is amiss, and your mind might immediately jump to expensive and complicated repairs. While it’s crucial to address the root cause of a check engine light, understanding how to interpret and even reset OBD2 codes can empower you to take control of your car’s diagnostics and potentially save time and money.
This guide will walk you through the process of resetting OBD2 codes using a scanner, a tool that’s surprisingly simple to use and can provide valuable insights into your vehicle’s health. We’ll break down each step, making it easy to follow even if you’re new to car maintenance. By the end of this article, you’ll understand how to confidently use an OBD2 scanner to clear your check engine light and gain a better understanding of your car’s diagnostic system.
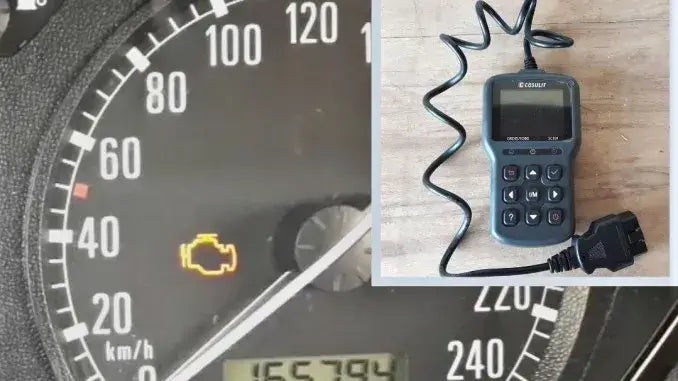
Before diving into the steps, it’s important to understand what you’ll need. The key tool for this process is an OBD2 scanner, also known as a code reader. These devices plug into your car’s OBD2 port and allow you to communicate with your vehicle’s computer system. Crucially, not all code readers are created equal. Some basic models can only read trouble codes, while others, like the recommended CGSULIT SC301, can both read and clear codes. Ensure you have a scanner that offers the code clearing function to follow this guide effectively.
Step-by-Step Guide: How to Reset OBD2 Codes
While it might seem intimidating at first, resetting your check engine light with an OBD2 scanner is a straightforward process. Here’s a detailed breakdown of each step:
1. Locate the OBD2 Port
The first step is to find your car’s OBD2 port. This port is standardized across all cars manufactured after 1996 and is usually located within a couple feet of the steering wheel. Common locations include:
- Under the dashboard on the driver’s side
- Below the steering column
- Near the center console
Consult your car’s owner’s manual if you are having trouble locating it. The port is typically trapezoidal in shape with 16 pins.
2. Connect the OBD2 Scanner
Once you’ve located the OBD2 port, take your OBD2 scanner and firmly plug it into the port. You should feel it click into place. Ensure it’s securely connected for proper communication with your vehicle’s computer.
3. Turn On the Ignition (Accessory Mode)
Now, you need to turn on your car’s ignition. This means turning the key to the “Accessory” or “ON” position, but without starting the engine. This provides power to the car’s electrical system and allows the OBD2 scanner to communicate with the computer.
4. Allow the OBD2 Scanner to Scan for Codes
With the scanner connected and the ignition on, the OBD2 scanner will typically power on automatically. Follow the scanner’s on-screen prompts to initiate a scan. This process allows the scanner to read any Diagnostic Trouble Codes (DTCs) stored in your car’s computer.
5. Read and Interpret the Error Codes
Once the scan is complete, the OBD2 scanner will display any error codes it has found. It’s crucial to carefully read and interpret these codes. The codes are usually alphanumeric and provide information about the specific issue the car’s computer has detected.
Most OBD2 scanners have a built-in DTC library that can provide a brief description of the code. Alternatively, you can easily search for the code online using a search engine to find detailed explanations and potential causes. Understanding the error code is vital before you decide to clear it. Some codes might indicate minor issues, while others could point to more serious problems that require immediate attention.
6. Navigate to the “Clear Codes” or “Erase Codes” Menu
After reviewing the error codes and determining that it’s appropriate to clear them (perhaps after addressing a minor issue or for diagnostic purposes), navigate through the OBD2 scanner’s menu to find the option to “Clear Codes” or “Erase Codes”. The exact menu layout will vary depending on your scanner model, but these terms are generally standard.
7. Confirm Code Clearing
Once you’ve selected the “Clear Codes” option, the scanner will usually ask you to confirm your decision. This is a safety measure to prevent accidental code clearing. Carefully read the prompt and confirm that you want to proceed with clearing the codes.
8. Return to the Main Menu
After confirming the code clearing, the scanner will typically indicate that the codes have been successfully erased. Navigate back to the main menu or home screen of the OBD2 scanner.
9. Disconnect the OBD2 Scanner
With the codes cleared, you can now disconnect the OBD2 scanner from the OBD2 port. Gently pull the scanner straight out, being careful not to damage the port or the scanner’s connector. If your scanner has a power button, turn it off before disconnecting.
10. Turn Off the Ignition
Turn the ignition key back to the “OFF” position, completely powering down the car’s electrical system.
11. Start the Engine and Verify the Check Engine Light is Off
Finally, start your car’s engine as you normally would. Check your dashboard to see if the check engine light has turned off. If the reset was successful and the underlying issue was resolved (or was minor and intermittent), the light should remain off.
It’s a good practice to start and run the engine a few times, even letting it reach operating temperature, to ensure the check engine light doesn’t reappear immediately.
Important Considerations Before Resetting OBD2 Codes
While resetting OBD2 codes is a simple process, it’s crucial to approach it responsibly and with a proper understanding:
- Understand the Error Code: Never clear codes blindly. Always read and understand the error codes before clearing them. Clearing codes without addressing the underlying issue is like turning off a fire alarm without putting out the fire. The problem will likely return, and potentially worsen.
- Temporary Fix: Resetting OBD2 codes only clears the check engine light; it does not fix the underlying problem that triggered the code in the first place.
- Recurring Check Engine Light: If the check engine light comes back on shortly after you reset it, this indicates that the problem persists. You should investigate the error code further and address the issue.
- Emissions Testing: Clearing OBD2 codes can also reset your car’s emissions monitors. These monitors need to run and complete their tests for your car to pass an emissions test. If you clear codes shortly before an emissions test, your car might fail because the monitors are not ready. Allow some driving time for the monitors to reset before testing.
- When to Seek Professional Help: If you are unsure about interpreting the error codes, or if the codes indicate a serious problem, it’s always best to consult a qualified mechanic. Ignoring serious issues can lead to further damage and more costly repairs down the line.
Conclusion
Learning How To Reset Obd2 Codes is a valuable skill for any car owner. It empowers you to understand your car’s diagnostics, potentially address minor issues yourself, and make informed decisions about car maintenance. However, remember that resetting codes is a diagnostic tool, not a repair solution. Always prioritize understanding and addressing the root cause of any check engine light for the long-term health and reliability of your vehicle.