When diagnosing car troubles or evaluating a used vehicle, understanding the status of diagnostic codes is crucial. Specifically, knowing how to identify if trouble codes have been recently cleared from a car’s computer system can reveal important insights into the vehicle’s health and history. This guide will walk you through the process of using an OBD2 scanner to determine if and when diagnostic trouble codes (DTCs) have been cleared, helping you make informed decisions about vehicle maintenance or purchase.
Why Knowing About Cleared Codes Matters
Imagine you’re inspecting a used car that appears to be in excellent condition. There are no warning lights illuminated on the dashboard, and the engine seems to run smoothly. However, appearances can be deceiving. A less scrupulous seller might have cleared the diagnostic codes just before your inspection to hide underlying issues.
These cleared codes could mask significant problems, from minor sensor malfunctions to serious engine or transmission troubles. By learning how to check for cleared codes, you can uncover potential red flags and avoid purchasing a vehicle that may soon require costly repairs. Similarly, if you are diagnosing your own vehicle, knowing if codes were recently cleared, especially unintentionally, can help you track down intermittent issues or ensure repairs were truly effective.
Related Reading: How to Clear Codes on Cars with Scanners
Essential Tools for Checking Cleared Codes
To effectively check if codes have been cleared on a vehicle, you will need an OBD2 scanner. This electronic tool is designed to interface with your car’s On-Board Diagnostics system, mandated in most vehicles manufactured since 1996. OBD2 scanners range from basic handheld devices to more advanced professional-grade equipment.
Car diagnostic tools connect to the OBD2 port in your vehicle, typically located under the dashboard on the driver’s side. These scanners allow you to read various types of data, including current DTCs, pending codes, freeze frame data, and importantly, readiness monitor status – all of which are crucial for detecting cleared codes.
Here are a few popular and effective OBD2 scanners suitable for this task:
- ANCEL V6 Pro (Highly Recommended): Known for its comprehensive features and user-friendliness, the ANCEL V6 Pro offers advanced diagnostics and bidirectional control.
- BlueDriver Bluetooth Pro OBD-II Scanner: A Bluetooth-enabled scanner that pairs with your smartphone, providing convenient and portable diagnostics.
- Innova 6100P OBD2 Scanner: A robust handheld scanner that offers a wide range of diagnostic capabilities, including ABS and SRS system checks in addition to standard OBD2 functions.
- Autel MaxiCOM MK808: A more advanced, tablet-based scanner that offers extensive diagnostic features, including advanced functions like key programming and service resets.
For checking cleared codes, ensure your professional OBD scanner is capable of reading readiness monitors and freeze frame data. These features are indispensable for determining if codes have been recently reset.
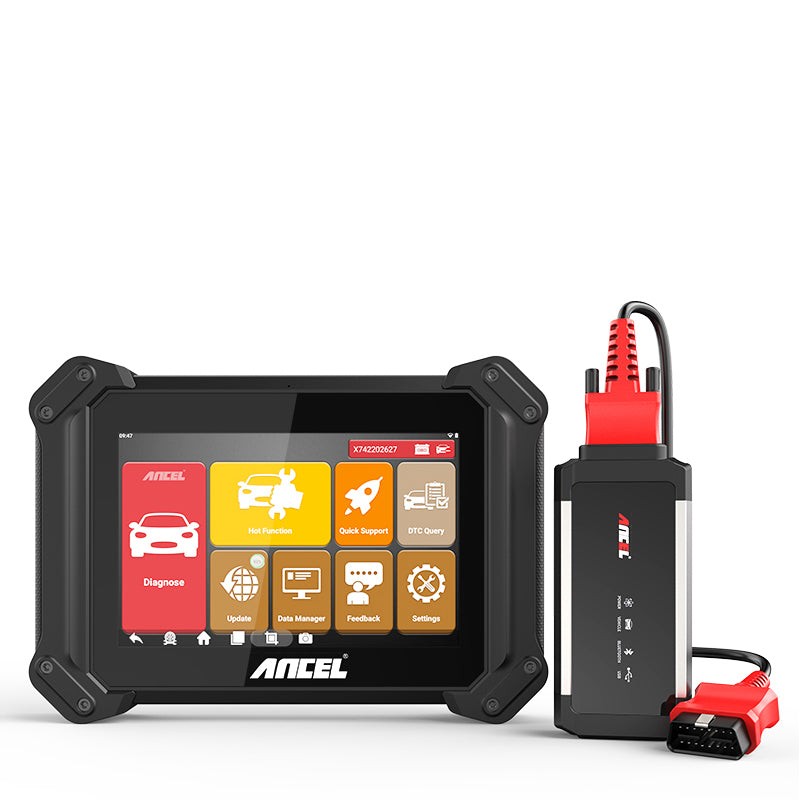 ANCEL V6 PRO OBD2 Scanner Displaying Diagnostic Data for Checking Cleared Codes
ANCEL V6 PRO+ Bluetooth Bidirectional Scan Tool Full System Car Diagnostic Tool Key Programmer $439.99
Step-by-Step Guide: How to Check If Codes Have Been Cleared
Follow these steps to effectively use your OBD2 scanner and determine if diagnostic codes have been cleared from a vehicle’s system.
Step 1: Establish Connection with Your Car Diagnostic Scanner
Begin by connecting your diagnostic scanner to your vehicle’s OBD2 port. This port is universally standardized and is usually located beneath the dashboard on the driver’s side. Its trapezoidal shape makes it easily identifiable.
Before connecting, ensure your vehicle’s ignition is turned to the “ON” position, but without starting the engine. This is often referred to as the “key on, engine off” (KOEO) position. In this state, the car’s computer systems, including the Engine Control Unit (ECU), are powered up and ready to communicate with the scanner.
Is your engine required to be running for diagnostics? For most basic diagnostic functions like reading codes and checking readiness monitors, the engine does not need to be running. However, some advanced diagnostic procedures might require the engine to be started. For our purpose of checking cleared codes, the “key on, engine off” position is generally sufficient.
Once connected, a direct-connect car scanner tool will typically power on automatically, drawing power from the OBD2 port itself. Bluetooth scanners will need to be paired with a smartphone or tablet according to the manufacturer’s instructions. Ensure a stable and proper connection to proceed.
Step 2: Access Diagnostic Trouble Codes (DTCs)
With your scanner successfully connected and powered up, navigate to the main menu and select the option to read Diagnostic Trouble Codes (DTCs). The menu interface might vary slightly depending on your best OBD scanner for all cars, but the DTC reading function is usually clearly labeled.
The scanner will then communicate with the vehicle’s ECU and retrieve any stored DTCs. These codes are categorized as either “active” or “pending”.
- Active Codes: These represent current problems that the ECU has detected and confirmed. These codes usually trigger the check engine light or other warning indicators on the dashboard.
- Pending Codes: Also known as intermittent codes, these indicate potential issues that the ECU has detected but hasn’t yet confirmed as a persistent fault. They may not always trigger a warning light, but they suggest a problem might be developing.
If the DTC section reports “No codes found,” this could mean one of two things: either the vehicle genuinely has no current or pending issues, or the codes have been recently cleared. An empty DTC list alone is not conclusive evidence of cleared codes, but it’s the first piece of information to consider. If you suspect the vehicle might have had issues recently, proceed to the next steps to investigate further.
Step 3: Analyze Freeze Frame Data
Freeze frame data is a valuable snapshot of vehicle operating conditions recorded by the ECU at the moment a DTC is triggered. This data includes parameters like engine speed (RPM), engine load, coolant temperature, fuel trim, and vehicle speed. It provides context to the fault and can be very helpful in diagnosing the root cause of a problem.
To check for cleared codes, the absence or unusual timestamp of freeze frame data can be a significant clue. If DTCs have been recently cleared, the freeze frame data associated with those codes will also be erased. Therefore, if you find “No codes found” in the DTC section, but also find no freeze frame data available (or unusually recent freeze frame data for a vehicle that seems to have been driven for a while), it raises suspicion of a recent code clearing.
Access the freeze frame data option within your scanner’s menu. If data is present, review the recorded parameters and the timestamp. An incomplete or missing freeze frame data record, especially in conjunction with no DTCs, is a strong indicator that codes may have been cleared. Conversely, if freeze frame data is present and seems to correlate with potential issues you might suspect, it could be genuine and not indicative of code clearing.
Step 4: Evaluate Readiness Monitor Status
Readiness monitors, also known as I/M (Inspection/Maintenance) monitors, are diagnostic tests that the vehicle’s ECU automatically runs on various emission control systems. These monitors ensure that systems like the catalytic converter, oxygen sensors, evaporative emissions system, and EGR system are functioning correctly.
When DTCs are cleared, either manually or by disconnecting the battery, all readiness monitors are reset to an “incomplete” or “not ready” status. These monitors then need to run their diagnostic self-tests again and complete successfully to return to a “ready” or “complete” status. This process typically requires driving the vehicle through specific driving cycles that vary depending on the monitor and vehicle make.
To check readiness monitor status, navigate to the “I/M Readiness” or “Readiness Monitors” section on your wireless Bluetooth OBD2 scanner. The scanner will display the status of each monitor, usually as “Complete,” “Incomplete,” or “Not Supported” (for systems not applicable to that vehicle).
This is perhaps the most reliable way to detect recently cleared codes. If you find multiple monitors in an “incomplete” state, especially after the vehicle has supposedly been driven a reasonable distance since any repairs, it strongly suggests that the codes were recently cleared. Under normal driving conditions, most readiness monitors should complete their tests within a short period of time. A large number of incomplete monitors is a significant red flag.
Step 5: Check for Permanent Codes (P-DTCs)
Permanent Diagnostic Trouble Codes (P-DTCs) are a special type of DTC introduced to prevent circumvention of emissions testing. Unlike regular DTCs, permanent codes cannot be cleared using a scanner or by disconnecting the battery. They can only be cleared by the ECU itself after it detects that the underlying fault has been resolved and the system has passed its self-tests over multiple drive cycles.
Checking for permanent codes is another excellent way to identify potential issues even if regular DTCs have been cleared. If a vehicle has had an emissions-related problem, and someone has cleared the regular DTCs to hide it, any corresponding permanent codes will still remain.
Access the “Permanent Codes” or “P-DTC” section of your scanner. If any permanent codes are present, they indicate that the vehicle has experienced a fault that was serious enough to set a permanent code, even if someone attempted to clear the regular codes. The presence of P-DTCs is a clear indication of past or unresolved issues, regardless of the status of regular DTCs or readiness monitors.
Step 6: Review Code History (If Available)
More advanced diagnostic scanners offer a code history feature, which logs past DTCs and events. This history can provide valuable insights into recurring problems or recent diagnostic activity. If your scanner has this capability, accessing the code history can further help in detecting cleared codes.
Navigate to the “Code History,” “DTC History,” or similar section in your scanner’s menu. Review the logged data for any patterns. For example, if you see a history of numerous DTCs that have been cleared multiple times, especially if they are related to emissions or engine performance, it suggests a persistent issue that someone might be trying to mask.
Similarly, a sudden and complete absence of any historical codes in a vehicle that is expected to have some history (especially an older used car) could also be suspicious and indicate a recent system reset or code clearing. Use the code history in conjunction with the other steps to build a comprehensive picture.
Extra Tips for Detecting Cleared Codes
-
Use a High-Quality Scanner: While basic OBD2 scanners are helpful, more advanced scanners provide deeper insights, manufacturer-specific codes, and more comprehensive data like code history. For critical evaluations, especially when buying a used car, investing in or using a professional car diagnostic tool is highly recommended. If unsure, consult a professional mechanic who uses advanced equipment.
-
Pay Attention to Vehicle Symptoms: Don’t rely solely on the scanner. Be observant of the vehicle’s performance. Does it have a rough idle? Is fuel economy poor? Are there intermittent warning lights? If you notice symptoms but the scanner shows no codes, it’s highly probable that codes were recently cleared. Symptoms combined with a “clean” scan result should raise a red flag.
-
Exercise Caution When Buying Used Cars: Always meticulously check readiness monitors and freeze frame data when inspecting a used vehicle. If these indicators are suspicious, it’s wise to assume codes might have been cleared to hide problems. A pre-purchase inspection by a trusted mechanic is invaluable, especially if you have any doubts.
Conclusion
Using an OBD2 scanner to check for cleared codes is a vital skill for both car owners and those in the used car market. By systematically examining DTCs, freeze frame data, readiness monitors, permanent codes, and code history, you can gain a much clearer understanding of a vehicle’s true condition and avoid potential pitfalls. This proactive approach empowers you to make informed decisions, whether it’s about maintaining your current vehicle or investing in a used one. Knowledge is power, and in the world of car diagnostics, knowing how to search for cleared codes can save you from significant headaches and expenses down the road.
FAQs
How long should I drive after clearing codes before an inspection?
After clearing codes, drive for at least 50-100 miles under varied driving conditions, including city and highway driving. This allows sufficient time for readiness monitors to run and complete their self-tests, ensuring your car is ready for an emissions inspection.
Can a dead battery clear diagnostic codes?
Yes, a completely dead or disconnected battery can reset the ECU and clear volatile diagnostic codes. However, it will also reset all readiness monitors, which will show as “incomplete” and will need to be reset through driving cycles.
Does clearing codes remove all historical data from the ECU?
Clearing codes will remove most active and pending DTCs. However, permanent codes (P-DTCs) cannot be cleared manually and will remain until the issue is resolved. Some advanced systems may retain certain historical logs, but standard code clearing typically removes most readily accessible diagnostic information.