For car tech enthusiasts and DIY automotive project builders, accessing real-time engine data is a fascinating frontier. Imagine building a custom dashboard displaying your car’s vital signs, all powered by your own software. This is where OBD2 (On-Board Diagnostics II) comes into play. Combined with the versatility of C# programming, you unlock a powerful way to interact with your vehicle’s computer and retrieve valuable performance information. This article explores how you can tap into your car’s OBD2 data using C# and readily available hardware.
Understanding OBD2 and ELM327
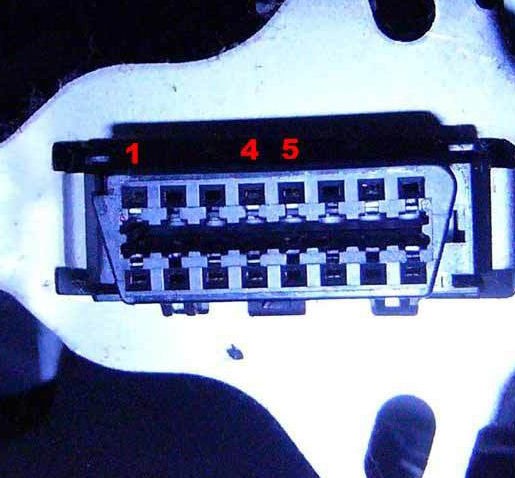
Modern vehicles are equipped with an OBD2 port, a standardized interface that mechanics use to diagnose issues. This 16-pin port is your gateway to a wealth of engine and vehicle data.
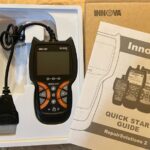
The most straightforward way to interface with OBD2 is using an OBD2 adapter, particularly those based on the ELM327 chip. These adapters act as a bridge between your car’s OBD2 port and your computer. They typically connect via USB and emulate a serial port, simplifying communication. Think of it as a translator, converting OBD2 protocols into something your computer can understand through serial commands.
This serial port emulation is key because it allows you to communicate with the ELM327 adapter using simple serial communication protocols, which are easily managed in C#. You can even test basic communication using terminal programs like HyperTerminal or PuTTY, sending commands directly to the adapter. The command set for ELM327 adapters is reminiscent of old modem “AT” commands, making it relatively intuitive to use.
Setting Up Your C# Environment for OBD2
To start pulling data, you’ll need to establish a connection to your ELM327 adapter in C#. First, ensure your adapter is plugged into your car’s OBD2 port and connected to your computer, and that the virtual COM port for the adapter is correctly installed and identified by your operating system.
Within your C# application, you’ll utilize the System.IO.Ports.SerialPort class. The fundamental steps involve setting the correct COM port name and opening the serial port connection. Basic initialization commands are then sent to the ELM327 adapter to prepare it for data requests. Here’s a basic C# code snippet illustrating the initialization process:
using System.IO.Ports;
using System.Threading;

public class OBD2Connection
{
    private SerialPort serialPort = new SerialPort();

    public bool Connect(string comPort)
    {
        serialPort.PortName = comPort;
        serialPort.BaudRate = 38400; // Standard ELM327 baud rate

        try
        {
            serialPort.Open();
        }
        catch (System.Exception ex)
        {
            // Handle exception - port may be in use or not exist
            return false;
        }

        // Initialize ELM327
        SendCommand("ATZ"); // Reset
        Thread.Sleep(2000);
        SendCommand("ATE0"); // Echo off
        Thread.Sleep(1000);
        SendCommand("ATL0"); // Line feeds off
        Thread.Sleep(500);
        SendCommand("ATH1"); // Headers on
        Thread.Sleep(500);
        SendCommand("ATSP 0"); // Auto protocol detect
        Thread.Sleep(500);
        SendCommand("0100"); // Test connection

        return true;
    }

    private void SendCommand(string command)
    {
        if (serialPort.IsOpen)
        {
            serialPort.WriteLine(command);
        }
    }

    public string ReadResponse()
    {
        if (serialPort.IsOpen)
        {
            return serialPort.ReadLine();
        }
        return null;
    }

    public void Disconnect()
    {
        if (serialPort.IsOpen)
        {
            serialPort.Close();
        }
    }
}
This code initializes the serial port, sends a series of AT commands for setup, including resetting the adapter (ATZ), disabling command echoing (ATE0), and enabling headers in responses (ATH1). ATSP 0 sets the protocol to automatic detection, which generally works well. 0100 is a standard OBD2 command to query supported PIDs and also serves as a connection test.
Communicating with OBD2 – AT Commands and PIDs
Once initialized, you communicate with the OBD2 system by sending specific commands. We’ve already seen AT commands for adapter setup. To request engine data, you use OBD2 PIDs (Parameter IDs). These are hexadecimal codes that represent different parameters like engine RPM, vehicle speed, coolant temperature, and more.
For example, to request engine RPM, you send the command “010C”. The “01” indicates service 01 (show current data), and “0C” is the PID for RPM. The ELM327 adapter will then send this request to your car’s computer, and the car will respond with data.
A typical response to “010C” might look like “410C0B34”. Here, “41” is the response code (0x40 + service ID), “0C” is the PID echoed back, and “0B34” is the data in hexadecimal. The data needs to be interpreted according to the OBD2 standard. For RPM (PID 010C), the formula is: RPM = ((A*256)+B)/4, where A and B are the two bytes of data (0B and 34 in this example, after converting hex to decimal).
You can find a comprehensive list of OBD2 PIDs and their formulas on Wikipedia and other online resources. Keep in mind that not all cars support every PID. Standard PIDs like RPM and speed are widely supported, while more specific sensor data might vary by vehicle make and model.
Practical C# Code Example for OBD2 Data Retrieval
Extending the previous C# example, let’s add a function to retrieve and process RPM data:
public int GetRPM()
{
    SendCommand("010C");
    string response = ReadResponse();

    if (string.IsNullOrEmpty(response) || !response.StartsWith("410C"))
    {
        return -1; // Error or invalid response
    }

    string dataHex = response.Substring(4); // Extract data bytes
    if (dataHex.Length != 4) return -1; // Ensure 4 hex characters (2 bytes)

    try
    {
        int a = Convert.ToInt32(dataHex.Substring(0, 2), 16); // First byte
        int b = Convert.ToInt32(dataHex.Substring(2, 2), 16); // Second byte
        return ((a * 256) + b) / 4; // Calculate RPM
    }
    catch (FormatException)
    {
        return -1; // Handle hex conversion error
    }
}
This GetRPM function sends the “010C” command, reads the response, and then parses the hexadecimal data to calculate and return the RPM value. Error handling is included to manage invalid responses or conversion issues. You can adapt this function to retrieve other OBD2 parameters by changing the PID in the SendCommand call and adjusting the data processing logic according to the specific PID’s formula.
Remember to implement proper threading in your application, especially when continuously polling for data. A short delay (e.g., 200ms) between commands is generally recommended to allow the ELM327 and vehicle ECU to process requests.
Simulation and Testing
Before connecting to your actual car, you can use an OBD2 simulator like “obdsimwindows.” This software creates a virtual OBD2 port on your computer, allowing you to test your C# code and OBD2 communication logic without needing a physical vehicle. This is invaluable for development and debugging.
This article serves as an introductory guide for technically inclined individuals eager to explore OBD2 data access with C#. It’s a stepping stone to building custom car PC interfaces, performance monitoring tools, or even advanced automotive diagnostics applications. Dive in, experiment, and unlock the rich data stream available from your vehicle!