As a car owner, you’re likely familiar with the dreaded emissions test. But have you ever wondered what happens behind the scenes to ensure your vehicle is environmentally compliant? The answer lies in Obd2 Emissions Readiness monitors. These self-diagnostic routines are crucial for assessing your car’s emission control systems and are key to passing your state’s inspection.
This guide, brought to you by the automotive experts at carparteu.com, will delve into the world of OBD2 readiness monitors. We’ll explain what they are, how they work, and what you need to know to ensure your vehicle is “ready” for its next emissions test.
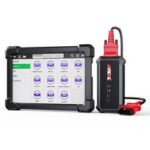
OBD2 emissions readiness monitors displayed on a Windows-based scan tool.
What are OBD2 Emissions Readiness Monitors?
OBD2 emissions readiness monitors, often simply called readiness monitors or emission monitors, are a set of diagnostic tests that your car’s onboard computer ( Powertrain Control Module or PCM) performs to evaluate the functionality of its emission control systems. Think of them as internal health checks for your car’s pollution-reducing components.
The primary purpose of these monitors is to confirm that your vehicle’s emission control systems are operating correctly and efficiently. This is vital for reducing harmful pollutants released into the atmosphere and ensuring compliance with environmental regulations. These monitors run in the background as you drive, constantly checking various systems to ensure they are within acceptable operating parameters.
Up to eleven different system tests, or readiness monitors, may be performed by your car, depending on its make, model, and year. The results of these tests are stored in your car’s computer and can be accessed using an OBD2 scan tool. The output of these monitors is crucial: it tells you whether your car’s computer has successfully completed these self-tests. If a monitor shows as “ready” or “complete,” it means the system it monitors has passed its self-test.
Types of OBD2 Readiness Monitors: Continuous vs. Non-Continuous
Readiness monitors are broadly categorized into two main types: continuous monitors and non-continuous monitors. Understanding the difference between these categories is important for grasping how your car assesses its emissions systems.
Continuous Monitors
Continuous monitors are, as the name suggests, constantly active whenever your engine is running. These monitors are designed to detect malfunctions in systems that should be operational at all times during vehicle operation. The three main continuous monitors are:
- Misfire Monitor: This monitor detects engine misfires, which are incomplete combustions in one or more cylinders. Misfires can significantly increase emissions and damage the catalytic converter. The continuous misfire monitor ensures that even momentary misfires are detected and flagged.
- Fuel System Monitor: This monitor oversees the fuel delivery system, ensuring the correct air-fuel mixture is maintained. An improperly functioning fuel system can lead to increased emissions and reduced engine efficiency. The monitor checks fuel trim, oxygen sensor readings, and other parameters to ensure optimal fuel system performance.
- Comprehensive Components Monitor (CCM): This monitor is a catch-all for various other emission-related components and circuits. It checks the integrity of sensors, actuators, and the PCM itself to ensure all emission-related components are functioning correctly and communicating properly. This can include checking sensor rationality, circuit continuity, and internal PCM diagnostics.
Non-Continuous Monitors
Non-continuous monitors, in contrast to continuous monitors, require specific operating conditions to be met before they can run their diagnostic routines. These conditions, often referred to as “enabling criteria,” can include factors like engine temperature, vehicle speed, driving time, and ambient air temperature. Because of these specific requirements, non-continuous monitors may not run every time you drive your car.
The conditions necessary for each non-continuous monitor to run vary depending on the vehicle manufacturer and the specific monitor. Some monitors may require a specific driving pattern known as a “drive cycle” to be completed. Some may need multiple drive cycles, incorporating both warm-up and cool-down periods, to gather sufficient data for a complete diagnostic assessment.
Here’s a breakdown of common non-continuous monitors, categorized by vehicle type:
Spark Ignition Vehicles (Gasoline Engines)
- Catalyst Monitor (CAT): This monitor evaluates the efficiency of the catalytic converter in reducing harmful pollutants like hydrocarbons (HC), carbon monoxide (CO), and nitrogen oxides (NOx). It typically uses oxygen sensors placed before and after the catalytic converter to measure its performance.
- Heated Catalyst Monitor: For vehicles equipped with heated catalytic converters, this monitor checks the functionality of the heating element, ensuring the catalyst reaches its optimal operating temperature quickly for efficient emissions reduction, especially during cold starts.
- Evaporative System Monitor (EVAP): The EVAP system prevents fuel vapors from escaping into the atmosphere. This monitor tests the integrity of the entire EVAP system, checking for leaks in hoses, canisters, and the fuel tank. It often involves pressurizing and depressurizing the system and monitoring for pressure changes.
- Secondary Air System Monitor: Some vehicles use a secondary air injection system to pump fresh air into the exhaust stream during cold starts. This helps to burn off excess hydrocarbons and speed up catalytic converter warm-up. This monitor verifies the proper operation of the secondary air pump and related components.
- Oxygen Sensor Monitor (O2 Sensor): Oxygen sensors are crucial for maintaining the correct air-fuel mixture. This monitor checks the response time, range, and accuracy of the oxygen sensors to ensure they are providing reliable feedback to the PCM.
- Oxygen Sensor Heater Monitor: Oxygen sensors need to reach a certain operating temperature to function accurately. This monitor verifies the functionality of the oxygen sensor heaters, ensuring they heat up quickly and maintain the correct temperature.
- EGR and/or VVT System Monitor: Exhaust Gas Recirculation (EGR) and Variable Valve Timing (VVT) systems are used to reduce NOx emissions and improve fuel efficiency. This monitor checks the operation of these systems, ensuring they are functioning as intended to optimize engine performance and minimize emissions.
Compression Ignition Vehicles (Diesel Engines)
- NMHC Catalyst Monitor: Non-Methane Hydrocarbon (NMHC) catalysts are used in diesel engines to reduce hydrocarbon emissions. This monitor assesses the efficiency of the NMHC catalyst.
- NOx/SCR Aftertreatment Monitor: Diesel engines often utilize Selective Catalytic Reduction (SCR) systems to reduce NOx emissions. This monitor evaluates the performance of the SCR system, including the urea injection system and NOx sensors.
- Boost Pressure Monitor: Turbocharged diesel engines rely on boost pressure for performance. This monitor checks the boost pressure control system to ensure it is functioning correctly, as improper boost control can affect emissions.
- Exhaust Gas Sensor Monitor: Diesel engines use various exhaust gas sensors, including NOx sensors and particulate matter sensors. This monitor verifies the functionality and accuracy of these sensors.
- PM Filter Monitor: Diesel Particulate Filters (DPF) trap soot particles from the exhaust. This monitor checks the status of the DPF, including its soot load and regeneration status.
- EGR and/or VVT System Monitor: Similar to gasoline engines, diesel engines also use EGR and/or VVT systems for emissions control and fuel efficiency. This monitor verifies their proper operation.
OBD2 emissions readiness monitors viewed on an Android device using a mobile OBD2 app.
Understanding OBD2 Monitor Status: Complete, Incomplete, and Disabled
Each OBD2 readiness monitor reports a status indicating whether it has successfully completed its diagnostic test. The possible status outcomes are:
- Complete (Ready): A “complete” or “ready” status, often indicated by a green checkmark on scan tools, signifies that the monitor has run its diagnostic routine and the system it is testing has passed. This is the desired status for all applicable monitors when preparing for an emissions test.
- Incomplete (Not Ready): An “incomplete” or “not ready” status, often shown as a red exclamation mark, means that the monitor has not yet run or has not successfully completed its diagnostic test. This doesn’t necessarily mean there’s a problem, but rather that the specific driving conditions required to run the monitor haven’t been met since the last time the monitors were reset.
- Disabled: A “disabled” status indicates that the monitor has been temporarily deactivated for the current monitoring cycle. This can happen under certain conditions, such as extreme ambient temperatures, where running the monitor might be unreliable or impractical.
- Not Available (N/A): “Not Available” means that the specific monitor is not supported by your vehicle. Not all vehicles are equipped with or required to support every possible monitor.
It’s important to note that clearing Diagnostic Trouble Codes (DTCs) using a scan tool will also reset the readiness monitor statuses to “incomplete.” This is because clearing DTCs essentially erases the history of completed tests, requiring the monitors to run again to confirm system readiness.
Why are OBD2 Monitors “Not Ready”?
There are several reasons why one or more OBD2 monitors might show as “not ready”:
- Recent DTC Clearing: As mentioned, clearing DTCs resets monitor statuses. If you’ve recently cleared codes (perhaps after a repair or to turn off the check engine light), the monitors will need to run again.
- Battery Disconnection: Disconnecting your car’s battery, even for a short period, can also reset the readiness monitors. This is because the PCM relies on continuous power to maintain the monitor status memory.
- Interrupted Drive Cycles: Non-continuous monitors require specific driving conditions to run. If your driving patterns haven’t included the necessary conditions (e.g., sustained highway driving, specific acceleration/deceleration patterns), these monitors may remain incomplete.
- Underlying Emission System Issues: In some cases, a monitor may remain “not ready” because there is an actual problem with the emission system it is testing. The monitor might be unable to complete its test because a fault is preventing the system from operating correctly.
- New Monitoring Cycle: When a new driving cycle begins (typically when you start your car after it has been off for a while), the monitors for the current driving cycle will initially show as “incomplete.” This is normal, and they will attempt to run as you drive.
Getting Your OBD2 Monitors “Ready” for Inspection
If you’re preparing for an emissions inspection and find that some of your OBD2 monitors are “not ready,” don’t panic. In most cases, you can get them to complete by simply driving your car. However, simply driving around randomly may not be enough. You might need to perform an OBD2 drive cycle.
Before attempting a drive cycle, ensure the following:
- No Check Engine Light (MIL): Make sure the Malfunction Indicator Light (MIL), or check engine light, is not illuminated. Active or pending DTCs can prevent monitors from running. Address any DTCs before proceeding.
- Sufficient Fuel: Some monitors, particularly the EVAP monitor, require the fuel tank to be between 15% and 85% full to run.
- No Extreme Temperatures: Extreme ambient temperatures (very hot or very cold) might prevent certain monitors from running.
The OBD2 Drive Cycle: A Step-by-Step Guide
An OBD2 drive cycle is a specific sequence of driving conditions designed to provide the necessary parameters for all non-continuous monitors to run their diagnostic tests. The exact drive cycle can vary depending on your car’s make, model, and year. Consult your owner’s manual or a repair manual for your specific vehicle’s recommended drive cycle.
However, a generic OBD2 drive cycle can often be effective in setting most monitors. Here’s a commonly used generic drive cycle:
- Cold Start: Begin with a cold start. Ensure the engine coolant temperature is below 122°F (50°C) and that the ambient air temperature and coolant temperature are within 11°°F (6°C) of each other. Allowing the car to sit overnight typically achieves this.
- Idle: Start the engine and let it idle in drive (automatic transmission) or neutral (manual transmission) for two and a half minutes. Turn on the air conditioning and rear defroster (if equipped) to increase engine load.
- Acceleration and Steady Speed: Turn off the A/C and defroster. Accelerate moderately and smoothly to 55 mph (90 km/h). Maintain a steady speed of 55 mph for three minutes.
- Deceleration: Slow down to 20 mph (30 km/h) without braking, if safe to do so. If you have a manual transmission, do not depress the clutch during deceleration.
- Acceleration and Steady Speed (Again): Accelerate again, this time at 3/4 throttle, to 55-60 mph (90-100 km/h). Maintain this steady speed for five minutes.
- Final Deceleration and Stop: Slow down to a complete stop without braking, if safe to do so.
Important Safety Note: Perform the drive cycle in a safe location where you can legally and safely perform the required maneuvers. Avoid public roads if possible, and always prioritize safe driving practices.
After completing the drive cycle, use an OBD2 scan tool to check your readiness monitor status again. You may need to repeat the drive cycle or drive for several days in mixed driving conditions (city and highway) for all monitors to become “ready.”
Prepare for Your Emissions Inspection with Confidence
Before heading to your emissions testing station, it’s wise to check your OBD2 emissions readiness monitors yourself. Using an inexpensive OBD2 scan tool and a smartphone app or dedicated scan tool, you can quickly determine if your vehicle is likely to pass the emissions test.
In most areas, vehicles are allowed to have one or two monitors “not ready” and still pass the inspection, especially for older vehicles. However, it’s best to aim for all monitors to be “ready” to avoid any potential issues.
Furthermore, it’s always a good idea to check for and address any Diagnostic Trouble Codes (DTCs) before your emissions test. A check engine light will almost certainly result in an automatic failure. You can use the same OBD2 scan tool to read and clear DTCs (after addressing the underlying issue, of course).
By understanding OBD2 emissions readiness monitors and taking proactive steps to ensure your vehicle is “ready,” you can approach your emissions inspection with confidence and avoid unnecessary delays or failures. Regularly checking your monitors and addressing any emission-related issues promptly will not only help you pass your inspections but also contribute to cleaner air and a healthier environment.