Car dashboards, with their array of lights and symbols, can sometimes feel like a foreign language. Among the most perplexing is the dreaded “check engine light.” It pops up, often at the most inconvenient times, leaving you wondering if it’s a minor hiccup or a sign of impending automotive doom. While some car issues require a professional mechanic, many times, these warning lights are triggered by minor, easily resolvable problems. This is where understanding Obd2 Erase Codes becomes invaluable. Imagine being able to diagnose and potentially resolve minor car issues yourself, all from the comfort of your garage. That’s the power of an OBD2 scanner and knowing how to erase those pesky codes.
Understanding OBD2 Scanners and Error Codes
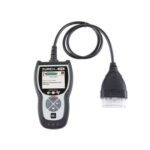
The OBD2 (On-Board Diagnostics II) system is a standardized system present in virtually all cars manufactured since 1996. It’s essentially your car’s internal health monitoring system. When something isn’t working optimally, the OBD2 system detects it and generates a diagnostic trouble code (DTC). These codes are like error messages from your car, indicating a potential issue. An OBD2 scanner is the tool that allows you to communicate with your car’s OBD2 system. It plugs into a port in your vehicle, reads these stored error codes, and, crucially, gives you the ability to erase OBD2 codes.
Mechanics use professional-grade OBD2 scanners to diagnose complex issues, but user-friendly, affordable scanners are readily available for car owners. Learning how to use one and understand obd2 erase codes can empower you to take a more proactive role in your car’s maintenance.
Step-by-Step Guide: How to Erase OBD2 Codes
Clearing codes with an OBD2 scanner is a straightforward process. Here’s a step-by-step guide to help you through it:
-
Acquire an OBD2 Scanner: The first step is to have an OBD2 scanner. There are many options available, from basic, budget-friendly readers to more advanced models with extensive features. Consider your needs and budget when choosing one. Brands like ANCEL offer reliable scanners, and we’ll touch upon a specific model later.
-
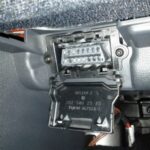
Locate the OBD2 Port: The OBD2 port is a standardized 16-pin connector. It’s usually found within a couple feet of the steering wheel, most commonly under the dashboard on the driver’s side. In some vehicles, it might be located on the passenger side or in the center console. Consult your car’s manual if you have trouble locating it.
-
Turn Off the Ignition: Before connecting the scanner, ensure your car’s ignition is completely turned off.
-
Connect the OBD2 Scanner: Carefully plug the OBD2 scanner’s connector into the OBD2 port. It should fit snugly but without excessive force.
-
Turn the Ignition to the “ON” Position (Engine Off): Turn your key to the “ON” position. This powers up the car’s electrical systems and the OBD2 port, allowing the scanner to draw power and communicate with the vehicle’s computer. Do not start the engine at this stage.
-
Power On the Scanner and Follow Instructions: The OBD2 scanner should power on automatically once connected and the ignition is in the “ON” position. Follow the scanner’s on-screen prompts. Most scanners will guide you through a boot-up sequence and present a main menu.
-
Navigate to the “Erase Codes” or “Clear Codes” Function: Using the scanner’s menu, look for options like “Read Codes,” “Erase Codes,” “Clear Codes,” or similar terminology. Select the option to erase codes.
-
Confirm Code Erasure: The scanner will likely ask you to confirm that you want to erase the stored diagnostic trouble codes. Carefully read the prompts and confirm your decision.
-
Wait for Confirmation: The scanner will communicate with your car’s computer to erase the codes. This process usually takes only a few seconds. The scanner should display a confirmation message once the codes have been successfully erased.
-
Turn Off Ignition and Disconnect Scanner: Once you receive confirmation, turn the ignition off and disconnect the OBD2 scanner from the port.
-
Observe and Test: After erasing the codes, start your engine and observe if the check engine light remains off. Take your car for a short test drive to see if the issue that triggered the code returns.
Important Considerations Before You Erase OBD2 Codes
While erasing OBD2 codes is a simple process, it’s crucial to understand when and why you should do it responsibly.
-
Understand the Code First (If Possible): Ideally, before you erase OBD2 codes, you should first read the codes using your scanner and try to understand what they mean. Many scanners will provide a brief description of the code. You can also search online for the specific code to get more information about the potential issue. This knowledge can help you determine if it’s a minor issue you can address or something that requires professional attention.
-
Address the Underlying Issue: Erasing codes simply turns off the warning light. It does not fix the underlying problem that triggered the code in the first place. If you erase a code without addressing the root cause, the check engine light will likely reappear soon. Therefore, attempt to diagnose and fix the problem before or immediately after erasing the code, especially if it’s related to emissions or safety.
-
When Erasing Codes is Appropriate:
- Minor, Resolved Issues: If you’ve identified and fixed a minor issue, such as a loose gas cap (a common cause of check engine lights), erasing the code after fixing it is perfectly appropriate.
- Troubleshooting: Erasing codes can be helpful during troubleshooting. For example, if you’ve made a repair and want to see if the code returns, erasing it allows you to monitor if the problem is truly resolved.
-
When to Seek Professional Help:
- Serious Codes or Recurring Codes: If the OBD2 scanner reveals codes related to serious engine, transmission, or safety system malfunctions, or if the check engine light comes back on immediately after erasing the code, it’s essential to consult a qualified mechanic.
- Unfamiliar Codes: If you are unsure about the meaning of a code or how to address the underlying issue, seeking professional advice is always the safest course of action.
A Quick Look at a Reliable OBD2 Scanner: ANCEL DS700
As mentioned earlier, ANCEL is a reputable brand in OBD2 scanners. The ANCEL DS700, for example, is a scanner that offers a good balance of features and user-friendliness. While the market offers various options, considering a scanner like the DS700 can be beneficial, especially if you want more than just basic code reading and erasing capabilities.
The ANCEL DS700, often favored by both DIY enthusiasts and professionals, boasts features like:
- Full System Diagnostics: Goes beyond basic OBD2 functions, allowing you to diagnose various vehicle systems like the engine, transmission, ABS, SRS, and more.
- Live Data Stream: Displays real-time sensor data, which can be invaluable for diagnosing intermittent issues or monitoring system performance.
- Bi-directional Control (Active Test): Allows you to send commands to vehicle components to test their functionality.
- User-Friendly Interface: Typically features a touchscreen and intuitive menu navigation.
- Wide Vehicle Coverage: Supports a broad range of car makes and models.
While models like the ANCEL DS700 offer advanced features, even basic OBD2 scanners will effectively perform the essential function of reading and erasing OBD2 codes.
Final Thoughts: Take Control of Your Car’s Diagnostics
Understanding obd2 erase codes and how to use an OBD2 scanner empowers you to be a more informed car owner. While it’s not a substitute for professional mechanic services for complex repairs, it provides a valuable tool for diagnosing minor issues, monitoring your car’s health, and potentially saving time and money on unnecessary trips to the repair shop. By learning to use an OBD2 scanner and understanding when and how to erase OBD2 codes responsibly, you can take a more proactive approach to car maintenance and keep your vehicle running smoothly.
FAQs About OBD2 Erase Codes and Scanners
What is an OBD2 scanner used for?
An OBD2 scanner is used to communicate with your car’s onboard diagnostic system. It reads diagnostic trouble codes (DTCs) that indicate potential malfunctions and allows you to erase OBD2 codes after addressing the underlying issues.
How do you clear codes using an OBD2 scanner?
To clear codes, plug the scanner into your car’s OBD2 port, turn the ignition to the “ON” position (engine off), navigate to the “Erase Codes” or “Clear Codes” function on the scanner’s menu, confirm the erasure, and wait for confirmation from the scanner.
Is it safe to erase OBD2 codes?
Yes, erasing OBD2 codes is generally safe, but it should be done responsibly. Always try to understand the code first and address the underlying issue. Erasing codes without fixing the problem will only temporarily turn off the warning light, and it will likely reappear. For serious or recurring issues, consult a mechanic.
What are some features of the ANCEL DS700 scanner?
The ANCEL DS700 scanner offers features like full system diagnostics, live data stream, bi-directional control, a user-friendly interface, and broad vehicle coverage, making it suitable for both DIY users and professionals.

