For car enthusiasts and everyday drivers alike, understanding your vehicle’s health is paramount. Modern cars are complex machines, constantly monitoring their systems and reporting issues through error codes. Dealing with these codes often means a trip to the mechanic, which can be time-consuming and costly. However, with the right tools and a bit of DIY spirit, you can take control of your car’s diagnostics yourself, especially if you’re a Linux user. This guide will show you how to leverage the power of OBD2 software on Linux to read and clear error codes, and monitor your car’s performance, all from the comfort of your own garage.
Understanding OBD2 and Connectors
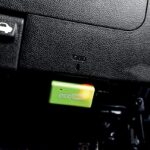
Since the early 2000s, On-Board Diagnostics II (OBD2) has become a standard in vehicles worldwide. Regulations mandated these systems to provide standardized access to vehicle diagnostic information. Specifically, in Europe, OBD2 became mandatory for petrol cars in 2001 and diesel cars in 2004. By 2007, regulations further standardized the location of the OBD-II connector, requiring it to be within easy reach of the driver, typically within 0.61 meters (approximately 2 feet) of the steering wheel. This standardized connector allows you to interface with your car’s computer using various devices.
You can find OBD2 connectors in two main types: USB and Bluetooth. While professional-grade scanners can be expensive, affordable options are readily available. For this guide, we’ll focus on using a USB OBD2 connector with a Linux system, as it provides a reliable and direct connection. I opted for an inexpensive USB OBD2 cable online, which proved to be a cost-effective solution for accessing my car’s diagnostics.
Setting up Scantool on Linux
For Linux users, the good news is that there’s excellent open-source software available for OBD2 diagnostics. One such tool is Scantool, a free and open-source application that allows you to communicate with your car’s OBD2 system. Installation on Ubuntu-based distributions like Kubuntu is straightforward as Scantool is available in the standard repositories.
To install Scantool, open your terminal and run the following commands:
sudo apt-get update
sudo apt-get install scantool
These commands will first update your package lists to ensure you have the latest information on available software, and then install the Scantool application.
Once installed, Scantool needs to communicate with your OBD2 device. Typically, USB OBD2 adapters are recognized as serial devices under Linux, often located at /dev/ttyUSB0. This device file is usually owned by the root user and the dialout group. To allow Scantool access without running it as root (which is not recommended for security reasons), you need to add your user to the dialout group. This grants your user the necessary permissions to communicate with serial devices.
To add your user to the dialout group, use the following command, replacing yourusername with your actual username:
sudo usermod -a -G dialout yourusernameIt’s crucial to avoid running Scantool with sudo or as the root user. This practice, while seemingly easier, violates the principle of least privilege, increasing potential security risks. Granting group access is the correct and secure way to allow Scantool to access the OBD2 interface.
Using Scantool for Car Diagnostics
After adding your user to the dialout group, you need to ensure these changes take effect. You can either log out and log back into your Linux session, or use the newgrp command to immediately apply the group changes to your current session. The newgrp command effectively starts a new shell session with the specified group as your primary group. In this case, use:
newgrp dialoutTo verify that you are now a member of the dialout group, use the groups command:
groupsThis command will list the groups your user belongs to. You should see dialout listed among them.
Now you’re ready to connect to your car. Ensure your car’s ignition is turned to the “ON” position (engine doesn’t need to be running for reading codes, but may be needed for sensor data), plug in your USB OBD2 connector, and then launch Scantool from the terminal by simply typing:
scantoolThis will open the Scantool main menu.
From the main menu, select “Read Codes” to retrieve any stored Diagnostic Trouble Codes (DTCs) from your car’s computer. Scantool will display the error codes along with descriptions. It’s worth noting that while OBD2 codes are standardized, manufacturers may sometimes have specific interpretations. Scantool may provide multiple possible explanations for each code to account for this.
If you understand the error codes and are confident in clearing them (for instance, after addressing a minor issue), you can select “Clear Codes” from the menu. Important Warning: Exercise caution when clearing codes. It’s always recommended to understand the meaning of the codes and address the underlying issue before clearing them. If you are unsure about any error code, consult a qualified mechanic before clearing it.
Beyond reading and clearing codes, Scantool also offers a “Sensor Data” option. Selecting this allows you to view real-time data from your car’s sensors, such as engine temperature, RPM, and more. For this feature to work, your car’s engine usually needs to be running. This real-time data can be invaluable for diagnosing intermittent issues or monitoring your car’s performance while driving (though always prioritize safe driving and avoid operating software while driving).
While the “Tests” option in Scantool might not be fully implemented in all versions, the software still provides a robust set of features for basic OBD2 diagnostics. For Linux users, Scantool offers a powerful and free way to interact with your car’s computer, empowering you to understand and address potential issues, saving time and potentially money on garage visits. By combining the flexibility of Linux with affordable OBD2 hardware and open-source software, you can gain valuable insights into your car’s health and become a more informed car owner.

