Connecting your car’s On-Board Diagnostics II (OBD2) port to a DB9 connector might seem straightforward, especially when you’re eager to pull data for custom projects like instrument clusters. However, many DIY enthusiasts and even experienced makers run into roadblocks. This article dives into common issues encountered when trying to establish an Obd2 To Db9 connection, drawing insights from real-world experiences and offering troubleshooting steps to get your car talking.
Understanding OBD2 and DB9 in Automotive Context
Before diving into troubleshooting, it’s crucial to understand what OBD2 and DB9 connectors represent in automotive diagnostics and data communication. OBD2 is the standardized port found in most modern vehicles, mandated for emissions monitoring but also providing access to a wealth of engine and vehicle data. This data is typically communicated over protocols like CAN bus.
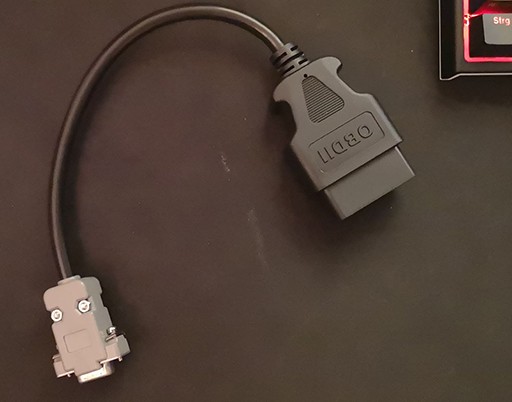
A DB9 connector, on the other hand, is a standard serial port connector. While not directly related to OBD2 protocols in cars, DB9 connectors are commonly used in RS-232 serial communication and sometimes for CAN bus interfaces in industrial and hobbyist applications. The confusion often arises when users attempt to bridge the gap between the car’s OBD2 CAN bus and a serial interface they can easily work with, like through a DB9 adapter connected to a microcontroller.
Common Challenges with OBD2 to DB9 Connections
Many makers face similar hurdles when attempting to read data from their car’s OBD2 port using a DB9 connection. These challenges often stem from a few key areas:
Wiring and Pinout Misconfigurations
Creating a custom OBD2 to DB9 cable requires precise wiring. Incorrect pin assignments are a frequent culprit. OBD2 ports have specific pins for CAN High, CAN Low, power, and ground. DB9 connectors also have their own pinouts depending on whether they are configured for RS-232 or CAN. Mismatched or incorrect wiring will prevent any communication. It’s essential to double-check the pinout diagrams for both the OBD2 port and the DB9 connector you are using, ensuring they correctly map to your CAN interface (like a CAN shield).
CAN Bus Communication Issues
OBD2 data, particularly engine data like RPM and speed, is often transmitted over the Controller Area Network (CAN bus). Simply connecting OBD2 to a DB9 serial port without proper CAN bus interface hardware and software will not work. You need a CAN transceiver to convert the CAN bus signals to a format your microcontroller (like an Arduino) can understand. CAN shields, like the Seeed CAN shield, incorporate this transceiver.
The continuous “spamming” of data observed on an oscilloscope, even after sending a single command, can indicate a few things. It might suggest the CAN shield is indeed transmitting, but either it’s not correctly formatted for the car’s ECU, or it’s not receiving acknowledgments, causing it to re-transmit. This could be due to incorrect CAN protocol settings, baud rate mismatches, or deeper communication errors.
Software and Code Errors
Even with correct wiring and hardware, software issues can prevent successful OBD2 data retrieval. Example code provided for CAN shields needs to be carefully reviewed and adapted for your specific car and desired PIDs (Parameter IDs). Simple mistakes in code, like incorrect PID requests (e.g., 0x0c for RPM, 0x0d for speed), incorrect CAN IDs for request and response messages (0x7DF and 0x7E8 are common but can vary), or issues with the CAN library initialization, can all lead to communication failure.
The provided code snippets illustrate attempts to request RPM and speed data using common PIDs. However, without proper error handling, response parsing, and potentially vehicle-specific adjustments, these examples might not work out-of-the-box for every car model.
#include <spi.h>
#include "mcp_can.h"

// ... (rest of the code from the original post) ...
Troubleshooting Steps for OBD2 to DB9 Connections
If you’re facing issues connecting OBD2 to DB9 for car diagnostics, consider these troubleshooting steps:
-
Verify OBD2 Port Functionality: Before suspecting your custom setup, ensure your car’s OBD2 port is working correctly. Use a standard OBD2 scanner to connect to your car. If the scanner reads data successfully, the issue likely lies within your OBD2 to DB9 setup.
-
Double-Check DB9 and OBD2 Wiring: Meticulously review your OBD2 to DB9 cable wiring against reliable pinout diagrams. Use a multimeter to test continuity and ensure each pin is correctly connected to its corresponding pin on both connectors. Pay special attention to CAN High (pin 6 on OBD2), CAN Low (pin 14 on OBD2), and ground (pin 4 & 5 on OBD2).
-
Isolate the CAN Shield: Test your CAN shield independently. Use example code provided with the shield to send and receive CAN messages in a controlled environment (e.g., a CAN bus simulator or another CAN device). This helps rule out hardware issues with the shield itself.
-
Review and Adapt Code: Carefully examine your Arduino code. Double-check PID values, CAN IDs, baud rate settings (usually 500kbps for OBD2 CAN), and CAN library initialization. Start with simple example code and gradually modify it. Ensure you are correctly parsing and interpreting the CAN responses from the car.
-
Check CAN Bus Termination: For reliable CAN bus communication, proper termination is essential. In automotive CAN bus systems, termination resistors (typically 120 ohms) are usually built into the vehicle’s network. However, if you’re extending or modifying the CAN bus, ensure proper termination is in place to prevent signal reflections and communication errors.
-
Seek Community Support: Online forums and communities dedicated to Arduino, CAN bus, and automotive DIY projects are invaluable resources. Share your wiring diagrams, code snippets, and oscilloscope readings with these communities. Experienced members can often spot subtle errors or suggest alternative approaches.
Conclusion
Successfully interfacing with your car’s OBD2 port via a DB9 connection for custom projects is achievable, but requires careful attention to detail. Accurate wiring, a solid understanding of CAN bus communication, and well-written code are crucial. By systematically troubleshooting and leveraging available resources, you can overcome common challenges and unlock the wealth of data your car’s OBD2 system offers. Remember to always prioritize safety and double-check your connections before attempting to communicate with your vehicle’s systems.