Car door jambs, the unseen heroes of your vehicle’s aesthetics, often get overlooked in routine maintenance. However, these areas are crucial for a seamless and professional-looking paint job. As part of our Car Bodywork 101 series at carparteu.com, this lesson, expanding on painting door and hood jamb areas, will guide you through the essential steps and tools for achieving a flawless finish. We’ll cover everything from selecting the right tools to fixing common paint imperfections, ensuring your car stands out for all the right reasons.
Essential Tools for Automotive Painting
Before diving into the painting process, let’s gather the necessary tools. While professional setups can be extensive, excellent results are achievable with a simple and budget-friendly toolkit. Here’s what you’ll need for painting the door jambs and similar areas of your car:
-
Air Compressor: The heart of your painting setup. Ensure it delivers a continuous airflow of at least 8 CFM (Cubic Feet per Minute) at 40 PSI (Pounds per Square Inch). A 20-gallon tank is recommended to maintain consistent pressure. Horsepower and compressor type are less critical than these flow and pressure specifications. This size compressor is ideal for paint guns and most pneumatic tools used in a home garage setting.
-
Paint Gun: A traditional siphon-feed paint gun, similar to the Binks #7 or DeVilbiss models, is a cost-effective and versatile choice. These guns have been industry standards for decades. While High Volume Low Pressure (HVLP) guns are known for reduced overspray, a conventional gun offers a balance of performance and affordability, saving you money without significantly compromising paint consumption. Minor adjustments allow these guns to handle various types of primers and paints effectively.
-
Air Filter/Moisture Trap: This small but vital component, often an orange bulb attached at the air inlet of the paint gun, removes moisture and contaminants from the compressed air. This ensures a clean and consistent paint application, preventing issues like fisheyes and paint defects.
-
Respirator Mask: Safety is paramount. A 3M-type respirator mask, costing around $20, protects you from harmful paint fumes and overspray. Replacement filters are readily available and inexpensive at auto parts stores.
-
Lightweight Air Hose: A dedicated painter’s air hose is lighter and more flexible than standard heavy-duty hoses. This makes maneuvering around the vehicle during painting much easier and less tiring. You don’t need a high-pressure hose for typical automotive painting pressures.
Step-by-Step Guide to Painting Door and Hood Jambs
With your tools prepared, let’s move on to the painting process itself. Jamb areas require a meticulous approach to ensure complete coverage and a professional finish.
Preparation is Key:
- Cleaning: Thoroughly clean the door jamb areas. Remove any dirt, grease, wax, or rust. Use a degreaser and wax remover to prepare the surface properly.
- Sanding: Sand the existing paint or primer in the jambs to create a smooth surface and provide adhesion for the new paint. Use progressively finer grits of sandpaper, starting with 320 and moving to 400 or 600 grit for the final sanding before paint.
- Masking: Mask off the surrounding areas meticulously to protect them from overspray. Use high-quality painter’s tape and masking paper. For jambs, consider masking slightly wider than the immediate area to catch overspray effectively.
Painting Process:
- Primer Application: Apply 2-3 coats of automotive primer to the jamb areas. Allow each coat to flash dry according to the primer manufacturer’s instructions. Primer is crucial for adhesion and creating a uniform base for the color coat.
- Base Coat Application: Once the primer is fully dry and lightly sanded smooth with fine-grit sandpaper (e.g., 600 grit), apply the base coat (color coat). Apply thin, even coats, overlapping each pass by about 50%. Usually, 2-3 coats of base coat are sufficient for good color coverage. Allow flash time between coats.
- Clear Coat Application (For Two-Stage Systems): If using a two-stage paint system (base coat and clear coat), apply 2-3 coats of clear coat after the base coat has properly flashed. Clear coat provides gloss, depth, and protection to the color coat. Ensure even application for a uniform shine.
Addressing Overspray:
Overspray is an inevitable part of spray painting, especially in jamb areas. Intentionally allowing some overspray onto masked areas is often beneficial to ensure complete coverage of edges and corners. The overspray is easily addressed later through sanding and polishing.
- Sanding Overspray: Once the paint is fully cured, use fine-grit sandpaper (1200-1500 grit) with a sanding block to carefully sand down the overspray. For heavier overspray, start with 1000 grit and progressively move to finer grits.
- Compounding and Polishing: After sanding, use a rubbing compound to remove sanding scratches and level the surface. Follow with a polishing compound to restore gloss and achieve a smooth, seamless blend with the surrounding paint.
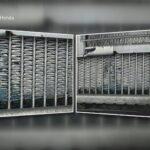
Engine Bay Jambs: A Detailed Approach:
Painting engine bay jambs can be more challenging due to tight spaces and numerous nooks and crannies. Take your time and use proper techniques:
- Access and Preparation: Ensure good access to all areas. Remove any parts that hinder access if possible. Thoroughly clean and degrease the engine bay jambs. Mask off engine components and wiring carefully.
- Painting Technique: Use a spray gun with adjustable settings to reach into tight corners and crevices. Multiple thin coats are better than thick coats in these areas to avoid runs. Pay close attention to areas around strut towers, air intake boxes, and firewall edges.
- Forgiving Clear Coat: Modern clear coats are designed to flow out well, even in complex areas. This helps achieve a smooth and uniform finish, even when spraying at different angles.
| Engine Bay Before Paint | Engine Bay Painted |
|---|
Fixing Paint Runs and Overspray Imperfections
Even with careful application, paint runs and minor imperfections can occur. Addressing these promptly is crucial for a show-quality finish.
Paint Runs:
- Identifying Runs: Paint runs are noticeable drips or sags in the paint, usually caused by applying too much paint in one area.
- Repairing Runs: Allow the paint run to fully dry. Use a sharp blade (like a razor blade) to carefully shave down the run, being cautious not to cut into the surrounding paint. Follow with wet sanding using progressively finer grits (1000, 1200, 1500, 2000), then buff and polish the area to blend it seamlessly.
Overspray and Dust Nib Removal:
- Sanding Overspray: As discussed earlier, fine-grit sandpaper and a sanding block are effective for removing overspray.
- Dust Nibs: Tiny dust particles can sometimes get trapped in the paint. These can be removed by carefully wet sanding with 1500 or 2000 grit sandpaper, followed by buffing and polishing. For very minor dust nibs, a specialized nib file can be used to carefully level them before polishing.
Block Sanding for a Flawless Finish
Block sanding is an essential technique for achieving a flat, smooth, and wave-free paint finish, especially on larger panels and jamb areas.
Why Block Sanding?
- Flatness: Block sanding uses a rigid sanding block to distribute pressure evenly, ensuring that you sand down high spots and level the surface effectively. This is far superior to palm sanding with just your hand, which can follow contours and worsen imperfections.
- Identifying Imperfections: When used with a guide coat (a contrasting color powder sprayed lightly over the primer), block sanding reveals low spots, high spots, and other surface imperfections that would be invisible otherwise.
Block Sanding Process:
- Guide Coat Application: Apply a light guide coat over the primed surface.
- Block Sanding: Use a hard sanding block (plastic or wood) wrapped with sandpaper. Start with 400 grit wet sandpaper for primer. Sand in a cross-hatch pattern (overlapping strokes in different directions).
- Inspection: As you sand, the guide coat will be removed from high spots first. Low spots will retain the guide coat. Continue sanding until the guide coat is evenly removed, indicating a flat surface.
- Progressive Sanding: After block sanding with 400 grit, move to finer grits like 600 grit to refine the surface and remove coarser sanding scratches.
Achieving Even Color (Color Hold-Out)
“Color hold-out” refers to the evenness and consistency of color in the final finish. This is particularly important with light colors, two-stage paints, and modern car finishes where color matching is critical.
Primer Color and Color Hold-Out:
- Influence of Primer: The color of the primer can affect the final appearance of the top coat, especially with translucent colors. Dark primers can darken light top coats.
- Primer Sealers: For critical color matches, professional painters use tinted primer sealers that are closer in shade to the top coat color. This ensures even color coverage and prevents color variations.
- Color Cards and Paint Matching: For accurate color matching, especially on newer vehicles, body shops often “shoot a color card” – spraying sample strips of paint in different shades to compare against the vehicle’s existing paint. This helps determine the correct paint formula, as even with VIN codes, color variations can exist.
For DIYers:
- Use a Primer Sealer: Consider using a primer sealer, especially if you’re painting with a light or metallic color.
- Consistent Primer Coats: Apply primer coats evenly to ensure a uniform base for the color coat.
- Test Spray: If color matching is crucial, do a test spray on a hidden area or a test panel to check the color match before painting the entire vehicle.
Conclusion: Mastering Car Door Jamb Painting
Painting car door jambs and similar areas requires attention to detail and the right techniques. By following these steps, using the appropriate tools, and understanding the principles of surface preparation, painting, and defect correction, you can achieve professional-quality results in your home garage. Remember, patience and meticulousness are key to a flawless finish that enhances the overall appearance of your vehicle.
This guide is part of our Car Bodywork 101 series, aimed at empowering novice body workers to achieve excellent results with accessible tools and methods. Stay tuned for our next lesson, which will cover final preparation steps before the final paint application.
Written by a carparteu.com content creator, your expert in auto repair and bodywork.
Based on original article by John D. Weimer