In the relentless pursuit of speed, Formula 1 teams operate tirelessly, constantly refining every component of their cars. From the intricate front wing to the sophisticated diffuser, each part is meticulously engineered to gain a competitive edge. Understanding how these complex machines work might seem daunting, but breaking down the key areas can reveal the fascinating science behind F1 car speed.
The Vital Front Wing
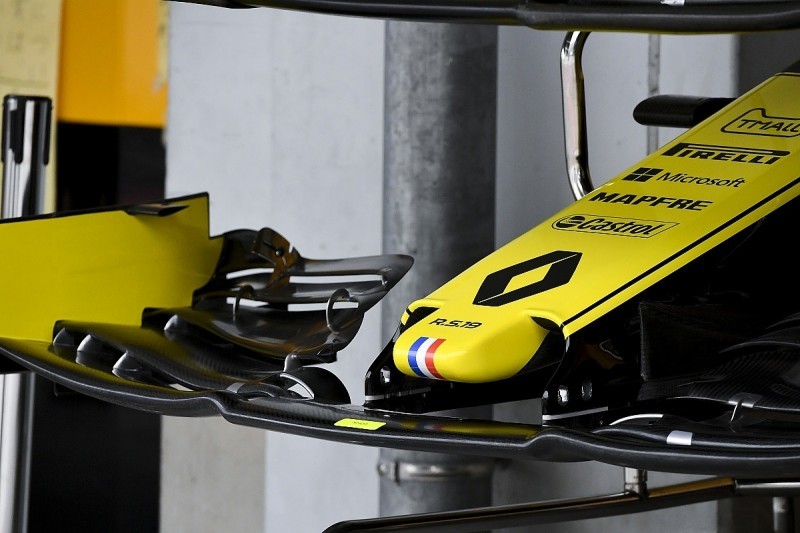
The front wing stands as a critical element of an F1 car. As the initial point of contact with airflow, it fundamentally dictates the car’s aerodynamic performance. A well-conceived front wing boosts overall car performance, while a flawed design can severely compromise it, forcing teams to compensate elsewhere.
Beyond generating its own downforce, the front wing must manage airflow around the front tires to minimize disruptive wake. Successful wake management here significantly benefits subsequent aerodynamic elements like the floor and diffuser.
Regulations mandate a 500mm-wide neutral central section on all front wings. The wing element tips generate vortices that enhance airflow quality across the car, feeding the diffuser and reducing drag from the front tires. Every minute detail on the wing directs airflow away from the tire and the car’s underside. Endplates prevent high-pressure air from the wing’s top surface spilling underneath, maximizing downforce. They also guide airflow around the tire, and the attached footplate generates a vortex to further divert airflow.
In 2019, front wings were widened to two meters, and stricter regulations curtailed design freedom compared to previous years. This change aimed to reduce aerodynamic complexity, potentially enabling closer racing on the track.
The Rear Wing and DRS: Enhancing Speed and Overtaking
Introduced in 2011, the Drag Reduction System (DRS) allows a portion of the rear wing to open on straights. When activated, DRS lifts the wing’s leading edge by 70mm, significantly increasing the slot gap and reducing the car’s frontal area. This drag reduction provides a substantial boost to top speed.
The system uses an actuator on the rear wing connected to a linkage for near-instantaneous wing movement. Releasing the accelerator typically deactivates DRS, restoring downforce as airflow reattaches to the rear wing.
Prior to 2017, rear wings were taller and narrower. Regulation changes made them shorter and considerably wider.
Further modifications in 2019 made rear wings taller again, with a 20mm increase in flap size. These adjustments aimed to make DRS more effective for overtaking. Circuits feature designated DRS zones on longer straights where drivers can activate the system. When a driver trails a competitor by less than a second, DRS becomes available to attempt an overtake.
However, DRS isn’t a guaranteed pass. F1 history is replete with instances of drivers stuck within DRS range for multiple laps. The DRS user must consider braking points and car positioning to successfully emerge ahead after the corner.
Sidepods: Packaging, Cooling, and Safety
Sidepods are crucial for compact car packaging, housing radiators and manifolds while minimizing drag. Radiator inlets on each side must draw in sufficient air to cool the power unit. Insufficient cooling can lead to overheating, performance loss, and potential engine failure.
Inlet design is a delicate balance: maximizing cooling efficiency while minimizing size. Positioning is also critical to ensure a supply of clean, undisturbed airflow.
Deformable safety structures, located on each side of the cockpit, are a vital safety component of F1 cars.
Until 2016, deformable structures were positioned at the sidepod’s front, with mandatory fixed dimensions. By 2018, most teams separated the deformable structure from the sidepod’s length, shortening the sidepod by approximately 15cm compared to the crash structure. This repositioning, further from the front axle, reduces drag by minimizing the negative impact of airflow from the front tires, improving cooling.
Since the early 2000s, sidepods have featured a distinctive undercut at the bottom, channeling airflow over the floor for a more streamlined path. This airflow can also create a seal along the floor edges. Sidepods also feature rearward openings to expel hot air, often flared wider at high-temperature circuits.
The Diffuser: Maximizing Underfloor Downforce
The diffuser, the flared section at the floor’s rear, is paramount for generating downforce from under the car. Airflow accelerates under the floor, creating a low-pressure zone and generating downforce as higher-pressure air above pushes the car downwards.
As the diffuser expands, airflow accelerates further, creating the lowest pressure area under the floor. This airflow is then drawn into the diffuser, expanding to transition from high underfloor velocity to the surrounding ambient velocity.
Careful diffuser shaping is crucial to prevent airflow separation as it exits from under the car, which can drastically reduce floor effectiveness.
Turbulent underfloor airflow can also impair performance, creating high-pressure pockets that destabilize the car’s underbody. Diffuser design regulations have evolved in recent years. Until 2017, rules restricted diffuser designs, but since then, designers have explored vertical strakes, diffuser shapes, and tire vicinity to optimize airflow.
Maximizing diffuser gains is essential. Teams must understand how airflow exits the diffuser area to minimize trailing drag. The diffuser edge incorporates small winglets, and internal strakes create vortices, further enhancing the low-pressure zone under the floor. Together with the rear wing, these elements are key to maximizing car downforce.
Suspension: Connecting Car and Wheels
Suspension links the car to its wheels, dictating its response to the track and driver inputs. F1 regulations allow up to six structural members per wheel, typically including two double wishbones, a pushrod or pullrod, and a steering arm or track rod (depending on front or rear suspension).
Teams often use pullrod rear suspension, while in 2019, all teams employed pushrod front suspension. Pushrods compress the spring as the wheel moves upwards. Pullrods operate in reverse. The choice between pushrod and pullrod is primarily packaging-driven.
Suspension setup is a primary focus in F1. Teams adjust camber, toe, spring rates, ride height, and numerous other parameters to optimize for each track. Tires also act as part of the suspension and must be considered in car design. Different tire compounds exhibit varying properties, and suspension performance can differ significantly between compounds.
Suspension is also integral to car aerodynamics. Steering levers are often positioned within the top wishbone to minimize aerodynamic disruption and improve airflow to the rest of the car. Lower wishbones are typically positioned high to closely direct airflow.
Suspension design has dramatically advanced throughout F1 history. McLaren’s 1969 M7C had basic suspension with simple spring dampers and limited adjustability. By 1972, the M19C featured inboard suspension connected via rockers and a sophisticated rising rate linkage system, allowing engineers to customize suspension compression for varied setups.
Modern F1 suspension is incredibly advanced, serving both suspension and aerodynamic functions, representing a monumental leap in engineering and sophistication.