Experiencing the dreaded check engine light? Don’t panic. AutoZone provides a free and easy way to understand what’s going on under the hood of your car using their Fix Finder service and an OBD2 scanner. This guide will walk you through how to use an OBD2 scanner at AutoZone to diagnose your check engine light and get you back on the road with confidence.
What is an OBD2 Scanner and How AutoZone Makes it Easy
An OBD2 scanner, or On-Board Diagnostics II scanner, is a vital tool for modern car diagnostics. It reads data from your vehicle’s computer system, helping to identify potential issues triggering your check engine light. Traditionally, understanding these codes required a trip to a mechanic, but AutoZone simplifies this process with their free Fix Finder service.
AutoZone’s service allows you to borrow an OBD2 scanner and get a free diagnostic report. This empowers you to understand your car’s problem before you even start considering repairs. It’s a user-friendly way to take control of your car maintenance and avoid unnecessary trips to the repair shop. Let’s dive into the simple steps to use an OBD2 scanner at AutoZone.
Step-by-Step Guide to Using the Fix Finder OBD2 Scanner at AutoZone
Using the Fix Finder service is straightforward. Follow these steps to diagnose your check engine light quickly and efficiently:
1. Preparation Before You Scan
Before you head to AutoZone or start scanning, ensure your vehicle is safely parked and turned off. This is a crucial safety precaution. Locate your vehicle’s Data Link Connector (DLC). This is usually found under the dashboard on the driver’s side. If you are unsure about its location, your vehicle’s owner’s manual can provide guidance.
2. Borrowing Your OBD2 Scanner at AutoZone
Visit your local AutoZone and request to borrow their Fix Finder OBD2 scanner from an AutoZoner. The AutoZone staff are there to assist you and will provide the scanner free of charge as part of their service.
3. Connecting the OBD2 Scanner to Your Vehicle
Take the OBD2 scanner to your vehicle. Locate the DLC you identified earlier. Connect the scanner to the DLC. The connector is designed to fit only one way, ensuring a correct connection. You’ll know it’s properly connected when it clicks into place.
4. Scanning for Diagnostic Trouble Codes (DTCs)
Once connected, turn your vehicle’s ignition to the “ON” position, but do not start the engine. This powers up your car’s computer system, allowing the OBD2 scanner to communicate with it. The scanner will automatically begin to link with your vehicle’s computer.
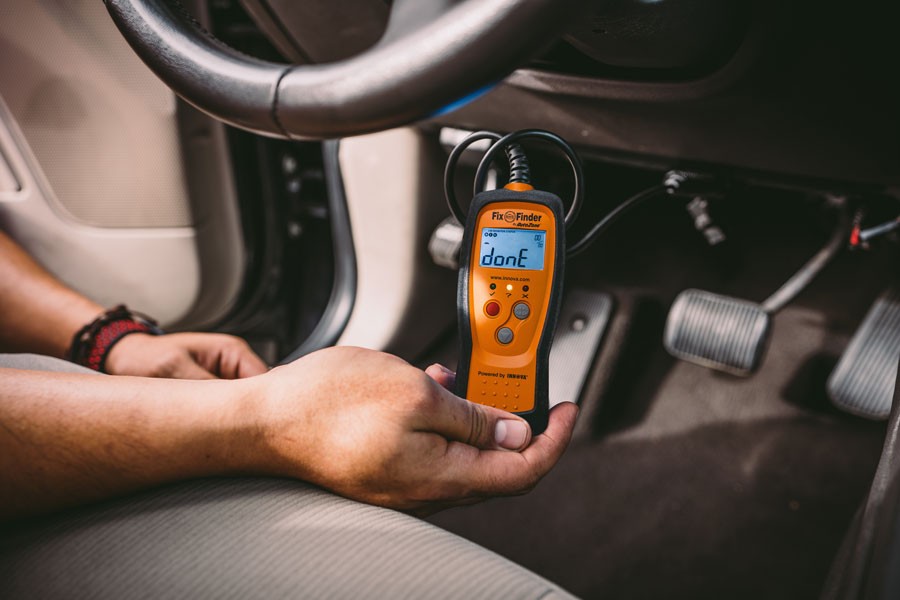
Depending on the specific Fix Finder tool, you might need to input your vehicle’s information on the LCD screen. Look for an option like “Read Codes” or similar to initiate the scanning process. The scanner will then read the diagnostic trouble codes (DTCs) stored by your car’s computer. This process usually takes just a few seconds. The screen will typically display “read” and then “done” to indicate completion.
5. Retrieving Your Free Diagnostic Report from AutoZone
After the scan is complete and the screen indicates “done,” disconnect the OBD2 scanner from your vehicle’s DLC and turn your vehicle off. Return the scanner to an AutoZoner inside the store.
Provide the AutoZoner with your vehicle’s information: year, make, model, and engine size (if you know it). The AutoZoner will use this information to retrieve your vehicle’s diagnostic report at their Z-Net terminal. They will explain the diagnostic trouble codes (DTCs) and provide a printed copy of the report for your reference. This report helps you understand the potential issues indicated by the OBD2 scanner.
 Scanning car using OBD2 scanner
Troubleshooting Your Fix Finder OBD2 Scanner Experience
While the Fix Finder OBD2 scanner is designed for ease of use, you might encounter a couple of common issues:
- Blank LCD Screen: If the scanner’s LCD screen is blank when connected, it usually indicates a lack of power at your vehicle’s DLC. Check your vehicle’s fuse panel for any blown fuses related to the DLC or PCM (Powertrain Control Module). Replacing a blown fuse might resolve the issue. If not, consult your vehicle’s repair manual to pinpoint the correct computer fuse or circuit and address any necessary repairs.
- No Codes Found: If the scan completes but reports no trouble codes, the issue triggering your check engine light might be manufacturer-specific and require a dealership’s diagnostic tools. It’s also possible the problem is intermittent and the code is no longer active.
- Connector Fit Issues: If you’re unable to connect the OBD2 scanner to your DLC, your vehicle might predate the standardized OBD-II protocol (typically vehicles older than 1996). In this case, a different type of diagnostic tester might be needed, which an AutoZoner can advise you on.
Understanding the Scan Tool Indicator Lights
The Fix Finder OBD2 scanner is equipped with helpful indicator LEDs to provide a quick visual assessment of your vehicle’s system status:
- Green LED (checkmark): This indicates that all engine systems are operating normally. All monitors are active, performing diagnostics, and no DTCs are present.
- Yellow LED (question mark): A yellow light signifies that some monitors haven’t completed their self-testing or that there’s a pending DTC. Completing a full drive cycle (driving under various conditions) can allow all monitors to run. Re-scan after a drive cycle to see if the yellow light clears or if a DTC is confirmed.
- Red LED (X): The red LED signals a problem within one or more of your vehicle’s systems. It also indicates the presence of one or more DTCs. When the red LED is lit, your check engine light on the dashboard will typically be illuminated.
Remember, these LEDs are quick visual aids. For detailed information, always rely on the diagnostic report provided by the AutoZoner after scanning with the OBD2 scanner.
Once you have your diagnostic report, the AutoZoner can offer advice and recommend potential solutions based on the DTCs. Sometimes, the issue might be simple, like a loose gas cap or a faulty oxygen sensor. In other cases, the codes might indicate more complex problems requiring further diagnosis or repair. AutoZone is also your source for any parts you might need to address the issues identified by the OBD2 scanner and clear your check engine light.
Frequently Asked Questions About Using an OBD2 Scanner at AutoZone
1. What should I do if the scan tool shows a red X?
A red X indicates the presence of trouble codes. Let the AutoZone staff download the diagnostic report from the OBD2 scanner to understand the specific issues.
2. How do I know if my Data Link Connector (DLC) is working?
If the OBD2 scanner powers on and appears to communicate with the vehicle after connecting to the DLC, then your DLC is likely functioning correctly.
3. Can I use the Fix Finder OBD2 scanner with other diagnostic tools?
The Fix Finder OBD2 scanner is designed as a standalone tool for use with AutoZone’s Z-Net terminals and is not intended to be compatible with other diagnostic devices.
4. How do I return the OBD2 scanner to AutoZone?
Simply return the OBD2 scanner to an AutoZone employee inside the store after you are finished using it. No receipt is needed for borrowing the tool for on-site diagnostics.
5. What if I can’t find my vehicle’s DLC?
The DLC is usually located under the driver’s side dashboard, near the steering column. Consult your vehicle’s owner’s manual for the precise location. Online resources specific to your car’s year, make, and model can also be helpful. If you are still unable to locate it, ask an AutoZone employee for assistance.
[ Coolant Temperature Sensor Replacement Guide] (https://www.autozone.com/diy/sensors/how-to-replace-a-coolant-temperature-sensor-in-your-car)
[ Signs of a Bad Oxygen Sensor] (https://www.autozone.com/diy/electrical/bad-o2-sensor-symptoms)
[