Experiencing issues with your OBD2 port on your 1999 Dodge Intrepid can be frustrating, especially when you need to run diagnostics or pass an inspection. A common culprit for a non-functional OBD2 port is a blown fuse. If you’re asking “What Fuse Powers My Obd2 On My 1999 Dodge Intrepid?”, you’ve come to the right place. This guide will walk you through identifying the correct fuse, checking it, and exploring other potential causes if a fuse replacement doesn’t solve the problem.
Identifying the OBD2 Fuse in Your 1999 Dodge Intrepid
Locating the fuse that powers your OBD2 (On-Board Diagnostics II) port is the first step in diagnosing communication issues. For the 1999 Dodge Intrepid, the fuse box you need to access is typically located inside the vehicle.
-
Locate the Interior Fuse Box: On a 1999 Dodge Intrepid, the interior fuse box is usually found on the driver’s side, often behind a panel on the side of the dashboard or underneath the steering wheel area. Refer to your owner’s manual for the precise location if you are unsure.
-
Consult the Fuse Box Diagram: Once you’ve located the fuse box, you’ll need the fuse box diagram. This diagram is crucial as it labels each fuse and relay, indicating what system it protects. The diagram is often printed on the inside of the fuse box cover itself. If it’s missing, your owner’s manual will have a detailed fuse box diagram.
-
Identify the Correct Fuse: According to resources and owner experiences for similar Chrysler models of that era, Fuse #18 is frequently cited as the fuse associated with the OBDII port. However, always confirm this with your 1999 Dodge Intrepid’s specific fuse box diagram. Fuse descriptions can sometimes vary slightly depending on the exact vehicle options and production variations. Look for labels that may include “Diagnostic Link Connector,” “OBDII,” or similar descriptions in your diagram next to fuse position 18 or nearby fuses.
It’s essential to check your specific fuse box diagram to confirm the fuse number for your 1999 Dodge Intrepid’s OBD2 port. Fuse box layouts can vary.
Symptoms of a Blown OBD2 Fuse
A blown fuse for your OBD2 port will typically result in a complete loss of power to the port, preventing any communication with diagnostic scanners. Here are common symptoms:
- OBD2 Scanner Failure to Connect: When you plug in an OBD2 scanner at an inspection station, auto parts store, or your own diagnostic tool, it will fail to establish a connection with your car’s computer. The scanner may display “Link Error,” “Communication Error,” or similar messages. This was the exact issue described in the original forum post, where the inspection station reported “Communications Established – fail”.
- Inspection Failure Due to OBD2 Communication: As highlighted in the original post, a failure to communicate with the OBD2 port will result in an inspection failure in many regions where emissions or safety inspections are required.
- No Codes via Key Dance (Potentially Misleading): While the “key dance” method (turning the ignition key on-off-on-off-on) can sometimes display basic diagnostic codes on the instrument cluster for some Chrysler vehicles, it’s not a substitute for a proper OBD2 scan. In the original post, the user noted “No codes come up with the key dance.” However, a blown OBD2 fuse would also prevent the key dance from accessing diagnostic information reliant on the same electrical circuit, making this symptom less conclusive on its own.
How to Check and Replace Your OBD2 Fuse
Checking and replacing a fuse is a straightforward process that you can often do yourself:
- Turn Off the Ignition: Ensure your car’s ignition is completely turned off before working with fuses.
- Locate and Access the Fuse Box: Refer back to the “Identifying the OBD2 Fuse” section to access the interior fuse box in your 1999 Dodge Intrepid.
- Identify the Suspect Fuse: Using your fuse box diagram, locate the fuse you’ve identified as the OBD2 port fuse (likely Fuse #18, but confirm).
- Visually Inspect the Fuse: Carefully pull out the fuse. You can usually do this with your fingers or use a fuse puller tool, which is often included in the fuse box. Hold the fuse up to the light and look at the thin wire inside. If the wire is broken or melted, the fuse is blown and needs replacement.
- Test with a Multimeter (Optional but Recommended): For a more definitive test, use a multimeter set to continuity mode. Place the probes on each of the metal terminals on top of the fuse. If the multimeter beeps or shows continuity, the fuse is good. If there’s no continuity, the fuse is blown.
- Replace with the Correct Fuse: If the fuse is blown, replace it with a new fuse of the exact same amperage rating. The amperage rating is printed on the fuse itself (e.g., “10”, “15”, “20”). Using a fuse with a higher amperage rating can damage your car’s electrical system and is a fire hazard.
- Test Your OBD2 Port: After replacing the fuse, try connecting your OBD2 scanner again to see if it now communicates with your vehicle. If you were experiencing inspection issues, return to the inspection station to re-test.
Other Potential Causes for OBD2 Communication Failure
If replacing the fuse doesn’t resolve the OBD2 communication issue, there might be other underlying problems. Based on suggestions from the original forum discussion and general troubleshooting, consider these possibilities:
- Dirty or Corroded OBD2 Port Contacts: Over time, the contacts within the OBD2 port can become dirty or corroded, hindering proper communication. As mentioned in the forum, simply cleaning the contacts can sometimes resolve the issue. Use a contact cleaner specifically designed for electronics and spray it into the OBD2 port. You can also gently clean the pins with a small brush or cotton swab.
Cleaning the contacts of your OBD2 port can sometimes restore communication if dirt or corrosion is the issue.
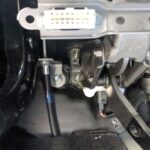
- Wiring Issues: Damage to the wiring harness leading to the OBD2 port can also cause communication failures. Inspect the wiring as much as you can visually for any signs of damage, fraying, or breaks. As suggested in the forum, check the wires at the back of the OBD2 connector itself. A wire may have become loose or disconnected. More in-depth wiring diagnosis might require professional assistance.
- Faulty OBD2 Port: In rare cases, the OBD2 port itself can be faulty. This is less common but possible. Diagnosis of a faulty port might involve testing the port’s pins for voltage and ground with a multimeter, which is best left to a qualified technician if you are not comfortable with electrical testing.
- PCM/ECM Issues (Less Likely): While less likely for a simple communication failure, problems with the Powertrain Control Module (PCM) or Engine Control Module (ECM) could theoretically cause OBD2 communication issues. However, PCM/ECM problems usually manifest with other noticeable drivability issues.
Conclusion
For a 1999 Dodge Intrepid with OBD2 communication problems, checking the fuse that powers the port is always the first and easiest step. While Fuse #18 is a likely candidate, always verify the correct fuse using your vehicle’s fuse box diagram. If a blown fuse isn’t the problem, cleaning the OBD2 port contacts is another simple DIY fix to try. If these steps don’t work, further diagnosis of wiring or potential component failures may be necessary, and seeking professional help from a qualified mechanic is recommended to ensure proper diagnosis and repair.