Using an OBD2 scan tool to check your car’s health is usually a breeze. You plug it in, and it instantly starts talking to your car’s computer, the ECU (Engine Control Unit). But what happens when you’re faced with that frustrating “No Communication” error? It can be a real headache, especially when you’re trying to figure out that pesky check engine light.
This article will dive into the common reasons why your OBD2 scanner might not be reading codes. We’ll explore troubleshooting steps to get you back on track, diagnosing your car’s issues like a pro.
Understanding OBD2 Scanner Communication Issues
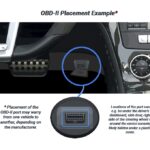
Before we jump into the fixes, let’s quickly understand how OBD2 scanners work. OBD2 (On-Board Diagnostics II) is a standardized system in most modern vehicles that allows diagnostic tools to communicate with the car’s computer. This communication happens through a specific port, usually located under the dashboard. When you plug in your OBD2 scanner, it should establish a connection and allow you to read trouble codes, access live data, and perform various diagnostic tests.
However, sometimes this communication breaks down. Several factors can interfere with this process, preventing your scanner from reading those crucial error codes. Let’s explore these common culprits.
Common Reasons Your OBD2 Scanner May Fail to Read Codes
Many issues can prevent your OBD2 scanner from connecting to your vehicle’s ECU. Here are some of the most frequent reasons:
1. Compatibility Problems: Is Your Scanner Speaking the Right Language?
While OBD2 is a standard, not all cars and scanners are perfectly matched. A primary reason for communication failure is compatibility. Your car might be using a non-standard OBD protocol instead of the typical OBDII. Older vehicles, or even some newer models with specific manufacturer systems, might utilize protocols like ALDL, MOBD, MUTT, or OBD1. These systems require specialized scanners equipped to read those unique protocols.
To ensure compatibility, especially if you’re working with a variety of vehicles, consider a professional multi-system diagnostic scanner. These advanced tools are often designed with OBD1 and OBD2 compatibility, expanding their ability to diagnose a wider range of cars and systems. Always check your vehicle’s manual or online resources to confirm OBD protocol compatibility before assuming your scanner should automatically work.
2. Incorrect Ignition Key Position: Are You Turned On?
It sounds simple, but the ignition key position is crucial for OBD2 scanner communication. Most OBD2 scan tools need the ignition to be in the “Run” position. This position powers up the car’s computer systems without actually starting the engine. Sometimes, simply having the key in the “Accessory” position isn’t enough to fully activate the necessary modules for communication.
Furthermore, modern vehicles are complex systems that take time to boot up fully. After turning the key to the “Run” position, wait a few seconds before plugging in and initiating your scan tool. Allow time for all the car’s systems to complete their start-up sequences. A good rule of thumb is to wait until all dashboard lights have stabilized and any chimes or system checks are finished before attempting to connect your scanner. Rushing this step can prevent the scanner from establishing a link.
3. Voltage Issues at the OBD2 Port: Powering the Connection
OBD2 scanners rely on power from your car’s battery through the OBD2 port itself. By standard specification, pin 16 of the OBD2 connector must provide 12-volt power, with pins 4 and 5 serving as ground. If there’s insufficient or no voltage at these pins, your scanner won’t power up or communicate correctly.
To check for voltage issues, use a voltmeter set to measure DC voltage. With the ignition in the “Run” position, place the red (positive) lead on pin 16 and the black (negative) lead on pin 4 or 5. A healthy reading should be around 12 volts DC. If the voltage is significantly below 11 volts, it could be causing communication problems. In this case, investigate your car’s battery and charging system first, as a weak battery can lead to low voltage at the OBD2 port.
If you get no voltage reading at all, the most likely culprit is a blown fuse. The OBD2 port power circuit often shares a fuse with other accessory systems. Consult your vehicle’s owner’s manual to locate the fuse panel diagram and identify the fuse related to accessory power or the diagnostic port. Check if the fuse is blown and replace it with a fuse of the correct amperage. After replacing the fuse, re-check the voltage at pin 16.
4. ECM (Engine Control Module) Hang or Reboot Issues: A Frozen Computer
Just like any computer, your car’s ECM can sometimes get into a “hung” state. In this situation, the ECM might be functioning enough to keep the car running, but it becomes unresponsive to external communication attempts, like those from your OBD2 scanner. You’ll notice the car runs, but your scan tool reports a communication link failure.
If you’ve ruled out other causes, rebooting the ECM might resolve the issue. To do this, disconnect both battery cables (negative first, then positive). Important: Before disconnecting the battery, consult your vehicle’s owner’s manual for any specific procedures or precautions related to battery disconnection, as some vehicles require specific steps to avoid issues with electronic systems.
After disconnecting the battery, press the brake pedal for about 30 seconds. This helps to discharge any residual capacitors in the system, ensuring a complete reboot. Then, reconnect the battery cables (positive first, then negative). This process forces the ECM to completely restart, often clearing up any temporary hangs and restoring communication.
5. Data Mismatch or PID (Parameter ID) Problems: Getting the Right Information
OBD2 scanners communicate with the ECM using PIDs (Parameter IDs), which are codes that request specific data points from the vehicle’s sensors and systems. When you first connect a scan tool, it typically queries the ECM to identify the valid PIDs for your specific vehicle.
However, some scanners might assume they are connecting to the same vehicle as the last time they were used. This can lead to a PID mismatch. The scanner might be requesting data using PIDs that are not valid for your current vehicle, resulting in communication errors or inaccurate data readings. You might see data points listed as “not available” or receive incorrect information.
To fix this, most scan tools have a function to “scan for PIDs” or “query PIDs”. This process forces the scanner to re-establish communication and identify the correct set of PIDs for the connected vehicle. This process might take a minute or two, depending on the vehicle and scanner. Alternatively, some advanced scan tools use the vehicle’s VIN (Vehicle Identification Number) to automatically determine the valid PIDs.
As a best practice, especially if you’re unsure, always initiate a PID scan when connecting your OBD2 scanner to ensure accurate data and reliable communication.
Troubleshooting Steps When Your OBD2 Scanner Won’t Connect
Here’s a quick checklist to troubleshoot OBD2 scanner connection issues:
- Verify Scanner Compatibility: Ensure your scanner is compatible with your vehicle’s make, model, and year. Check for protocol compatibility (OBD2, OBD1, etc.).
- Check Ignition Position: Make sure the ignition key is in the “Run” position and wait for system boot-up completion.
- Inspect OBD2 Port Voltage: Test voltage at pin 16 of the OBD2 port using a voltmeter. Look for 12V and check for blown fuses if no voltage is present.
- Reboot the ECM: If other steps fail, try rebooting the ECM by disconnecting and reconnecting the car battery (after consulting your owner’s manual).
- Initiate PID Scan: Use your scan tool’s function to scan or query PIDs to ensure correct data parameters are being used.
- Try a Different Scanner: If possible, test with another OBD2 scanner to rule out a faulty scan tool.
- Inspect OBD2 Port: Visually inspect the OBD2 port for any damage or bent pins.
Choosing the Right OBD2 Scanner and Supplier
If you’re in the market for an OBD2 scanner, choosing the right tool and supplier is important. Consider your needs and budget. For basic code reading and clearing, a simple OBD2 code reader might suffice. However, for more in-depth diagnostics, live data, and advanced functions, a more comprehensive diagnostic scanner is recommended.
Furthermore, choosing a reputable supplier is crucial. Opt for suppliers known for their customer support and service. A good supplier can provide valuable assistance with troubleshooting, software updates, and any questions you may have about your scanner. Local suppliers who understand the market and vehicle types in your region can be particularly helpful.
Conclusion
While OBD2 scanners are generally user-friendly, communication issues can arise. Understanding the common causes, like compatibility, power problems, or ECM issues, empowers you to troubleshoot effectively. Remember, OBD2 scanning is a valuable first step in vehicle diagnostics, but it’s not always a magic bullet. In complex cases, further professional diagnosis may be necessary. By following these troubleshooting steps and choosing the right equipment and support, you can maximize the effectiveness of your OBD2 scanner and keep your car running smoothly.